
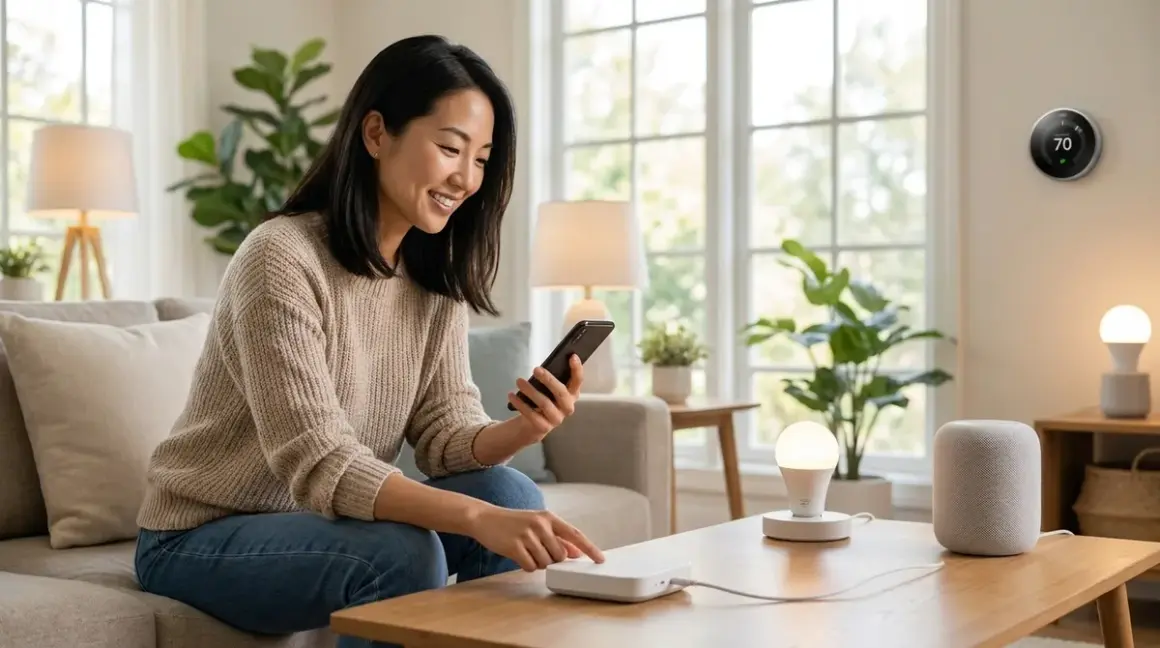

Picture this: you walk through the front door at dusk, and without reaching for a single switch, the living room glows with warm light—not stark overhead glare, but pools of illumination from lamps you've never actually turned on. The thermostat has already nudged the temperature up by two degrees, anticipating your arrival. Your favorite evening playlist fades in at low volume. Nothing beeps. No app opens. You simply step into a space that knows you're home.
That's what the best smart home automation ideas for beginners should deliver: environments that respond to your rhythms, not devices demanding your attention. If you're new to home automation, the goal isn't to fill your rooms with gadgets—it's to build invisible routines that make daily life feel lighter, more intentional, and surprisingly calm.

Quick verdict: Start with lighting and presence detection using Zigbee or Matter devices paired with a multi-protocol hub, layer in climate automation with native smart thermostats, then add motion-activated scenes that trigger based on time, occupancy, and natural light levels. Focus on what you feel before you notice the tech.
What to Look For in Beginner Smart Home Automations
Start with a Protocol That Won't Lock You In
The foundation of any automation system is the communication language your devices speak. Zigbee and Matter offer the widest compatibility across brands, meaning a Philips bulb can talk to a Samsung hub, which can trigger an IKEA blind—all without cloud dependencies or internet lag. Zigbee automations execute locally with latency under 100 milliseconds, so when a motion sensor detects you entering the hallway, lights respond before you finish your second step.
Wi-Fi devices like most smart plugs and thermostats are easier to set up initially (no hub required), but they rely on your router and cloud servers—if your internet drops, so do your routines. Z-Wave offers similar local control to Zigbee but locks you into Z-Wave-certified devices, which tend to cost more. For beginners, a hub that supports Zigbee, Matter, and Wi-Fi gives you flexibility to mix affordable sensors with premium fixtures without painting yourself into a single-brand corner.
When evaluating hubs, confirm they expose automation logic you can actually customize—some platforms hide the "if/then" structure behind pre-set scenes. You want to see conditions (if motion detected AND time is after sunset AND room luminance < 50 lux) paired with actions (then set living room lamps to 40% warm white). That transparency lets you refine automations over time instead of accepting factory defaults.
Prioritize Presence Over Manual Control
The automations that truly disappear into your routine are triggered by where you are and what you're doing, not by voice commands or app taps. Motion sensors, door/window contacts, and presence detectors become the sensory layer that knows when you've entered the bedroom, when the laundry room door opens, when the last person leaves the house.
A motion sensor (Zigbee or Matter) mounted discreetly above a doorframe can trigger a soft pathway of light when you walk toward the bathroom at 2 a.m., then turn it off 90 seconds after the last movement. The logic: if (motion detected in hallway AND time between 22:00–06:00) then (set hallway sconces to 10% amber for 90 seconds, cancel on no motion). Fallback: if the sensor battery dies or loses connection, the lights remain manually switchable—automation failure never locks you out of basic control.
Door/window sensors aren't just for security—they're positional cues. When the bedroom door closes at night, the system can trigger "wind down" mode: lower the overhead light, pause notifications on linked displays, set the thermostat back by one degree. When the front door opens during the day, it can pause the living room speaker to avoid startling arrivals. These triggers feel intuitive because they mirror how humans already navigate space.
Invisible Alternatives: Hide the Hardware
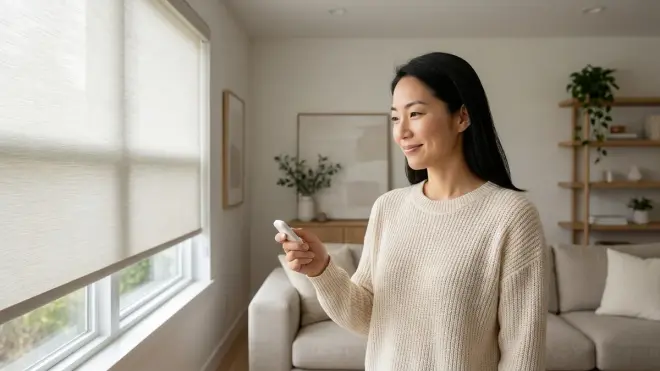
Here's what I've learned across dozens of residential projects: clients love smart lighting until they see the bulky sensor on the wall. If you want automation that enhances ambiance rather than announces itself, invest in recessed sensors, in-wall modules, or multi-function devices.
Aqara and Third Reality make Zigbee motion sensors the size of a bottle cap—mount them on door frames painted the same color, tuck them on shelf edges, or use adhesive clips behind crown molding. For light switches, replace the entire switch with an in-wall relay (Shelly, Inovelli) that preserves the existing rocker or toggle face while adding Zigbee or Wi-Fi control behind the plate. The switch looks untouched, but now it can be automated or manually overridden.
Contact sensors can be recessed into door jambs during new construction or remodels, leaving no visible hardware. For renters or retrofit projects, the newer ultra-slim Zigbee contacts (under 8mm thick) painted to match trim become nearly unnoticeable. The goal: every sensor should read as architecture first, technology second.
Layer Lighting by Purpose, Not Just Room
Beginners often automate room-by-room—"turn on the kitchen lights"—but spaces feel most intentional when lighting responds to activity and mood. Think in terms of task light, ambient glow, and accent illumination, then trigger the appropriate layer based on context.
In a kitchen, morning automation might bring under-cabinet LEDs to 80% cool white for food prep (if time between 06:00–10:00 AND motion detected), while evening mode shifts to pendant fixtures at 50% warm white for a softer dining atmosphere (if time after 18:00 AND no motion for 10 minutes, dim further to 20%). Night mode could trigger only a single strip under one cabinet at 5% amber when motion is detected between 22:00–06:00, enough to navigate without shocking your night vision.
This layered approach requires dimmable bulbs or smart switches with dimming capability. Philips Hue, Sengled, and IKEA Trådfri all offer Zigbee-based bulbs with 1–100% dimming and tunable white temperature (2700K–6500K), so you can script the exact quality of light you want. For recessed cans or track lighting, an in-wall dimmer paired with dimmable LED retrofits preserves clean ceilings while enabling the same nuance.
Build in Manual Overrides and Failure Modes
Automation should never trap you. Every automated device must include a physical control that works when the hub crashes, the network drops, or you simply want direct input. Wall switches should toggle lights on/off regardless of automation state. Door locks should have a mechanical key backup. Thermostats should allow manual temperature adjustment.
Define fallback behavior for every automation. If the motion sensor in the bathroom stops reporting, the light should default to manual switch control, not stay dark. If the hub reboots, lights should return to a safe state (usually "last known" or "off" depending on room). If a scheduled automation fails to fire, the system should log the error and alert you rather than silently skipping the action.
One pattern I recommend: time-based overrides. If someone manually turns off a light that automation just triggered, suppress that automation for the next 60 minutes. Example logic: if (user manually turns off bedroom lamp) then (disable "bedtime scene" automation until 60 minutes elapsed OR user leaves room). This respects human intent without disabling the whole routine permanently.
Start Small, Then Chain Automations
The most reliable systems are built incrementally. Begin with a single automation that solves a daily friction point—maybe the hallway light that's always left on, or the thermostat you forget to adjust before bed. Prove that one routine works for two weeks. Adjust timing, tweak brightness, refine the trigger conditions. Once it feels invisible, add the next.
As you gain confidence, chain automations into sequences. A "good morning" routine might begin when the bedroom motion sensor detects your first movement after 06:00: lights fade up over three minutes, the thermostat adjusts to daytime temp, the coffee maker (on a smart plug) powers on. Thirty minutes later, if the front door opens, the system assumes you've left and triggers "away mode": lights off, thermostat to eco, door lock engages (if installed). Each step has a clear condition and a defined action—no ambiguity, no cloud dependency.
For understanding the broader planning process behind these individual automations, how to plan your smart home automation system walks through the strategic decisions that prevent you from outgrowing your setup six months in.
Our Top Picks for Beginner Smart Home Automations
Motion-Activated Pathway Lighting with Zigbee Sensors
The Philips Hue Motion Sensor🛒 Amazon pairs with any Zigbee hub or the Hue Bridge to create soft, time-aware lighting that appears exactly when you need it. Mount it in hallways, stairwells, or bathrooms, and set brightness and color temperature to shift based on time of day—bright and cool during morning hours, dim and amber late at night. The sensor reports motion, luminance, and temperature, so you can build logic like: if (motion detected AND ambient light < 30 lux AND time between 22:00–06:00) then (set hallway lights to 10% 2200K for 2 minutes). Latency averages 80 milliseconds from motion to light trigger when running locally on a hub.
Pros:
- Compact, battery-powered design mounts with adhesive or screws
- Tunable sensitivity and timeout settings prevent false triggers
- Luminance sensor prevents lights from triggering in daylight
- Works with SmartThings, Home Assistant, Hubitat, and Hue Bridge
- Three-year battery life under typical use
Cons:
- White plastic housing is conspicuous on dark walls (paint or recess it for invisibility)
- Motion detection cone is 100°, so corner placement may miss peripheral movement
- Requires a Zigbee hub; won't work standalone
Invisible Alternative: Recess the sensor into the ceiling near the entry of each hallway using a shallow junction box, or paint the housing to match your trim. For new construction, specify low-voltage Zigbee motion detectors that install flush with drywall.
Time-of-Day Climate Scheduling with a Smart Thermostat
The Ecobee SmartThermostat Premium🛒 Amazon uses built-in occupancy sensors, remote room sensors, and geofencing to adjust heating and cooling based on where you actually are. The automation logic is straightforward: if (no occupancy detected for 30 minutes AND time is weekday 08:00–17:00) then (set to eco temp 68°F heat / 78°F cool). When the system detects you're home (via motion or phone location), it returns to comfort settings. Native Matter support (as of firmware 4.8 in 2026) lets it integrate with Apple Home, Google Home, or Samsung SmartThings without cloud dependencies.
Pros:
- Includes one remote room sensor; add up to 32 for whole-home occupancy awareness
- Voice control via Alexa built in (optional, easily disabled)
- Detailed energy reports show impact of each automation
- Works with most 24V HVAC systems including heat pumps and multi-stage systems
- Local control via Matter or Ecobee's own hub; no internet required for basic schedules
Cons:
- Touchscreen interface is large (4.3") and glossy—very visible on the wall
- Initial setup requires compatible C-wire or power extender kit (included but adds install complexity)
- Remote sensors are white plastic rectangles that scream "tech" on nightstands
The thermostat's reliability is strong—I've seen units run for three years without a missed schedule—but the remote sensors occasionally lose connection if placed farther than 45 feet from the thermostat. Fallback behavior: if a sensor disconnects, the system relies on the thermostat's own sensor and continues scheduled automation.
Invisible Alternative: Flush-mount the thermostat into a recessed wall box, then frame it with trim that reduces the bezel visibility. Hide remote sensors behind furniture, on closet shelves, or inside decorative objects with perforated surfaces.
Arrival Detection and "Welcome Home" Scenes via Geofencing
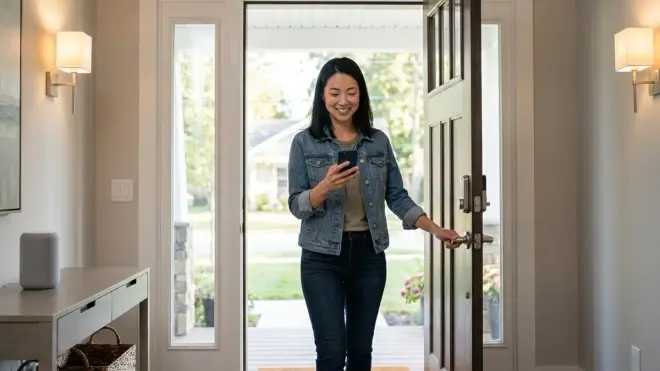
Most multi-protocol hubs—Samsung SmartThings Station, Hubitat Elevation, and Home Assistant running on a dedicated device—support geofencing, which uses your phone's location to trigger automations when you cross a virtual perimeter around your home. The logic: if (user's phone enters 200m radius of home AND time after 16:00) then (unlock front door, set entryway lights to 70% warm white, adjust thermostat to 72°F, start favorite playlist at 30% volume). Latency depends on how often your phone updates location (typically every 3–5 minutes), so expect a slight delay compared to motion sensors.
Geofencing works best when paired with a backup trigger: if the front door contact sensor opens, execute the same scene immediately. That way, if your phone didn't update in time, the physical action of arriving still triggers the welcome routine.
Pros:
- No additional hardware required if you already have a multi-protocol hub
- Works for multiple household members with individual phone detection
- Prevents "nobody home" scenarios where lights and climate stay active
- Can trigger "away mode" when last person leaves (if all phones exit radius)
Cons:
- Battery drain from constant location tracking (usually 3–5% per day)
- Unreliable if you disable location services or forget your phone
- Privacy-conscious users may resist sharing continuous location data
- Requires hub with geofencing capability (not all hubs offer this)
Fallback: Always pair geofencing with a manual override button (physical switch or app widget) so you can trigger "home" or "away" modes when location tracking fails. For those who need more granular control, what is a smart home hub and do you need one clarifies which hubs expose this level of logic customization.
Automated Window Shades Synced to Sunlight and Privacy Needs
The IKEA Fyrtur Smart Roller Blind🛒 Amazon uses Zigbee to integrate with most hubs, offering battery-powered motorization for windows where hardwiring isn't practical. You can script shades to lower at sunset for privacy (if time equals local sunset minus 30 minutes then close living room shades to 100%), or raise at sunrise to wake naturally with daylight. Pair with a Zigbee luminance sensor to add conditional logic: if ambient light exceeds 500 lux AND shades are closed then open shades to 60% (prevents overheating in south-facing rooms).
The motors are quiet—under 40 dB during operation—and the fabric comes in blackout or light-filtering weights. Battery life averages eight months per charge with two cycles per day.
Pros:
- No visible wires or external power supplies
- Custom-cut to your exact window width at IKEA stores
- USB-C rechargeable battery accessible without removing the blind
- Works with Apple Home, Google Home, SmartThings, and Home Assistant via Zigbee
- Repeater function strengthens Zigbee mesh network
Cons:
- Installation requires precise measurement and bracket placement—misalignment causes uneven rolling
- Blind fabric shows creases if left partially open for extended periods
- Limited color options (white, gray, blackout) may not suit all interiors
- Two-year lifespan for motor before replacement becomes likely
One recurring issue I've noticed: the Fyrtur struggles with very wide windows (over 140cm)—the motor occasionally fails to lift the full weight, causing the blind to sag mid-travel. For those spans, consider splitting into two narrower blinds with synchronized automation.
Invisible Alternative: Recess the roller cassette into a soffit or valance above the window so only the fabric is visible. Paint the bottom bar to match your trim.
Voice-Free Bedtime Routine Triggered by a Single Tap
The IKEA Trådfri Shortcut Button🛒 Amazon is a coin-sized Zigbee button that mounts anywhere—nightstand, hallway wall, inside a drawer—and triggers up to three actions (single press, double press, long press). Program it to execute a multi-device scene: if button single-press then (turn off all lights except bedroom lamp at 20%, lock front door, set thermostat to 68°F, pause all media, enable do-not-disturb on linked devices). Double-press could trigger a softer variant for reading mode, long-press could activate a "panic" scene that turns on all lights and unlocks doors.
Because the button uses Zigbee, commands execute locally on your hub with latency under 150 milliseconds—press the button, and within half a second, every device begins its action. No voice assistant waking up, no app to unlock.
Pros:
- Costs around $10, making it the most affordable automation trigger
- Sticky-pad mount or screw holes for permanent installation
- Battery lasts two years under typical use (CR2032 replaceable)
- Works with any Zigbee hub that supports button binding
Cons:
- No feedback mechanism—you don't know if the command succeeded until you see the result
- Small size means it's easy to lose or knock off surfaces
- Single color (white) doesn't blend into dark surfaces
For a more refined aesthetic, embed the button into furniture—drill a shallow recess in a nightstand drawer front, mount the button flush, and you have a concealed trigger that guests never notice.
Conditional Lighting That Adjusts to Natural Light Levels
Pairing a Zigbee luminance sensor (Aqara, Hue, Third Reality) with smart bulbs or switches creates lighting that responds to available daylight, not just time of day. The logic: if (ambient light in living room drops below 200 lux AND occupancy detected) then (set table lamps to 50% warm white); if (ambient light rises above 400 lux) then (turn off lamps). On overcast mornings, lights supplement natural light earlier; on sunny afternoons, they stay off even as evening approaches.
This prevents the jarring experience of lights turning on at 6 p.m. on a bright summer evening just because the clock says so. The system adapts to actual conditions.
Pros:
- Eliminates unnecessary lighting during bright daylight hours
- Saves energy by only supplementing when needed
- Creates smoother transitions—lights fade in gradually as natural light wanes
- Sensors double as temperature monitors for more nuanced climate automation
Cons:
- Sensor placement is critical—too close to a window reads only direct sun, too far reads only artificial light
- Requires experimentation to find the lux thresholds that feel right for your space
- Not all hubs expose luminance as an automation trigger (confirm before buying)
Fallback: If the sensor fails or loses connection, the automation should revert to time-based triggers so you don't end up in a dark room at dusk.
Frequently Asked Questions
What is the easiest smart home automation for complete beginners?
Motion-activated lighting in a single hallway or stairwell is the simplest starting point. You need three components: a Zigbee motion sensor, a smart bulb or in-wall switch, and a hub that supports both. The automation logic is one line: if motion detected then turn on light for 2 minutes, then turn off. There's no voice command to remember, no app to open—just movement that triggers light. Once you see how naturally it integrates into your evening walk to the kitchen, you'll understand what invisible automation feels like. From there, layer in time-based conditions (dim the light late at night) or luminance checks (don't trigger if the room is already bright). The beauty of starting here is that failure doesn't disrupt your life—the wall switch still works manually if the automation breaks.
Do I need a smart home hub, or can I use Wi-Fi devices without one?
You can absolutely start with Wi-Fi-only devices like smart plugs, bulbs, and thermostats that connect directly to your router and are controlled via their brand's app. This works for simple on/off control or voice commands through Alexa or Google Assistant. But the moment you want to create cross-brand automations—a motion sensor from one company triggering a light from another—you hit a wall. Wi-Fi devices rarely talk to each other without a hub acting as translator.
A multi-protocol hub (SmartThings, Hubitat, Home Assistant) lets you mix Zigbee, Z-Wave, Matter, and Wi-Fi devices in a single automation, and it executes logic locally without relying on cloud servers. That means faster response (under 100ms vs. 1–3 seconds for cloud-based commands), better reliability when your internet drops, and privacy benefits since device states stay on your network. If you plan to build more than three or four automations, a hub becomes necessary. For context on which hubs support the broadest device compatibility, best multi-protocol smart home hubs that support legacy devices compares current models.
How do I make sure my smart home automations don't fail when the internet goes down?
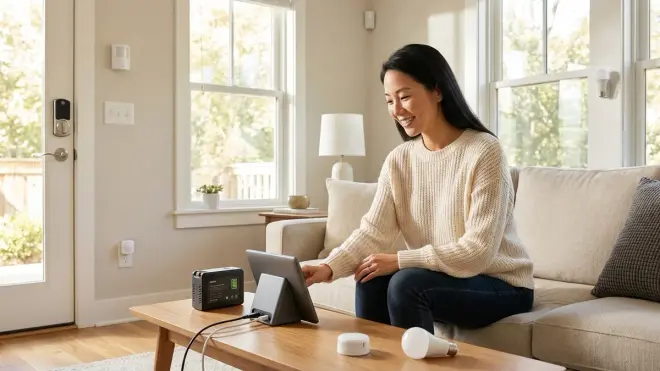
Choose devices that communicate over Zigbee, Z-Wave, Thread, or Matter and a hub that processes automation logic locally. Cloud-dependent systems (most Wi-Fi bulbs, plugs controlled only through a brand app, voice assistants routing commands through remote servers) stop working the moment your ISP drops. Local systems keep running because the hub, sensors, and actuators form their own mesh network independent of the internet.
Your hub should expose its automation engine—Node-RED, Home Assistant automations, SmartThings Automations (local execution), or Hubitat Rule Machine—so you can verify that routines are flagged as "local" rather than "cloud." When evaluating a device, check whether it requires a cloud account to function or if the hub can control it directly over its native protocol. Thermostats like Ecobee run scheduled automations locally even without internet; lights paired via Zigbee respond instantly to local triggers. The only thing you lose offline is remote access from your phone when you're away from home—but automations inside the house continue uninterrupted.
Can I automate smart home devices without using voice assistants?
Yes, and I'd argue that voice-free automation is the more elegant approach. Voice commands require you to remember exact phrases, pause conversations to speak them, and tolerate the lag while a remote server processes your request. Well-designed automation removes the need to ask for anything—your environment simply anticipates what you need based on time, presence, and context.
Use motion sensors, contact sensors, buttons, luminance sensors, and time schedules as triggers instead. When you enter the bathroom at night, a motion sensor turns on a dim night light without a word. When you close the bedroom door, a contact sensor dims the overhead light and sets the thermostat back. A button on your nightstand executes a five-device bedtime routine with a single press. Voice assistants remain available as a backup manual control (useful when you're across the room and can't reach a switch), but they're no longer the primary interface. This shift works especially well for households with children, guests, or anyone who finds talking to devices awkward or intrusive. The home responds to what you do, not what you say.
How do I hide smart home sensors and devices so they don't clutter my space?
I've spent years solving this exact problem for clients who want the benefits of automation without the visual noise. The strategies depend on whether you're retrofitting or building new, but the principles are the same: recess, conceal, or match.
Recessing: Motion sensors can be embedded into ceilings using shallow junction boxes, leaving only the lens visible. Contact sensors can be mortised into door jambs so they sit flush with the surface. Smart switches and dimmers replace existing switches but use the same wall plate and rocker style—you'd never know the relay module hiding behind the plate is Zigbee-connected.
Concealing: Place sensors on top of door frames (eye level when walking through, but above sightlines when seated), behind furniture legs, inside decorative objects with perforations, or under shelves. Battery-powered Zigbee sensors the size of a quarter can be tucked almost anywhere that maintains line-of-sight for motion or contact detection.
Matching: Paint sensor housings to match your trim or wall color using plastic-safe paint (test adhesion first). Choose devices in neutral tones—black for dark interiors, white for light—or opt for devices designed with aesthetics in mind (Aqara's sensors come in matte white, Third Reality's are available in black). For thermostats and wall-mounted hubs, frame them with trim or recess them into shallow wall niches so they read as intentional architectural details rather than afterthoughts.
For lighting, favor in-wall relays and modules over smart bulbs that lock you into a specific fixture style. An in-wall Zigbee dimmer lets you choose any pendant or sconce you love, then control it invisibly. The tech becomes infrastructure, not decor.
The Verdict
The best smart home automation ideas for beginners are those you stop noticing after the first week—lighting that shifts with your daily rhythm, climate that adjusts before you reach for the thermostat, scenes that unfold without a command. Start with motion-activated pathway lighting and a time-aware thermostat, both built on Zigbee or Matter so they talk to a local hub without cloud lag. Layer in presence detection via door sensors and geofencing, then chain those triggers into multi-device routines that respond to how you actually move through your home.
Resist the urge to automate everything at once. Build one reliable routine, refine it for two weeks, then expand. Choose devices that preserve manual overrides and fail gracefully—automation should enhance your control, never replace it. And always ask: does this make the space feel calmer, or does it just add another thing to manage? The best automations are the ones you forget are even running.