
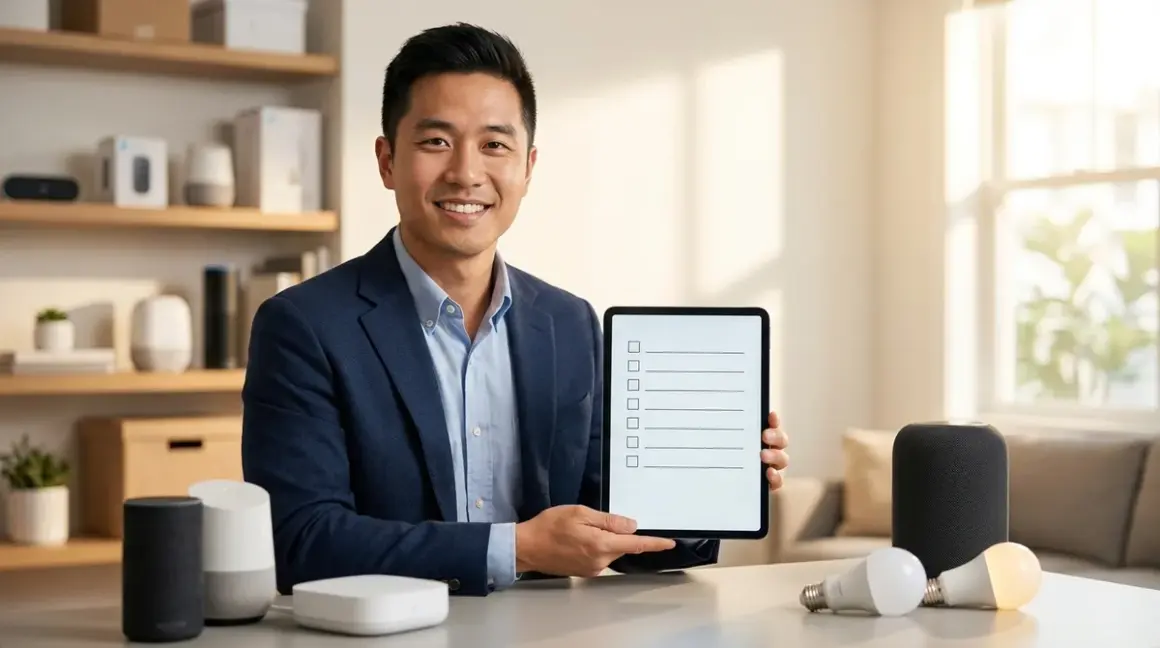

Before you buy another smart home device, you need to know it'll actually work with what you already own. This smart home interoperability checklist walks you through the compatibility factors that matter—protocols, hubs, automation logic, and fallback behaviors—so you can avoid the frustration of devices that refuse to communicate. I've watched too many homeowners return perfectly good hardware simply because they didn't check one critical compatibility requirement before purchasing. Whether you're just starting out or expanding an existing system, this checklist will save you from expensive mistakes.
Does Your Hub Support the Device Protocol?


The first barrier to interoperability isn't the device itself—it's whether your hub can speak its language. In my experience, this is where 90% of compatibility issues start.
1. Identify which protocol each device uses
Every smart device communicates via Wi-Fi, Zigbee, Z-Wave, Thread, or Matter. You'll find this information on the product packaging, in the specifications section, or listed as "wireless connectivity" in the manual. If a product only says "wireless" without specifying the protocol, that's a red flag—contact the manufacturer before buying. I've seen homeowners purchase five Zigbee bulbs only to discover their hub exclusively supports Z-Wave devices.
2. Verify your hub's protocol support explicitly
Your hub might support multiple protocols, but not all of them simultaneously. The Samsung SmartThings Hub v3 supports Zigbee, Z-Wave, and Wi-Fi, but you need to confirm firmware version 000.051.00004 or newer for full Thread device support. Check your hub's settings menu under "About" or "System Information" to see exactly which protocols are active. Some hubs require a separate radio dongle for certain protocols—the original Amazon Echo, for example, needed a separate Zigbee hub despite Amazon's ecosystem supporting Zigbee elsewhere.
3. Check for protocol version compatibility
Zigbee 3.0 devices generally work with Zigbee 1.2 hubs, but you'll lose newer features like Green Power device support. Z-Wave is less forgiving: Z-Wave Plus devices (700 series chipset) can talk to older Z-Wave hubs (500 series), but with significantly reduced range—expect about 30-40% less effective distance. Thread devices require a Thread Border Router, which is a specific hardware function, not just "Thread support" listed in marketing materials. Matter devices need a Matter controller with firmware updated to at least Matter 1.0 specification.
4. Confirm hub firmware is current
Outdated hub firmware is the silent killer of interoperability. Before adding any new device, navigate to your hub's settings and check for updates. Many hubs won't auto-update if you've disabled that feature for stability reasons. A friend's Hubitat hub wouldn't recognize her new Aqara motion sensors because her firmware was three versions behind—the pairing process would start, then fail silently at 87% completion every single time.
5. Understand Wi-Fi device isolation from mesh protocols
Wi-Fi devices connect directly to your router, not your smart home hub, which means they're controlled through cloud APIs rather than local mesh protocols. This creates a fundamental architectural difference: if your internet goes down, Wi-Fi devices typically stop responding to automation commands, even if they're on your local network. Zigbee, Z-Wave, and Thread devices continue functioning locally through your hub. When building automations that mix Wi-Fi and mesh protocol devices, you need to account for this reliability gap in your logic (more on that below).
6. Check for protocol-specific pairing requirements
Zigbee devices need to be within 15-20 feet of your hub during initial pairing, then you can move them to their final location. Z-Wave devices often require you to bring the hub to the device location for secure pairing. Thread devices need at least one Thread Border Router already active on your network before they'll complete pairing. Matter devices require a QR code or numeric setup code—lose that code, and you're often stuck resetting the device to factory settings. I keep photos of all setup codes in a password manager for this exact reason.
7. Verify multi-protocol hub priority settings
Some hubs try to be helpful by auto-selecting which protocol to use when pairing a new device, but they often guess wrong. The Hubitat Elevation C-8 allows you to set protocol priority in Settings > Zigbee/Z-Wave > Pairing Mode. If you're in a dense apartment building with 50+ Zigbee networks nearby, your hub might default to Z-Wave even for a Zigbee device, leading to failed pairings that appear to work but never actually complete.
8. Test range before permanent installation
Protocol support means nothing if your device is out of range. After successfully pairing a new device, place it in its intended location and trigger it manually. Watch your hub's event logs (usually under Settings > Logs or Events) to confirm commands arrive within 2-3 seconds. If you see delays beyond 5 seconds, or intermittent "device unavailable" messages, you need a mesh repeater between the device and hub. This is especially critical for battery-powered sensors, which often transmit at lower power to conserve energy.
Will Your Devices Communicate Across Platforms?

Having compatible protocols doesn't guarantee your devices will actually work together in automations. Cross-platform communication depends on how manufacturers implement their ecosystem boundaries.
1. Map each device to its control ecosystem
Every smart device belongs to a primary control ecosystem: Google Home, Amazon Alexa, Apple HomeKit, Samsung SmartThings, Home Assistant, or manufacturer-specific apps like Philips Hue or Aqara Home. Write down which ecosystem controls each of your devices. You might be surprised to discover you're managing four separate ecosystems without realizing it—I've consulted with homeowners running Alexa, SmartThings, and three manufacturer apps simultaneously, creating unnecessary complexity.
2. Identify ecosystem bridging methods
To make devices from different ecosystems work together, you need a bridge mechanism. The most common bridges are voice assistants (Alexa/Google Home) acting as middleware, IFTTT (If This Then That) applets, or Matter as a universal protocol layer. Each bridge method has latency implications: voice assistant bridges typically add 3-8 seconds of delay, IFTTT can introduce 10-30 seconds, while Matter-native communication runs under 500ms. For time-sensitive automations like motion-activated lighting, these delays matter significantly.
3. Check for local versus cloud control
When you create an automation like "IF motion sensor triggered THEN turn on light," where does that logic execute? If both devices connect to the same hub using Zigbee or Z-Wave, the automation runs locally with 200-800ms latency. If one device is Wi-Fi-based and controlled via cloud API, your command travels: hub → cloud → device, adding 2-5 seconds minimum. When your internet drops, cloud-dependent automations fail completely. Before buying devices to work together, confirm both can be controlled by the same local hub, or accept the cloud dependency with appropriate fallback behaviors.
4. Verify Matter device compatibility explicitly
Matter promises universal interoperability, but in 2026 we're still in the transition period. A "Matter-compatible" device might only support Matter over Thread but not Matter over Wi-Fi, or vice versa. Check the device specifications for both "Matter support" and "supported Matter transport protocols." Similarly, your Matter controller (hub or voice assistant) might only support certain Matter device types—many controllers fully support Matter lighting and switches but have incomplete support for Matter thermostats or door locks. The what is Matter protocol fundamentals explain these distinctions in detail.
5. Test automation trigger-to-action speed before relying on it
Set up a test automation using the exact devices you plan to use: IF bedroom motion sensor triggered THEN turn on bedroom lamp. Time how long the light takes to respond after you walk into view. Run this test 10 times and note the slowest response. If your slowest response exceeds what you'd tolerate in daily life, you have an interoperability problem—possibly cloud routing, hub overload, or mesh congestion. I've seen beautifully designed automation logic rendered useless by 8-second delays caused by routing through three different cloud services.
6. Confirm device state synchronization across ecosystems
If you control a smart switch through both Google Home and its native app, do both interfaces show accurate, real-time state? Turn the switch on using the physical button, then immediately check your Google Home app. If the state updates within 2-3 seconds, synchronization is solid. If it takes 10+ seconds, or shows incorrect state, you'll experience automation failures when one ecosystem makes decisions based on outdated information from another. This is particularly problematic for "IF light is ON THEN turn off after 30 minutes" logic—if the "is ON" state is stale, the automation never triggers.
7. Review platform update stability history
Some ecosystems have a track record of breaking third-party integrations with updates. SmartThings, for example, transitioned from Groovy to Edge Drivers in 2023-2024, breaking thousands of custom device handlers. Google Home regularly modifies its API authentication requirements, breaking integrations without warning. Before committing to an ecosystem bridge, search "[platform name] + broken integration" with date filters for the past 12 months to see if other users report frequent breakage. A stable interoperability setup relies on platforms that respect backward compatibility.
8. Document your automation dependencies
Create a simple spreadsheet listing each automation, which devices it uses, and which bridge method connects them. This documentation becomes critical when troubleshooting failures or planning expansions. I recommend columns for: Automation Name, Trigger Device (protocol + ecosystem), Action Device (protocol + ecosystem), Bridge Method, Expected Latency, and Last Tested Date. When an automation stops working after a platform update, this documentation tells you exactly where to look for the break.
Are Your Automation Logic Patterns Portable?

The way you write automation logic determines whether you can migrate between platforms without rebuilding everything from scratch. Building platform-independent automation saves hundreds of hours if you ever switch hubs.
1. Use universal IF/THEN structures instead of proprietary scripting
Stick to basic conditional logic that translates across platforms: IF (condition) THEN (action) ELSE (alternative action). Avoid platform-specific scripting languages like SmartThings' Groovy, Hubitat's Groovy variants, or Home Assistant's YAML unless you're certain you'll never migrate. I've helped homeowners migrate from Wink to SmartThings, and those who used simple IF/THEN automations rebuilt their system in 2-3 hours; those who wrote custom Groovy scripts spent 15+ hours rewriting everything.
2. Structure automations as discrete, single-purpose rules
Instead of one complex automation with multiple conditions, break it into several simple automations. Rather than: IF (motion detected AND time is after sunset AND door is closed) THEN (turn on light to 60% brightness), create three separate pieces: IF motion detected THEN trigger motion event, IF motion event AND after sunset THEN trigger evening motion event, IF evening motion event AND door closed THEN set light to 60%. This modular approach makes each piece independently testable and portable to new platforms.
3. Avoid manufacturer-specific features in critical automations
Philips Hue offers proprietary features like dynamic light scenes and sunrise simulation. Aqara offers proprietary rotation sensor modes. If you build critical automations around these features, you can't migrate without replacing devices. For core automations like security lighting or morning routines, use only universal device capabilities: on/off, brightness, temperature, motion detected, door open/closed. Save proprietary features for non-critical, nice-to-have automations you're willing to lose.
4. Test automations with one device disconnected
Your automation might work perfectly today, but what happens when one device goes offline? Manually disconnect a device (remove batteries or unplug it), then trigger the automation. Does it fail gracefully with a logged error, timeout and retry, or execute a fallback action? Or does it hang indefinitely, blocking other automations in the queue? Platforms with robust smart home automation fallback behaviors let you specify: IF device unavailable THEN skip action OR wait 30 seconds OR use different device.
5. Verify automation execution timing under load
Your hub processes automations sequentially or in parallel depending on its architecture. Create 10 simple automations that all trigger from the same motion sensor. Trigger the sensor and watch your hub's logs to see if automations execute simultaneously or queue up. If they queue, measure total execution time from first trigger to last action completed. I've seen budget hubs take 12+ seconds to process a queue of five automations—completely unacceptable for time-sensitive use cases like security lighting. If your hub shows queuing delays, you need to limit how many automations share the same trigger.
6. Check for maximum automation complexity limits
Every platform has undocumented limits on automation complexity. SmartThings routines support up to 60 actions per automation but start showing UI lag around 40 actions. Hubitat recommends keeping Rule Machine rules under 25 conditions for optimal performance. Home Assistant's automation.yaml file can theoretically support unlimited complexity, but automations beyond 200 lines become nearly impossible to debug when they fail. If you're building complex automations with dozens of conditions and actions, break them into smaller automations that pass state to each other through virtual switches.
7. Use intermediate virtual devices to decouple automation stages
Create virtual switches as state holders between automation stages. Stage 1: IF motion detected THEN turn on virtual switch "Motion_Evening". Stage 2: IF virtual switch "Motion_Evening" is on THEN turn on lights. Stage 3: IF virtual switch "Motion_Evening" has been on for 10 minutes THEN turn it off. This pattern decouples your automations, making each piece independently testable and portable. When you migrate platforms, you recreate the virtual switches first, then rebuild each simple automation stage individually rather than debugging one enormous monolithic rule.
8. Document your automation logic in plain English pseudocode
Before building an automation in your platform's interface, write it out in plain English: "IF bedroom motion sensor detects motion BETWEEN 10pm AND 6am AND bedroom light is currently OFF THEN turn on bedroom light to 20% brightness WAIT 10 minutes IF no motion detected during wait THEN turn off bedroom light." This documentation serves two purposes: you can review the logic for errors before implementing it, and you have a platform-agnostic blueprint for rebuilding the automation if you migrate hubs. I keep this documentation in a simple text file organized by room.
What Happens When Network or Devices Fail?
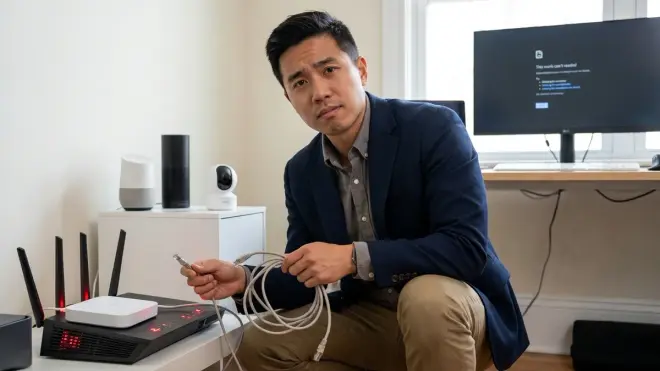
Reliability determines whether your smart home is a convenience or a frustration. Testing failure modes before you depend on automations reveals how robust your interoperability really is.
1. Simulate internet outage and test critical automations
Unplug your router for 10 minutes and test every automation you consider essential: motion lighting, door sensors, alarm triggers. Which ones still work? If you've built your system correctly using local mesh protocols (Zigbee, Z-Wave, Thread), most automations should continue functioning. Wi-Fi devices controlled through cloud APIs will fail. This test reveals your true local versus cloud dependency ratio. After working through this scenario with a client, we discovered 80% of his automations depended on cloud services—we restructured his system to move critical automations to local-only devices.
2. Test device battery failure notification timing
Battery-powered sensors are reliability weak points. Most platforms offer low battery alerts, but when do they actually trigger? Let a sensor battery drain completely (or remove it) and time how long until you receive a notification. Some platforms notify when battery voltage drops to 30%, giving you weeks of warning. Others don't notify until the device stops responding entirely. If your platform doesn't offer proactive battery alerts, set calendar reminders to manually replace sensor batteries every 9 months regardless of reported level.
3. Verify hub failure recovery procedures
If your hub loses power or crashes, how do you recover? Some hubs restore automatically with all automations intact. Others require manual re-pairing of devices. The worst-case scenario: hubs that lose automation configurations during power failures, forcing you to rebuild everything from scratch. Test this before you depend on it—unplug your hub for 30 seconds, plug it back in, and verify all devices reconnect and automations resume. If devices don't automatically reconnect, you need a UPS (uninterruptible power supply) for your hub.
4. Check for automation retry logic on failed commands
When your hub sends "turn on light" and the light doesn't respond (out of range, powered off, or crashed), does your hub retry? Many platforms retry 2-3 times with exponentially increasing delays: immediate, +2 seconds, +5 seconds. Others send the command once and move on, leaving your light off and your automation "succeeded" according to logs even though nothing happened. You can test this by triggering an automation while a target device is unplugged—watch the logs to see if retry attempts appear.
5. Understand mesh network self-healing timelines
Zigbee, Z-Wave, and Thread networks automatically reroute around failed devices, but this "self-healing" isn't instant. When a mesh repeater device goes offline, the network needs 5-30 minutes to recognize the failure and rebuild routing tables around it. During this healing period, devices that were routing through the failed repeater might be unreachable. If you need guaranteed uptime, build redundant mesh paths by placing multiple repeaters so each end device has at least two routes back to the hub.
6. Test response time degradation as device count increases
Add devices incrementally and benchmark automation response time at 10 devices, 25 devices, 50 devices, and 100+ devices. Many hubs show nonlinear performance degradation—working perfectly up to 40 devices, then suddenly slowing to unusability at 45 devices as they hit memory or processing limits. The only way to know your hub's real-world capacity is to test it with your actual automation load. I've seen the budget-friendly Wink Hub 2 struggle with 30 devices, while the Hubitat Elevation C-8 handles 150+ devices without measurable latency increase.
7. Verify Matter device fallback behavior
Matter devices can be controlled by multiple controllers simultaneously—this is a feature, but it complicates failure behavior. If your primary Matter controller (say, Apple HomePod) goes offline, can your secondary controller (Google Home) still control the device? Test this by powering off your primary controller and confirming secondary control still functions. Some Matter devices require re-commissioning to fully transfer control to a new controller, while others support seamless failover. This distinction matters significantly for reliability.
8. Document and test your manual override procedures
Every automation should have a physical manual override. Motion-activated lights should have physical switches that work regardless of hub status. Smart locks should have physical keys or backup codes. Smart thermostats should have manual temperature controls on the device itself. Test these overrides annually to confirm they still function—I've encountered physical smart switches that stopped working because their firmware assumed the hub would always be available, leaving homeowners locked out of basic control when their hub crashed.
Does Your Network Infrastructure Support the Device Load?

The most overlooked compatibility issue isn't protocols or ecosystems—it's whether your network can actually handle the traffic and device count you're generating.
1. Calculate total device count against router capacity
Your router has a maximum client limit, typically 50-250 devices depending on model. Count every device connected to your network: computers, phones, TVs, streaming devices, game consoles, smart speakers, and every smart home device. Wi-Fi smart home devices count toward this limit. Zigbee, Z-Wave, and Thread devices don't—they connect to your hub, which appears as a single client to your router. If you're approaching your router's capacity, prioritize mesh protocol devices over Wi-Fi devices to reduce router load.
2. Check for IP address exhaustion on your subnet
Most home routers default to 192.168.1.x subnets with DHCP pools of 50-100 addresses. If you're running 40+ Wi-Fi smart home devices plus computers and phones, you might exhaust available addresses, causing new devices to fail during setup with cryptic "network unavailable" errors. Log into your router (usually at 192.168.1.1), navigate to DHCP settings, and verify the DHCP address range includes at least 150 addresses (e.g., 192.168.1.2 through 192.168.1.254). If your router doesn't support this range, you need a router upgrade before adding more Wi-Fi devices.
3. Test Wi-Fi saturation with device load
Wi-Fi bandwidth is shared among all connected devices. Twenty smart plugs polling status every 30 seconds generates constant background traffic that can saturate 2.4GHz Wi-Fi, causing lag for all devices. Use a Wi-Fi analyzer app (like WiFi Analyzer for Android or NetSpot for iOS) to measure channel utilization percentage in your home. If 2.4GHz shows above 60% utilization, you're approaching saturation—prioritize dual-band devices that can move to 5GHz, or better yet, switch to Zigbee/Z-Wave devices that don't use Wi-Fi at all.
4. Verify your router supports multicast DNS for Matter and HomeKit
Matter and Apple HomeKit rely on mDNS (multicast DNS) for device discovery. Some routers disable mDNS by default or implement broken mDNS forwarding between network segments. If Matter devices pair successfully but then appear "unreachable" in your controller app, mDNS is usually the culprit. Look for router settings labeled "multicast filtering," "IGMP snooping," or "mDNS forwarding" and ensure they're enabled. If your router doesn't support mDNS properly, devices won't consistently discover each other, making the best Matter-compatible hubs useless.
5. Check for VLAN or network segmentation blocking device communication
Many modern routers offer "guest networks" or "IoT networks" as separate VLANs for security isolation. If your smart home hub is on your main network but devices are on your IoT network, they often can't communicate. Some Matter and HomeKit setups explicitly require devices and controllers on the same network segment. Review your router's network topology and move all smart home devices (including hubs) to the same network, or configure VLAN routing to allow traffic between segments on specific ports (usually 5353 for mDNS).
6. Test mesh network congestion with Zigbee channel analysis
Zigbee operates on channels 11-26 in the 2.4GHz band, overlapping with Wi-Fi channels 1, 6, and 11. If your Wi-Fi router uses channel 6, it saturates Zigbee channels 15-19, causing dropped messages and slow response times. Use your hub's Zigbee channel analysis tool (found in hub settings under "Zigbee" or "Network") to measure interference on your current channel. If interference is high, switch to a clear Zigbee channel—I typically recommend Zigbee channel 25 for homes with Wi-Fi on channel 11, or Zigbee channel 15 for homes with Wi-Fi on channel 1. After changing channels, you'll need to re-pair all Zigbee devices.
7. Verify Thread Border Router placement and network reach
Thread networks require at least one Thread Border Router connected to your IP network, and ideally 2-3 for redundancy. These routers need Ethernet or reliable Wi-Fi connections—a Thread Border Router on weak Wi-Fi becomes a bottleneck for your entire Thread network. Test this by running a speed test from the location where your Thread Border Router sits. If you see below 10 Mbps or high packet loss, relocate the router closer to your main Wi-Fi access point or run an Ethernet cable to it.
8. Monitor hub CPU and memory usage during peak automation load
Some hubs expose system resource monitoring in their web interface or logs. Trigger your most complex automation sequences while watching CPU and memory usage. If CPU spikes to 100% or memory usage exceeds 80%, your hub is overloaded and will start dropping commands or queuing automations with unacceptable delays. The solution is either optimizing your automation logic (fewer conditions, less frequent polling) or upgrading to a more powerful hub. I've seen this exact scenario with Home Assistant running on Raspberry Pi 3—upgrading to Raspberry Pi 4 with 4GB RAM eliminated all performance issues.
Final Check Before You Go
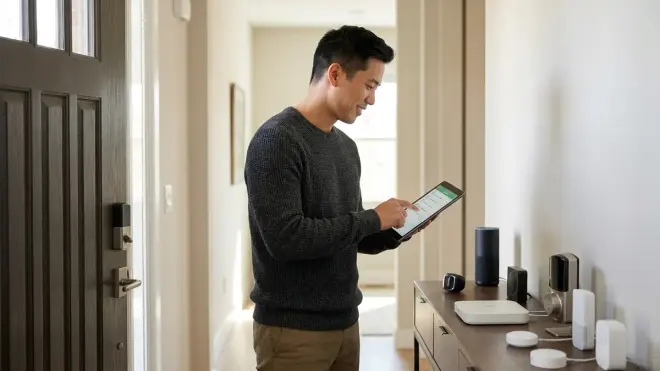
Before purchasing any new smart home device, run through this condensed checklist to avoid compatibility issues:
- Protocol match: Device protocol must be explicitly supported by your hub's current firmware version
- Range test: After pairing, test the device in its final location; if delays exceed 5 seconds, you need a mesh repeater
- Ecosystem mapping: Confirm which app/ecosystem will control the device and whether it needs to communicate with devices on other ecosystems
- Automation latency: For time-sensitive automations, verify end-to-end trigger-to-action latency under 3 seconds (local control) or accept 5-10 seconds (cloud control)
- Failure mode: Test the automation with internet disconnected; critical automations must work locally
- Network capacity: Verify your router has available IP addresses and isn't saturated on 2.4GHz (for Wi-Fi devices)
- Manual override: Every automated device should have a physical manual control method
- Documentation: Write down the automation logic in plain English before building it in your platform's interface
I run this checklist with clients before every installation, and it catches problems 80% of the time—usually protocol mismatches or network capacity issues that would've resulted in returned devices and wasted hours troubleshooting.
If you're building a system from scratch rather than adding to an existing setup, the future-proof smart home guide covers the architectural decisions that minimize compatibility problems long-term. And if you're still weighing protocol options, the Thread vs Zigbee comparison provides concrete performance data for typical residential installations.
For homeowners who've already invested in older devices, understanding how to migrate your existing smart home to Matter protocol makes sense only after you've confirmed your devices and hubs actually support Matter—this checklist helps you make that determination before spending money on upgrades.
Frequently Asked Questions
What's the most common reason smart home devices won't work together?
Protocol mismatch is the most common culprit—buying a Zigbee device when your hub only supports Z-Wave, or assuming "wireless" means compatible with your setup. The second most common issue is devices that technically use the same protocol but require cloud routing to communicate, adding latency and internet dependency that breaks automations when your connection drops.
Do I really need a multi-protocol hub if I'm just starting out?
Not necessarily, but you need a clear plan. If you commit to one ecosystem and carefully choose devices that stay within it, a single-protocol hub works fine. However, I've never seen a homeowner successfully stick to one protocol long-term—you'll inevitably find that perfect motion sensor or switch that only comes in a different protocol, and multi-protocol smart home hubs eliminate that constraint from day one, giving you flexibility as your needs change.
How do I know if my smart home has reliability problems before they affect daily life?
Run regular reliability tests: once monthly, unplug your internet router for 10 minutes and verify critical automations still function, manually trigger each automation to confirm response times haven't degraded, and check hub logs for any "device unavailable" or "timeout" errors even if automations appear to work. These proactive tests reveal developing issues before they become daily frustrations—battery sensors dying, mesh routes degrading, or cloud service latency increasing.
Making Compatibility Work for You, Not Against You
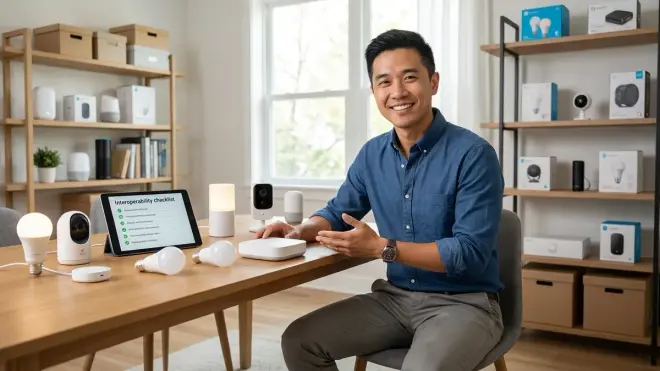
The smart home industry wants you to believe everything "just works" out of the box. After 500+ installations, I can tell you the reality is messier—but manageable if you check compatibility before buying rather than after unboxing.
This smart home interoperability checklist isn't about achieving perfection. It's about knowing exactly where your system's friction points are so you can work around them. That Wi-Fi switch with 8-second cloud latency is fine for an outdoor light you trigger manually, but unacceptable for motion-activated security lighting. That limitation matters only if you know about it before installation, not after.
The homeowners I work with who have the most reliable systems aren't the ones who spent the most money or bought the newest devices. They're the ones who tested compatibility methodically, documented their automations in plain English, and built fallback behaviors into every critical automation. That disciplined approach prevents 95% of the "smart home stopped being smart" complaints I hear from frustrated DIYers who assumed their $300 hub would magically make incompatible ecosystems cooperate.
Start with one room, test every compatibility factor on this checklist, and expand only after you've verified reliable operation. That patient, methodical approach takes longer initially, but saves you from the expensive nightmare of ripping out and replacing an entire system because you discovered a fundamental incompatibility too late to fix.