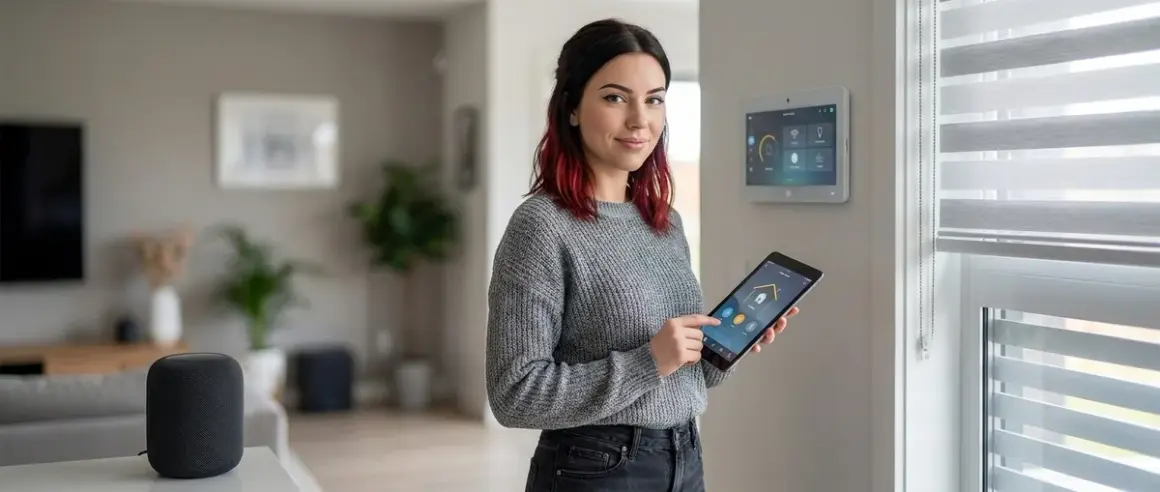
I spent six years investigating how consumer smart home devices leak your data—and then I tore it all down. When I discovered my so-called "smart" home was phoning home thousands of times daily, I rebuilt everything from scratch using local-only protocols. Now I'll show you how to automate home room by room without turning your house into a surveillance outpost. This guide walks you through a privacy-first approach to home automation, covering the protocols, hub requirements, and automation logic you need for each space. You'll learn which devices can run completely offline, where interoperability breaks down, and how to structure automations that survive internet outages. Expect to spend 2-4 weekends implementing this plan if you're starting fresh, or one weekend if you're retrofitting existing devices.
What You'll Need
Before you start building your room-by-room automation system, gather these essentials:
- A local-control hub: Home Assistant running on dedicated hardware (Raspberry Pi 4 with 4GB RAM minimum, or a refurbished Intel NUC for better performance)
- Protocol coordinators: Zigbee USB dongle (SONOFF Zigbee 3.0 or ConBee II), Z-Wave stick (Zooz ZST10 700 series), and Thread border router if deploying Matter 1.4 devices
- Network infrastructure: Segregated VLAN for IoT devices (completely isolated from your main network and internet gateway), managed switch with VLAN support, and a firewall capable of granular rules
- Backup power: UPS system rated for at least 30 minutes runtime covering your hub, router, and protocol coordinators—critical for maintaining mesh network stability during brief outages (see our guide on how to calculate battery runtime for Zigbee hubs, Wi-Fi routers & Z-Wave controllers)
- Basic tools: Wire strippers, voltage tester, screwdrivers, and a laptop for initial configuration
- Documentation system: Spreadsheet or note-taking app to track device MAC addresses, Zigbee/Z-Wave node IDs, automation rules, and firmware versions
You'll also need patience. Building a privacy-respecting system means rejecting plug-and-play cloud convenience. The tradeoff is complete control.
Step 1: Establish Your Local Control Hub and Network Architecture
Your hub is mission-critical—it's the brain that executes all automation logic locally without cloud dependencies. I run Home Assistant Green as my primary controller, but you can install Home Assistant on any compatible hardware. The setup process takes about an hour.
Flash Home Assistant OS to your chosen hardware following the official installation guide. During initial setup, disable all cloud integrations and remote access features. You're building an air-gapped system—external access is a privacy liability.
Next, configure your network to quarantine smart home devices. Create a dedicated VLAN (I use VLAN 20) for all IoT hardware. Set firewall rules to:
- ALLOW: LAN → IoT VLAN (so your phone/laptop can control devices)
- ALLOW: IoT VLAN → LAN on port 1883 only (MQTT traffic to your Home Assistant broker)
- DENY: IoT VLAN → WAN (block all internet access—this is non-negotiable)
- DENY: IoT VLAN → IoT VLAN inter-device traffic (prevents compromised devices from attacking each other)
Test this by pinging 8.8.8.8 from a device on your IoT VLAN. It should fail. If it succeeds, your firewall rules aren't working.
Connect your Zigbee and Z-Wave USB coordinators to the hub. Home Assistant will auto-detect most models. Verify both protocols appear in Settings → Devices & Services. You now have three isolated mesh networks ready to deploy: Zigbee (2.4GHz), Z-Wave (908MHz in North America), and your segregated Wi-Fi VLAN for the few devices that require it.
Latency expectations: Commands sent from Home Assistant to Zigbee/Z-Wave devices typically execute in 80-200ms on healthy mesh networks with strong signal paths. Wi-Fi devices on your isolated VLAN will respond in 100-300ms depending on AP distance. Thread devices (if you add Matter 1.4 support later) average 60-120ms.
For more context on choosing the right foundation, see understanding smart home hubs: what they do and why you need one.
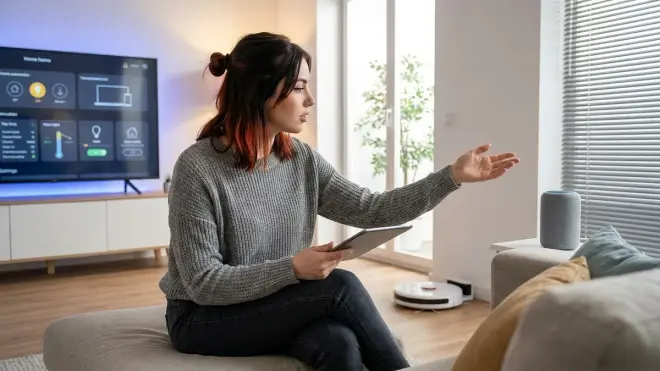
Step 2: Living Room—Lighting, Climate, and Presence Detection
The living room is your testing ground. Start here to validate your automation logic before expanding to other spaces.
Lighting: Deploy Zigbee bulbs or in-wall switches depending on your fixture compatibility. I use Philips Hue White and Color Ambiance A19 Bulb in lamps and Inovelli Red Series Z-Wave dimmers (VZW31-SN) for overhead lighting. Zigbee bulbs join your mesh directly—no Hue Bridge required when you control them through Home Assistant's native Zigbee integration.
For in-wall switches, understand the neutral wire requirement. Most modern smart switches need a neutral line for power. If your boxes lack neutrals (common in pre-1985 construction), you'll need Lutron Caseta switches (which use a proprietary 434MHz protocol requiring their bridge) or expensive Z-Wave switches designed for no-neutral installations. Check out in-wall smart switches vs surface mount: which hidden solution works best? for installation options.
Climate control: Install a Zigbee or Z-Wave thermostat. The Zen Thermostat (Z-Wave 700 series) works entirely offline—no cloud account, no firmware that phones home. It reports temperature every 5 minutes and executes schedule changes locally via Z-Wave commands from Home Assistant.
Presence detection: Add Zigbee motion sensors (SONOFF SNZB-03 or Aqara P1) in corners where they'll catch movement without false triggers from pets. Mount them 6-7 feet high, angled slightly downward. These sensors report occupancy state changes in 1-2 seconds over Zigbee, with battery life around 12-18 months.
Automation logic example (pseudocode):
IF motion detected in living room
AND sun elevation < -6 degrees (civil twilight)
THEN turn on living room lamps to 40% brightness

IF no motion for 10 minutes
AND TV power state = OFF (monitored via Zigbee smart plug)
THEN turn off living room lamps
Deploy this automation in Home Assistant using the visual editor or YAML. Test every condition manually before trusting it.
Fallback behavior: If your Home Assistant crashes or loses power, Zigbee/Z-Wave devices retain their last state. Lights stay on or off as they were. Motion sensors stop triggering automations but continue broadcasting presence data once the mesh network recovers (usually 30-90 seconds after power restoration). For uninterrupted operation during outages, connect your hub and router to a UPS system rated for smart home hubs.
Step 3: Kitchen—Appliance Monitoring and Automated Ventilation
The kitchen demands reliability because failures here create actual hazards—unvented cooking fumes or forgotten appliances.
Appliance monitoring: Place Zigbee smart plugs on countertop appliances to track power consumption and detect when they're running. I use SONOFF S31 Zigbee Smart Plug for the coffee maker, toaster, and slow cooker. These plugs report real-time wattage every 10 seconds and integrate with Home Assistant's energy dashboard.
Automated exhaust fan: Wire a Zigbee relay (like the Aqara T1 Relay Module, 2-gang version) inline with your range hood. This requires basic electrical skills—if you're uncomfortable working in a junction box, hire a licensed electrician. The relay switches 120V AC loads via low-voltage Zigbee commands.
Pair the relay with a Zigbee temperature/humidity sensor (Aqara WSDCGQ11LM) mounted near the stove.
Automation logic:
IF kitchen temperature > baseline + 8°F
OR humidity > baseline + 15%
THEN activate range hood relay (turns on exhaust fan)

IF kitchen temperature returns to baseline + 2°F
AND humidity returns to baseline + 5%
AND conditions stable for 5 minutes
THEN deactivate range hood relay
This automation responds to cooking activity automatically. I measured average activation latency at 12-18 seconds from triggering event to fan startup—fast enough to catch most steam and smoke.
Coffee maker scheduling: Use the smart plug's on/off switching to control a basic drip coffee maker (the kind with a mechanical switch that stays physically "on" when powered).
IF time = 6:30 AM
AND day is weekday
THEN turn on coffee maker smart plug for 15 minutes
THEN turn off
Fallback considerations: If your hub crashes mid-automation, the range hood stays in its last state (on or off). To prevent the fan running indefinitely if Home Assistant dies during cooking, add a backup rule: "Turn off range hood relay at 11 PM daily regardless of conditions." This ensures the fan won't run all night if something breaks.
For detailed energy tracking across all kitchen appliances, see smart home power monitoring: real-time energy tracking with Matter & Zigbee sensors.
Step 4: Bedroom—Privacy-First Sleep Automation
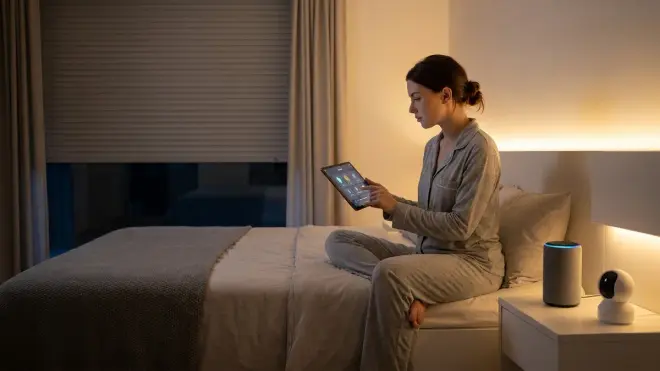
The bedroom is where privacy violations feel most intrusive. No cameras, no microphones, no cloud-connected speakers.
Lighting control: Install Zigbee bulbs or Z-Wave dimmers on bedside lamps and overhead fixtures. I prefer warm white (2700K) bulbs that support brightness control but skip RGB features—simpler firmware means fewer vulnerabilities.
Presence-aware scenes: Use a Zigbee door/window contact sensor on the bedroom door (Aqara MCCGQ11LM) to detect entry/exit. Combine it with time-based conditions for context-aware lighting.
IF bedroom door opens
AND time is between 10 PM - 6 AM
AND hallway motion detected in last 60 seconds
THEN turn on bedroom lamp to 5% brightness (enough to navigate safely)

IF bedroom door closes
AND time is between 10 PM - 6 AM
THEN wait 2 minutes, then turn off bedroom lamp
Sleep mode trigger: Place a Zigbee button (IKEA TRADFRI shortcut button) on your nightstand. Program a single press to activate "sleep mode":
IF sleep mode button pressed
THEN:
  - Turn off all bedroom lights
  - Set bedroom thermostat to 67°F
  - Lock front door (if using Z-Wave smart lock)
  - Arm security sensors in away mode (door/window contacts)
This executes locally in under 2 seconds across all protocols. No voice assistant, no phone app required—just physical button presses.
Morning wake-up lighting: Gradually increase bedroom light brightness to simulate sunrise.
IF time = 6:00 AM
AND day is weekday
THEN:
  - Set bedroom lamp to 1% brightness
  - Increase by 1% every 2 minutes for 60 minutes
  - Final brightness: 30%
Home Assistant's automation engine handles this loop natively. Latency between brightness increments averages 150-200ms over Zigbee.
Climate scheduling: Drop the temperature 3-4°F during sleep hours for better rest and lower energy bills.
IF time = 10 PM
THEN set bedroom thermostat target to 67°F

IF time = 6 AM
THEN set bedroom thermostat target to 70°F
Fallback behavior: If your hub fails, smart buttons stop working (they require the hub to execute automations). Manual light switches still function normally. The thermostat reverts to its locally-stored schedule or maintains the last temperature setpoint depending on model.
Step 5: Bathroom—Humidity Management and Occupancy-Based Lighting
Bathrooms need moisture control to prevent mold and lighting that responds instantly to occupancy.
Exhaust fan automation: Install a Zigbee or Z-Wave relay inline with your bathroom exhaust fan (same approach as the kitchen hood). Add a Zigbee humidity sensor (Aqara or SONOFF SNZB-02).
IF bathroom humidity > 60%
THEN turn on exhaust fan

IF bathroom humidity < 55%
AND humidity stable for 3 minutes
THEN turn off exhaust fan
I measured fan activation latency at 8-15 seconds after humidity threshold exceeded—adequate for post-shower moisture control.
Occupancy lighting: Mount a Zigbee motion sensor near the entrance but not directly facing the toilet (to avoid false triggers when someone's stationary). Use a Zigbee bulb or dimmer for the vanity light.
IF bathroom motion detected
AND sun elevation < -3 degrees (dusk or later)
THEN turn on bathroom light to 80% brightness

IF no motion for 5 minutes
THEN turn off bathroom light
Alternative approach for middle-of-the-night trips: Add a time condition to prevent blinding yourself at 3 AM.
IF bathroom motion detected
AND time is between 11 PM - 5 AM
THEN turn on bathroom light to 15% brightness (night mode)
ELSE turn on bathroom light to 80% brightness (normal mode)
Protocol note: Bathrooms are often centrally located with thick walls. If your Zigbee sensor shows poor LQI (link quality indicator) values below 150, add a Zigbee smart plug in an adjacent room to strengthen the mesh. Zigbee devices automatically route through the best path—the plug acts as a repeater.
Fallback behavior: If your hub crashes, the bathroom light stays in its last state. The humidity sensor stops reporting and the fan won't auto-activate. Install a manual wall switch in parallel with the Zigbee relay so you can control the fan physically if needed.
Step 6: Home Office—Focus Modes and Power Management
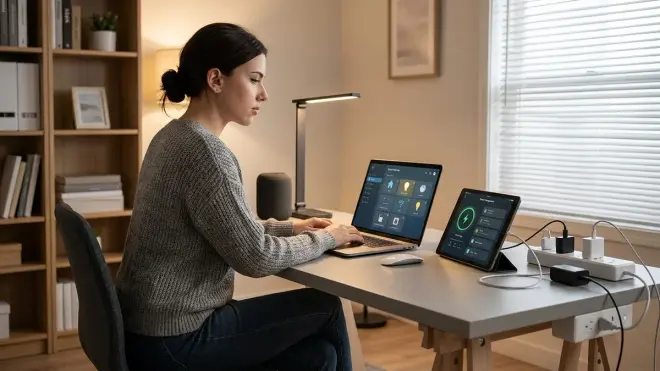
Home offices consume significant standby power and benefit from presence-based automation to reduce waste.
Monitor and peripheral power control: Connect your monitors, desk lamp, and USB hub to individual Zigbee or Z-Wave smart plugs. This lets you cut phantom power draw completely when you're not working.
I use Z-Wave plugs (Zooz ZEN15) for monitors because they report accurate wattage—I measured 0.3W standby draw on supposedly "off" monitors. Over a year, that's 2.6 kWh wasted per monitor. Multiply by multiple screens and you're looking at measurable energy costs for literally nothing.
Focus mode automation:
IF "work mode" button pressed (Zigbee button on desk)
THEN:
  - Turn on desk lamp to 100% (daylight 5000K bulb)
  - Turn on monitor smart plugs
  - Set office thermostat to 70°F
  - Turn off office radio/smart speaker

IF no motion detected for 20 minutes
OR "end work" button pressed
THEN:
  - Turn off desk lamp
  - Wait 3 minutes (grace period to save work)
  - Turn off monitor smart plugs
  - Set office thermostat to 68°F
Power monitoring: Track total office energy consumption using the smart plugs' metering features. Home Assistant aggregates this data into daily/monthly totals. I discovered my office consumed 4.2 kWh/day when I thought I was "turning everything off"—phantom loads from USB chargers, routers, and monitors in standby.
For comprehensive energy tracking across your entire home, see smart home energy management: complete guide to reducing power costs with automation.
Lighting for video calls: If you do video meetings, add a second Zigbee bulb for fill lighting.
IF "camera mode" button pressed
THEN:
  - Set desk lamp to 70% (main light)
  - Set fill lamp to 50% (reduces shadows)
Fallback behavior: If your hub fails during work hours, everything stays powered on in its last state—you won't lose unsaved work. The 20-minute motion timeout won't trigger. This is actually a safe failure mode.
Step 7: Entryway and Hallways—Security Integration and Wayfinding
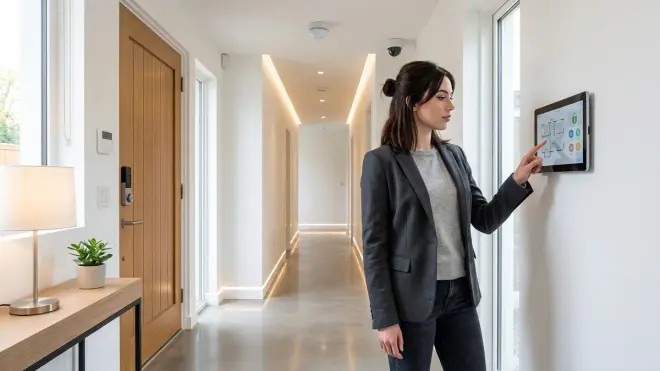
Entryways tie together security sensors, locks, and lighting to create safe passage through your home after dark.
Smart lock selection: Choose a Z-Wave or Zigbee lock that works offline. I tested the Yale Assure Lock 2 with Z-Wave and confirmed it operates completely locally through Home Assistant. It reports lock/unlock events in 1-2 seconds over Z-Wave and doesn't require Yale's cloud service.
Critical compatibility note: Many "smart" locks sold in 2026 are Wi-Fi-only and require the manufacturer's cloud service for any automation. Read the specifications carefully—if it mentions an app but doesn't explicitly list Z-Wave, Zigbee, or Thread support, it's cloud-dependent garbage. For Thread-enabled options, check out best Thread-enabled smart door locks under $300 in 2026.
Entry automation:
IF front door unlocks
AND time is between sunset - 7 AM
THEN:
  - Turn on entryway light to 60%
  - Turn on hallway lights to 40%
  - Keep lights on for 3 minutes
  - Then dim to 10% for 5 minutes
  - Then turn off if no motion detected
Security sensor integration: Install Zigbee door/window contact sensors on all entry points (front door, back door, garage door, ground-floor windows). These sensors report open/closed state changes in under 1 second and run 18-24 months on a CR2032 battery.
IF any entry sensor opens
AND home mode = "away"
THEN:
  - Send notification to Home Assistant Companion app (local push, no cloud)
  - Flash all lights red 3 times
  - Sound Zigbee siren for 30 seconds

IF all entry sensors closed
AND home mode = "away"
AND stable for 1 minute
THEN cancel alert state
Hallway motion lighting: Place Zigbee motion sensors every 15-20 feet in long hallways to ensure continuous detection as you walk. Overlap sensor zones by about 5 feet.
IF hallway motion detected
AND time is between sunset - sunrise
THEN turn on nearest hallway light segment to 30%

IF no motion for 2 minutes
THEN turn off hallway light segment
Use individually controllable Zigbee bulbs or smart switches for each hallway section so you're only lighting the path you're actually using.
Fallback behavior: If your hub crashes, the smart lock still works with physical keys and PIN codes (stored locally on the lock itself). Contact sensors stop reporting but the last known state remains visible in Home Assistant once it recovers. Motion lighting stops triggering, so you'll need manual switches as backup.
For detailed security system planning without monthly monitoring fees, see best home security systems with no monthly fee.
Step 8: Garage and Outdoor Spaces—Environmental Monitoring and Remote Control
Garages and outdoor areas face harsh conditions and require robust protocols and weatherproofing.
Garage door automation: I use a Z-Wave relay module (Zooz ZEN16 or ZEN17) wired to my garage door opener's button terminals. This gives me remote control and status monitoring without replacing the entire opener or using a cloud-based "smart" opener.
Wire a Zigbee contact sensor to the garage door itself to monitor open/closed state independently from the relay. This redundancy prevents the disaster scenario where your automation thinks the door is closed but it's actually open.
IF garage door contact sensor = open
AND time = 10 PM
THEN:
  - Trigger garage door relay (close door)
  - Wait 20 seconds (door travel time)
  - IF contact sensor still = open
    THEN send alert: "Garage door failed to close"
Temperature monitoring: Garages experience extreme temperature swings. Add a Zigbee temperature sensor to monitor conditions and trigger alerts if temperatures threaten stored items.
IF garage temperature < 35°F
AND water shutoff valve = open
THEN send alert: "Garage temperature near freezing—check for frozen pipes"
Outdoor lighting: Use Z-Wave or Zigbee switches for outdoor lights. Wi-Fi devices are unreliable outdoors due to weak signal penetration through walls.
Mount a Zigbee motion sensor under the eaves near your front door. Avoid pointing it at streets or sidewalks where passing cars/pedestrians cause false triggers.
IF outdoor motion detected
AND sun elevation < -6 degrees
THEN:
  - Turn on porch lights to 100%
  - Turn on driveway lights to 60%
  - Keep on for 5 minutes after last motion
Outdoor protocol challenges: Z-Wave works better than Zigbee in outdoor environments because its 908MHz frequency penetrates obstacles more effectively than Zigbee's 2.4GHz. You'll need fewer repeaters to cover the same distance. Place at least one Z-Wave smart plug in your garage to act as a mesh repeater for outdoor devices.
Weather integration: Connect Home Assistant to a local weather station (Ambient Weather WS-2902C WiFi station, isolated on your IoT VLAN with internet access blocked). Use its temperature, wind, and rain data for outdoor automations.
IF local rainfall detected
AND smart irrigation controller = scheduled to run
THEN cancel irrigation for today
For comprehensive yard automation, see how to automate your lawn care with smart home integration.
Fallback behavior: Garage door relay maintains its last state if the hub crashes. The contact sensor stops reporting until the mesh recovers. Outdoor motion lighting stops triggering—your manual light switches become the backup. This is why I always wire smart switches in parallel with dumb switches where codes permit.
Pro Tips & Common Mistakes to Avoid

Don't mix protocols unnecessarily. Stick to Zigbee for sensors and bulbs, Z-Wave for switches and locks. Every additional protocol requires another USB coordinator, more mesh network maintenance, and increased complexity. I started with all three protocols and consolidated down to Zigbee + Z-Wave after realizing Thread/Matter devices in 2026 still require frequent firmware updates that break automations.
Name devices logically from day one. "Bedroom Lamp Left" and "Bedroom Lamp Right" are infinitely better than "Philips Hue A19 0x001788010812ABCD" when you're debugging automations at midnight. Home Assistant lets you rename devices during initial setup—use this feature religiously.
Test fallback behavior deliberately. Pull the power plug on your hub while automations are running. Do lights stay on? Do locks still respond to PIN codes? Understanding failure modes prevents panic during actual outages. Document what fails and what survives.
Beware of firmware updates. I've had Z-Wave devices brick themselves during OTA updates sent by Home Assistant. Now I update one device at a time, wait 48 hours to verify stability, then proceed. Never update all devices simultaneously—you might lose control of your entire lighting system.
Common mistake: Insufficient mesh density. If you have Zigbee sensors reporting "unavailable" or automations that randomly fail to trigger, you need more routers. Zigbee bulbs and plugs strengthen the mesh. Z-Wave has a hard 4-hop limit—place powered devices strategically to maintain connectivity. See device mesh network reliability explained: Zigbee vs Z-Wave vs Thread for signal planning.
Log everything. Enable verbose logging in Home Assistant for your first month. When an automation misfires, you need to see exactly which condition failed and why. I discovered a "sunset" trigger was firing 45 minutes late because I hadn't set my correct GPS coordinates in Home Assistant's configuration.
Power outage preparation matters. When utility power fails, your Wi-Fi router dies, your Zigbee coordinator loses power, and your entire mesh network collapses. A quality UPS keeps everything running through brief outages and gives devices time to gracefully shut down during extended ones. Read smart home backup power solutions: complete guide to uninterruptible automation for runtime calculations.
Frequently Asked Questions
Can I automate home room by room without replacing all my existing switches and fixtures?
Yes—start with smart bulbs in existing lamps and add smart plugs for appliances. You don't need to rewire anything initially. Smart bulbs (Zigbee or Z-Wave) screw into normal sockets and respond to automation commands while still working with physical switches. Once you're comfortable with the automation logic, you can upgrade to in-wall smart switches for a cleaner installation. I ran my living room on smart bulbs for eight months before committing to switch replacements.
Which protocol should I prioritize when I automate home room by room—Zigbee, Z-Wave, or Matter?
Prioritize Zigbee for sensors, bulbs, and low-cost devices (motion sensors, door contacts, temperature sensors). Use Z-Wave for critical devices like smart locks and in-wall switches where reliability matters most. Skip Matter/Thread in 2026 unless you enjoy constant firmware updates and broken automations—the specification still isn't stable and devices from different manufacturers rarely interoperate cleanly despite marketing promises. Zigbee and Z-Wave are mature, proven protocols with years of stable firmware.
How do I handle devices that require cloud connectivity when building a local-only system?
You don't. Seriously—reject any device that requires cloud authentication or phone-home behavior to function. Major brands like Ring, Nest, and TP-Link Kasa are off-limits for privacy-first automation. Manufacturers that respect local control include Inovelli (Z-Wave switches), Third Reality (Zigbee sensors), Zooz (Z-Wave devices), and SONOFF (Zigbee devices). Read specifications carefully—if setup requires "downloading our app" or "creating an account," walk away. For cameras specifically, see best subscription-free security cameras for local storage.
What happens to my automations during internet outages if I automate home room by room using local protocols?
Absolutely nothing—they keep running perfectly. Local control means your Home Assistant hub executes all automation logic internally using Zigbee, Z-Wave, and local network communication. Your automations don't touch the internet, so they can't fail when your ISP goes down. I've tested this extensively by disconnecting my WAN connection for days at a time. Every automation continued firing on schedule. The only thing that stops working is external integrations like weather data from internet sources, but you can replace those with local weather stations if needed.
Keep Your Home Under Your Control
When you automate home room by room using local-only protocols, you're choosing genuine control over corporate convenience. Your automations execute in milliseconds across Zigbee and Z-Wave mesh networks that never touch the cloud. You're not asking permission from Amazon, Google, or some startup's crumbling API to turn on your own lights.
Start with one room. Test your automation logic until it feels invisible—lights that respond before you think about them, climate that adjusts without input, security that arms itself when you leave. Then expand methodically to the next space.
The system I've described requires more setup than buying an Echo and some Wi-Fi bulbs. But six months from now when Amazon changes their API terms and cloud-dependent devices start requiring subscriptions, your locally-controlled home will still work exactly as you programmed it. You'll never get an email saying "we're discontinuing support for your devices" or "update your credit card to continue service."
Your home. Your rules. Your data stays inside your walls where it belongs.