Dynamic load balancing automatically shifts your home's energy consumption away from high-demand appliances when your electrical system approaches capacity limits—or when electricity costs peak. Learning how to set up dynamic load balancing smart home systems means you'll reduce energy bills, prevent circuit breaker trips, and optimize when your devices draw power based on real-time grid pricing. This guide walks you through the hardware, protocols, and automation logic you need to implement load balancing that actually works.
You'll need intermediate smart home experience and about 4-6 hours for initial setup, plus another 2-3 hours for testing and refinement. The complexity comes from creating conditional automation logic and ensuring your devices communicate reliably across different protocols.
What You'll Need
Hardware Requirements:
- Energy monitor with real-time reporting (Sense Home Energy Monitor, Emporia Vue Gen 2, or equivalent with sub-second update rates)
- Smart plugs with energy monitoring for controllable loads—minimum 4 units (Zigbee or Matter recommended for faster response times than Wi-Fi)
- Smart thermostat or smart AC controller compatible with your hub ecosystem (Matter 1.4, Zigbee 3.0, or Z-Wave Plus)
- Smart water heater controller or contactor relay (optional but high-impact for load shifting)
- Hub or controller capable of running complex automation logic (Home Assistant, Hubitat Elevation, or SmartThings with custom automations)
Protocol Considerations:
- Your energy monitor must expose real-time wattage data via API or local integration—cloud-only solutions add 2-5 second latency that breaks load balancing
- Smart plugs should use Zigbee 3.0 or Matter over Thread for 200-800ms response times; Wi-Fi plugs typically add 1-3 seconds
- All devices need local control capability—internet outages can't prevent load balancing from functioning
Software Prerequisites:
- Hub software updated to latest stable release (Home Assistant 2026.1+ recommended for built-in energy management dashboard)
- Basic understanding of conditional logic and variable comparison
- Access to your utility's time-of-use (TOU) rate schedule if you plan to optimize for cost, not just capacity
Knowledge Requirements:
- Your home's main panel amperage rating (typically 100A, 150A, or 200A residential)
- Which circuits control high-draw appliances (dryer, HVAC, water heater, EV charger)
- Your typical daily load patterns—when do you use the most power?
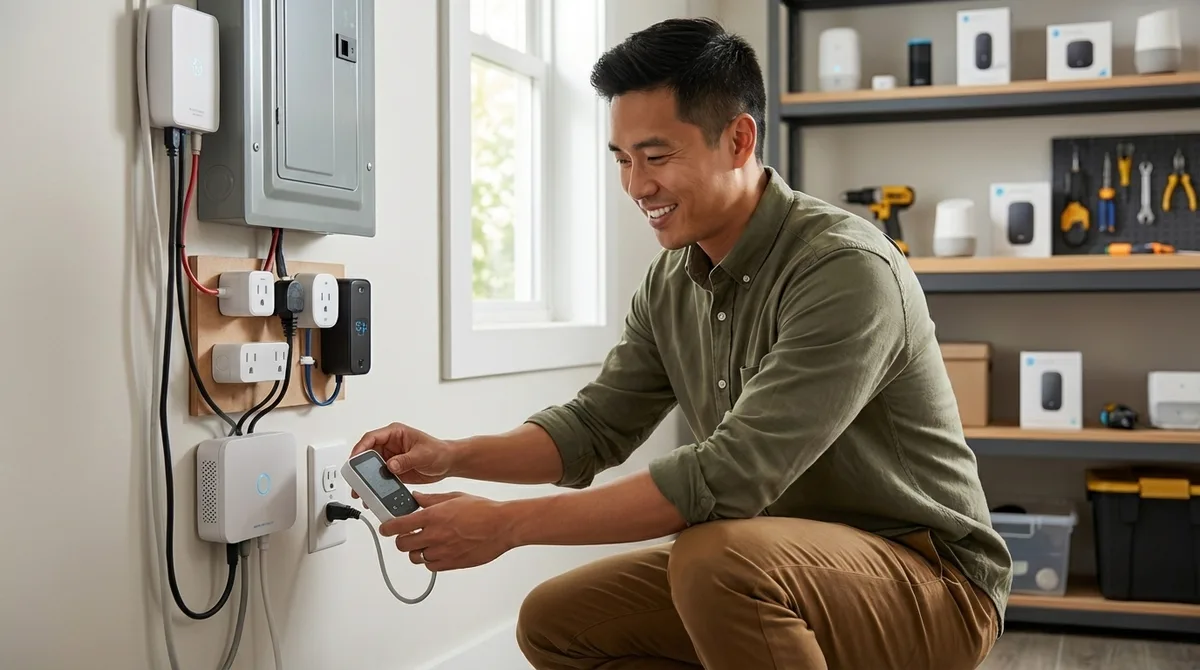
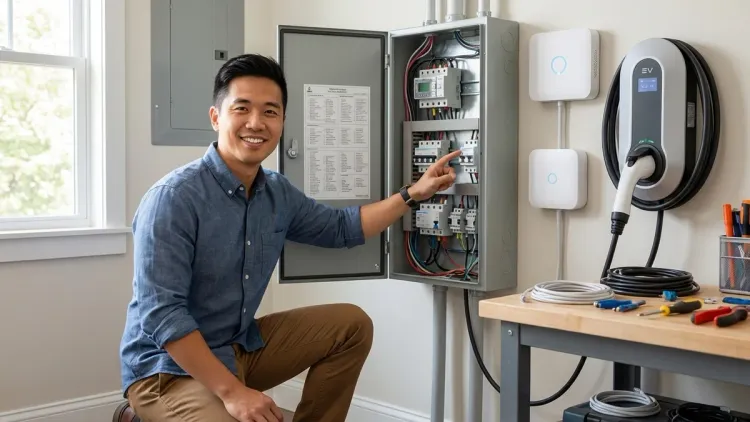
Step 1: Install Your Whole-Home Energy Monitor
Mount your energy monitor's current transformers (CTs) around the two main feed lines entering your electrical panel. The Emporia Vue Gen 2 Energy Monitor clamps onto these conductors without requiring an electrician in most jurisdictions, but verify local code requirements before opening your panel.
Installation specifics:
- Turn off the main breaker (yes, this means your whole house goes dark—plan accordingly)
- Remove the panel cover and locate the two thick cables feeding your main breaker
- Clamp the CTs around each cable with arrows pointing toward the breaker (direction matters for accurate readings)
- Route the CT cables through a knockout hole to the monitor mounted beside the panel
- Connect the monitor to a 240V breaker for power (or use the included plug adapter for 120V outlets)
Protocol setup: Configure your energy monitor's local API integration—the Emporia Vue requires enabling "Partner Access" in their app, then adding the custom integration in Home Assistant via HACS. The Sense monitor uses local mDNS discovery but may require port forwarding for some hub platforms. Latency expectation: You need updates every 1-2 seconds maximum for load balancing to react before breakers trip.
In my experience, installers rush this step and don't verify the CT orientation. If your readings show negative wattage or values that don't match your utility meter, flip the CT clamps 180 degrees.
Step 2: Deploy Smart Plugs on Controllable Loads

Identify appliances that can be briefly interrupted without causing problems—these become your "shedding" loads during peak demand. Good candidates include:
- Space heaters (1,500W each—prime targets)
- Dehumidifiers (400-700W, cyclical operation tolerates interruption)
- Phone/tablet chargers (collectively 50-200W, completely flexible timing)
- Aquarium equipment (heaters and pumps can pause for 5-10 minutes)
- Coffee makers and electric kettles (if automated brewing isn't critical)
Installation: Plug Zigbee or Matter-enabled smart plugs with energy monitoring into outlets serving these loads, then pair them with your hub. The Third Reality Zigbee Smart Plug provides per-plug monitoring and 200ms response times through a Zigbee mesh network.
Bad candidates for load shedding:
- Refrigerators (food safety)
- Medical equipment (obvious safety concern)
- Networking equipment (kills your smart home during load events)
- Desktop computers without UPS backup (data loss risk)
Each plug needs a descriptive entity name in your hub—space_heater_bedroom, dehumidifier_basement—because you'll reference these in automation logic. Test that you can read current wattage and toggle each plug from your automation platform before proceeding.
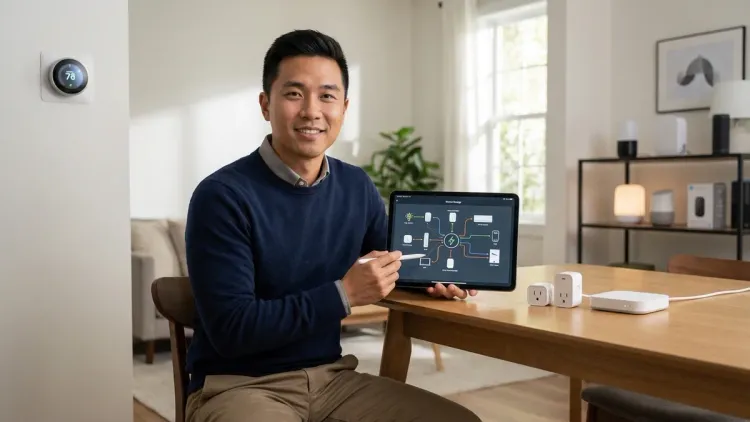
Step 3: Configure Your Hub's Energy Tracking Dashboard
Home Assistant includes a built-in Energy dashboard (Settings → Dashboards → Energy) that aggregates data from your whole-home monitor and individual smart plugs. Configure this first because it visualizes what your automation logic will act upon.
Setup requirements:
- Add your energy monitor's total power sensor as the "Grid Consumption" source
- Add each smart plug's energy sensor as an "Individual Device"
- If your utility offers TOU pricing, manually input the rate schedule (off-peak: $0.10/kWh, peak: $0.35/kWh, or whatever your actual rates are)
- Let the system collect 48 hours of baseline data before building automations
Why this matters: You need to understand your home's typical load profile—when do you hit 80% of panel capacity? Does your HVAC compressor starting always push you over threshold? The dashboard reveals these patterns. For a 200A panel at 240V, your maximum safe continuous load is around 38,400W (80% of 48,000W capacity). In practice, most homes peak at 8,000-15,000W.
Other platforms like Hubitat require custom dashboard configurations using Grafana or similar tools—this adds complexity but provides more granular control over data visualization.
Step 4: Create the Load Priority Hierarchy
Not all loads are equal. Before writing automation logic, document which devices get shed first, second, and third when demand exceeds your threshold. This prevents your system from turning off critical loads while leaving convenience items running.
Example priority structure:
- Priority 1 (first to shed): Space heaters in unoccupied rooms, decorative lighting
- Priority 2: Dehumidifiers, charging stations for non-essential devices
- Priority 3: HVAC fan speed reduction (not full cutoff), water heater
- Priority 4 (last resort): Partial dimming of all smart lighting, delayed dryer cycle
Create this as a simple text document or spreadsheet—you'll translate it into if/then logic next. The key insight: you want to shed the least disruptive loads first while maximizing the wattage reduction per action.
In my experience, homeowners initially classify everything as "critical" until they experience a few load-shedding events. After seeing that their basement dehumidifier pausing for 8 minutes caused zero problems, they become more aggressive about adding devices to Priority 1 and 2.
Step 5: Write the Core Load Balancing Automation Logic
This automation triggers whenever your whole-home power consumption exceeds your defined threshold, then systematically shuts down loads according to your priority hierarchy. Here's the pseudocode logic before we implement it:
IF total_power > threshold_watts THEN
  IF priority_1_load_1 == ON THEN
    TURN OFF priority_1_load_1
    WAIT 5 seconds
    IF total_power < threshold_watts THEN EXIT
  END IF

  IF priority_1_load_2 == ON THEN
    TURN OFF priority_1_load_2
    WAIT 5 seconds
    IF total_power < threshold_watts THEN EXIT
  END IF

  [continue through priority hierarchy]

  IF all_priority_loads_off AND total_power > threshold_watts THEN
    SEND notification "Load balancing exhausted - check for unexpected high draw"
  END IF
END IF
Home Assistant YAML implementation:
alias: "Dynamic Load Balancing - Main"
trigger:
  - platform: numeric_state
    entity_id: sensor.emporia_vue_total_power
    above: 30000  # 30kW threshold for 200A panel
    for: "00:00:03"  # Sustained for 3 seconds to avoid false triggers
action:
  - if:
      - condition: state
        entity_id: switch.space_heater_bedroom
        state: "on"
    then:
      - service: switch.turn_off
        target:
          entity_id: switch.space_heater_bedroom
      - delay: "00:00:05"
  - if:
      - condition: numeric_state
        entity_id: sensor.emporia_vue_total_power
        below: 30000
    then:
      - stop: "Load reduced below threshold"
  - if:
      - condition: state
        entity_id: switch.dehumidifier_basement
        state: "on"
    then:
      - service: switch.turn_off
        target:
          entity_id: switch.dehumidifier_basement
      - delay: "00:00:05"
  - if:
      - condition: numeric_state
        entity_id: sensor.emporia_vue_total_power
        below: 30000
    then:
      - stop: "Load reduced below threshold"
  # Continue pattern for additional priority levels
  - service: notify.mobile_app
    data:
      message: "Load balancing active - all priority loads shed, still above threshold"
Critical timing considerations:
- The 3-second trigger delay prevents nuisance tripping from momentary spikes (compressor starts, microwave operation)
- The 5-second delays between load shedding allow your energy monitor to report the new lower value—too short and you'll shed more loads than necessary
- Latency chain: Trigger detection (1-2s) + automation processing (0.5-1s) + device command (0.2-3s depending on protocol) + monitor update (1-2s) = 3-8 seconds total response time
For Z-Wave or Thread-based systems, adjust entity IDs to match your platform's naming convention. SmartThings uses similar conditional logic through their Rules API but requires JSON formatting instead of YAML.
Step 6: Implement Restoration Logic
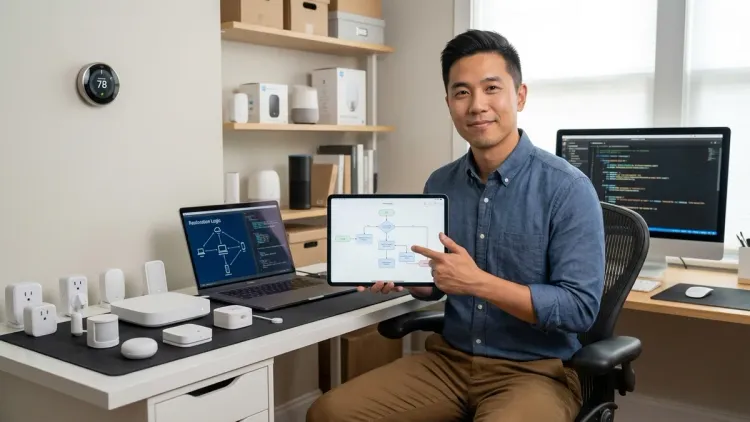
Load shedding is only half the system—you also need logic to restore loads once consumption drops safely below threshold. Without this, your space heater stays off forever after a single load event.
Restoration automation pseudocode:
IF total_power < (threshold_watts - hysteresis_margin) THEN
  IF priority_3_load_1 was_recently_shed AND time_since_shed > minimum_off_time THEN
    TURN ON priority_3_load_1
    WAIT 10 seconds
  END IF

  IF total_power < (threshold_watts - hysteresis_margin) THEN
    IF priority_2_load_1 was_recently_shed AND time_since_shed > minimum_off_time THEN
      TURN ON priority_2_load_1
      WAIT 10 seconds
    END IF
  END IF

  [continue in reverse priority order]
END IF
Key design elements:
- Hysteresis margin: Restore loads only when consumption drops 2,000-3,000W below threshold—prevents rapid on/off cycling
- Minimum off time: Force each load to remain off for at least 3-5 minutes before restoration eligibility—gives the system time to stabilize
- Reverse priority order: Restore Priority 3 loads (HVAC, water heater) before Priority 1 loads (space heaters)—ensures critical comfort systems come back first
Home Assistant restoration example:
alias: "Dynamic Load Balancing - Restore"
trigger:
  - platform: numeric_state
    entity_id: sensor.emporia_vue_total_power
    below: 27000  # 3kW hysteresis below 30kW threshold
    for: "00:01:00"  # Sustained low for 1 minute
action:
  - repeat:
      for_each:
        - switch.dehumidifier_basement
        - switch.space_heater_bedroom
      sequence:
        - if:
            - condition: state
              entity_id: "{{ repeat.item }}"
              state: "off"
            - condition: template
              value_template: >
                {{ (as_timestamp(now()) - as_timestamp(states[repeat.item].last_changed)) > 300 }}
          then:
            - service: switch.turn_on
              target:
                entity_id: "{{ repeat.item }}"
            - delay: "00:00:10"
            - if:
                - condition: numeric_state
                  entity_id: sensor.emporia_vue_total_power
                  above: 29000  # Stop restoring if we approach threshold
              then:
                - stop: "Approaching threshold during restoration"
This template-based approach scales better than manually coding each device—you maintain a simple list of entity IDs and the automation iterates through them.
Step 7: Add Time-of-Use (TOU) Rate Optimization
If your utility uses time-of-use pricing (common in California, New York, and increasingly nationwide), extend your load balancing logic to consider cost optimization alongside capacity management. This means shedding loads during expensive peak hours even if you're not approaching electrical capacity limits.
Enhanced trigger logic:
IF (total_power > threshold_watts) OR (current_time IN peak_hours AND flexible_loads_running) THEN
  [execute load shedding per priority]
END IF
Home Assistant TOU implementation: Add a schedule helper defining your utility's peak hours:
- Settings → Devices & Services → Helpers → Create Schedule
- Name:
utility_peak_hours - Define periods: Monday-Friday 4pm-9pm (example—use your actual utility schedule)
Reference this in your automation:
trigger:
  - platform: numeric_state
    entity_id: sensor.emporia_vue_total_power
    above: 30000
  - platform: state
    entity_id: schedule.utility_peak_hours
    to: "on"
condition:
  - or:
      - condition: numeric_state
        entity_id: sensor.emporia_vue_total_power
        above: 30000
      - condition: and
          - condition: state
            entity_id: schedule.utility_peak_hours
            state: "on"
          - condition: numeric_state
            entity_id: sensor.emporia_vue_total_power
            above: 15000  # Lower threshold during peak pricing
Cost-saving potential: Shifting 3kWh of water heating from peak ($0.35/kWh) to off-peak ($0.10/kWh) saves $0.75 daily or $273 annually. HVAC pre-cooling—running AC harder during off-peak hours to reduce peak-hour runtime—can save 15-30% on summer cooling costs. For detailed strategies, see our guide on peak and off-peak energy automation.
Step 8: Test and Validate Fallback Behavior

Dynamic load balancing systems must function reliably even when components fail. Test these failure scenarios before depending on the system:
Scenario 1: Hub loses internet connection
- Disable your router's WAN connection and verify load balancing still executes
- Expected behavior: Local automations continue running (Home Assistant, Hubitat), cloud-dependent platforms fail (SmartThings legacy, most Wi-Fi-only smart plugs)
- Fallback strategy: Use Zigbee/Z-Wave/Thread devices that maintain local mesh communication
Scenario 2: Energy monitor becomes unavailable
- Unplug your energy monitor and observe automation behavior
- Expected behavior: Automation triggers should timeout after 10-15 seconds and send error notification
- Fallback strategy: Add a watchdog automation that disables load balancing if the monitor hasn't updated in 60 seconds—prevents false shedding
Scenario 3: Individual smart plug becomes unresponsive
- Remove a smart plug from the wall mid-automation
- Expected behavior: Automation should skip the unavailable device and proceed to next priority load
- Fallback strategy: Wrap device commands in try/catch blocks (Home Assistant:
continue_on_error: true)
Testing protocol: Manually push your consumption above threshold by running your dryer, HVAC, and electric kettle simultaneously. Watch your hub's automation traces to verify:
- Shedding occurs within 5-10 seconds of threshold breach
- Only necessary loads are shed (system stops shedding once below threshold)
- Restoration begins after the hysteresis delay
- No rapid cycling—loads stay off for minimum time before restoration attempts
I've seen homeowners skip fallback testing and only discover problems during a real brownout event when their internet is also down. Test offline behavior explicitly—it reveals whether your system architecture is truly resilient.
Pro Tips & Common Mistakes to Avoid
Protocol mixing creates latency nightmares. If your energy monitor updates via Wi-Fi every 2 seconds but your smart plugs respond via Zigbee in 300ms, your load shedding timing becomes unpredictable. Standardize on low-latency protocols wherever possible—I prioritize Zigbee for all controllable loads specifically because response times are consistent.
Setting threshold too close to panel capacity. Many installers use 90-95% of rated capacity as their threshold, which leaves almost no safety margin for transient spikes. Use 75-80% maximum—for a 200A panel, that's 28,800-30,720W. You're optimizing for reliability, not extracting every possible watt from your electrical system.
Forgetting to account for startup surge current. When your HVAC compressor kicks on, it briefly draws 2-3x its running wattage. Your energy monitor sees this spike, triggers load shedding, then consumption drops back to normal as the compressor reaches steady state. Add a 2-3 second trigger delay specifically to filter out these transients.
Over-complicating the priority hierarchy. I've consulted on systems with 8-10 priority levels that became unmaintainable. Stick to 3-4 levels maximum—you're building a practical load management system, not modeling the entire physics of your home's electrical flow.
Not documenting which devices were shed. Add entity attributes or input_text helpers that record which loads were shed and when. During troubleshooting, you need to know whether your space heater was off due to load balancing or because someone manually turned it off. Home Assistant's logbook integration provides this automatically, but Hubitat users need to manually log state changes.
Ignoring seasonal load pattern changes. Your summer baseline with AC running differs massively from winter with electric heating. Review and adjust your threshold seasonally—what worked in April might cause nuisance shedding in July. Set a recurring calendar reminder every 3 months to review your energy dashboard.
For broader energy management strategies beyond load balancing, our complete guide to smart home energy management covers monitoring, optimization, and automation integration.
Frequently Asked Questions
What protocols work best for dynamic load balancing smart home systems?
Zigbee 3.0 and Matter over Thread provide the best combination of low latency (200-800ms response times) and local operation during internet outages. Z-Wave Plus works equally well with similar latency characteristics. Wi-Fi smart plugs typically add 1-3 seconds of delay due to cloud dependencies and introduce reliability problems when your network is congested—avoid Wi-Fi for time-sensitive load shedding applications unless the device explicitly supports local control through your hub. For critical loads like HVAC systems, wired relay controls (like Shelly switching modules) eliminate wireless variables entirely.
How much can I realistically save with dynamic load balancing?
Most homes save 8-15% on monthly electricity costs by combining capacity-based load balancing with time-of-use optimization. The exact savings depend on your utility's rate structure—homes with aggressive TOU pricing (peak rates 2-3x higher than off-peak) see the largest benefit. The savings come from two sources: avoiding demand charges if your utility bills based on peak usage (common for commercial, rare for residential), and shifting flexible loads like water heating and EV charging to cheaper off-peak hours. Capacity-focused load balancing primarily prevents electrical panel upgrades (saving thousands in upgrade costs) rather than directly reducing monthly bills. For detailed monitoring hardware recommendations, see our comparison of the best smart home energy monitors.
Does dynamic load balancing work during power outages?
No, because your whole-home energy monitor stops functioning when grid power is lost. If you have battery backup or a generator, load balancing can theoretically manage your limited power capacity, but you'll need a specialized energy monitor designed for off-grid operation—most consumer models like the Emporia Vue only measure grid-supplied power. Homes with solar plus battery storage (like Tesla Powerwall) can implement load balancing using the battery system's built-in energy management, but this requires different automation logic that queries battery state-of-charge instead of whole-home power draw. The battery system's controller handles load prioritization automatically during outages, making manual smart home automations redundant.
Can I use this system with an apartment or do I need access to my electrical panel?
You can implement limited load balancing in apartments using only smart plugs without accessing the electrical panel. Instead of measuring whole-home consumption, you'll track the cumulative wattage from all your monitored smart plugs and shed loads when that aggregate number exceeds a threshold you define—typically 1,800W for a single 15A circuit to avoid tripping breakers. This approach only manages loads plugged into smart outlets, so you can't shed your HVAC or water heater, but you can prevent running space heaters, dehumidifiers, and other portable appliances simultaneously. The automation logic remains identical to whole-home systems, just with a lower threshold and fewer controllable devices. For plug selection guidance, review our recommendations for smart plugs under $50 with energy monitoring.
Setting Up Load Balancing Is an Iterative Process
Dynamic load balancing transforms your home from a passive energy consumer into an adaptive system that responds to electrical capacity constraints and utility pricing signals. You've now installed the monitoring infrastructure, deployed controllable loads, written the automation logic with proper priority hierarchies, and tested fallback behaviors for reliability.
The key to long-term success: treat your initial setup as a baseline, not a finished product. Monitor how often load shedding triggers over the next month, which devices actually get shed during real events, and whether your priority hierarchy matches your actual comfort preferences. Most of my consulting clients adjust their priority structure 2-3 times in the first 60 days as they discover which loads they can tolerate interrupting and which ones cause frustration.
Your load balancing system works best as part of a comprehensive energy strategy—for complementary automation approaches like pre-cooling and scheduled device operation, explore our guide on creating energy-saving automations with Home Assistant. The hardware you've deployed for load balancing also enables detailed energy auditing—our smart home energy audit checklist shows how to identify phantom loads and high-consumption devices using the same monitoring infrastructure.
Start conservative with your threshold and priority settings, then gradually optimize as you gain confidence in the system's behavior. You're building reliability, not chasing the absolute maximum theoretical efficiency.