
The most successful smart lighting automations are the ones you never consciously notice—the ones that read the rhythm of your day and respond before you reach for a switch. Learning to build automations around if/then logic and scenes transforms lighting from a task you manage into an atmospheric layer that shifts with intention. This guide walks you through the logic structures, protocol considerations, and invisible design strategies that make smart lighting automations feel effortless rather than technological.
You'll need a working understanding of your smart home hub's interface—whether that's Home Assistant, SmartThings, or a platform-specific controller—and roughly two to three hours to build, test, and refine your first set of automations. The reward is a home that responds to presence, time, and activity without visible control panels or voice commands disrupting the mood.

What You'll Need
- A smart home hub or controller supporting automation logic (Home Assistant, Hubitat Elevation, Samsung SmartThings, Apple Home with HomePod, or Amazon Echo with Zigbee/Matter support)
- Smart bulbs, switches, or dimmers using Zigbee, Z-Wave, Thread, or Matter protocols (Wi-Fi bulbs work but introduce latency and network congestion—more on that below)
- Motion sensors (Zigbee or Z-Wave preferred for <100ms response times; Thread/Matter sensors are emerging but ecosystem support varies as of early 2026)
- Contact sensors for doors/windows (optional, but valuable for entry/exit routines)
- Illuminance/lux sensors if you want automations to factor in natural light levels (many motion sensors include built-in lux detection)
- Time/schedule access within your automation platform (standard in all major hubs)
- Mobile app access to your hub for testing and adjustments
- Basic familiarity with your hub's automation editor—whether that's visual blocks, YAML configurations, or a graphical interface
Step 1: Understand the If/Then Structure and Choose Your Automation Platform
Every smart lighting automation follows the same fundamental structure: if [condition(s)] are met, then [action(s)] execute. The sophistication comes from layering conditions and defining fallback behaviors when networks lag or devices don't respond.
A simple example:
IF motion detected in hallway
AND time is between 10:00 PM – 6:00 AM
AND lux level < 10
THEN turn on hallway lights to 20% warm white
WAIT 3 minutes with no motion
THEN turn off hallway lights
Your hub's automation engine determines how many conditions you can stack, how precisely you can control timing, and what happens when a sensor drops offline. Understanding Concealed Smart Home Hubs: Z-Wave, Zigbee & Matter Compatibility covers the differences between platforms, but for lighting automation specifically, prioritize hubs that support local processing (no cloud dependency) and sub-second response times.
Protocol considerations: Zigbee and Z-Wave handle lighting automations with 50–150ms latency when the mesh network is healthy. Matter 1.4 over Thread shows similar performance, but as of 2026, not all lighting manufacturers support the full Matter scene and automation spec—some devices still rely on manufacturer apps for complex logic. Wi-Fi bulbs like the Govee RGBIC Smart LED Bulbs work well for scenes you trigger manually but introduce 300–800ms delays in motion-triggered automations due to cloud routing and network overhead.
Choose your platform based on the protocols your existing devices use. If you're starting fresh, Zigbee or Matter over Thread offers the best balance of responsiveness, mesh reliability, and discreet device availability.
Invisible alternative: Most hubs can be concealed in cabinetry, media consoles, or utility closets. The only visible element should be sensors—and even those can be recessed or disguised.
Step 2: Map Your Lighting Zones and Define the Mood of Each Space
Before writing a single automation rule, walk through your home at different times of day and observe how natural light shifts, where shadows gather, and when you instinctively reach for switches. The goal is to identify zones and the emotional temperature each space needs to hold.
A kitchen might need three distinct modes: bright task lighting for morning prep (5000K, 100% brightness), ambient warmth during dinner (2700K, 60%), and a low nightlight path (2200K, 10%) for late-night water runs. A bedroom needs gentle wake lighting that ramps slowly, evening wind-down tones that suppress blue wavelengths, and near-darkness for middle-of-the-night bathroom trips.
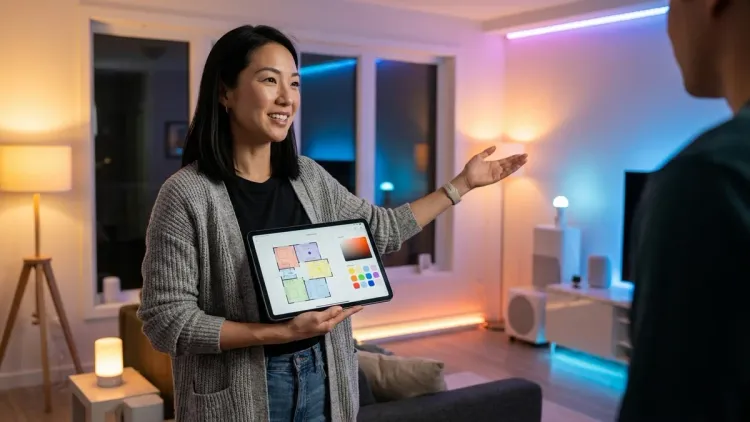
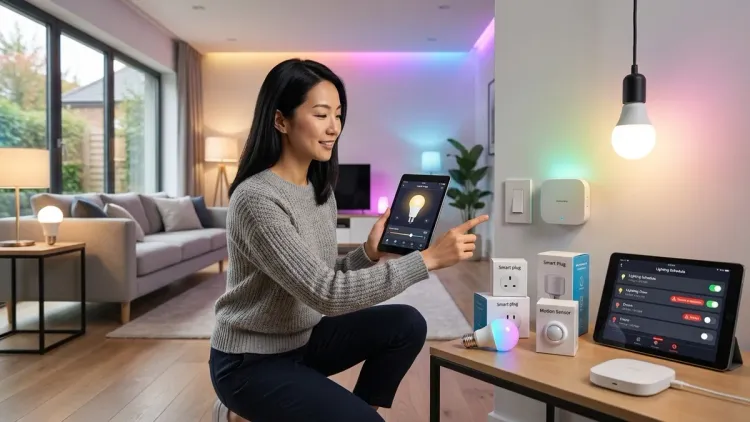
Sketch out zones and assign each a shorthand—"Kitchen Task," "Kitchen Ambient," "Kitchen Night Path." These become your scenes: preset combinations of brightness, color temperature, and which fixtures are active. Most platforms let you save scenes as reusable blocks that automations can call.
Protocol note: Scenes stored locally on a Zigbee hub execute almost instantaneously (under 100ms for an entire room to transition). Scenes that require cloud API calls—common with some Wi-Fi bulbs—can take 1–3 seconds to fully render, creating a perceptible lag that breaks immersion.
In one Pacific Northwest remodel, we hid Philips Hue Lightstrip Plus behind crown molding in a dining room, programmed to shift from cool white during the day to amber at dusk. The automation reads time and lux level; the light source itself is completely invisible, casting indirect glow upward. The space feels responsive without appearing controlled.
Step 3: Build Your First Motion-Activated Lighting Automation with Layered Conditions
Start with a high-traffic transitional space—a hallway, entryway, or staircase—where motion-activated lighting provides immediate value. The simplest version:
IF motion detected in hallway
THEN turn on hallway lights to 100%
This works, but it's blunt. Layering conditions adds nuance:
IF motion detected in hallway
AND time is between 6:00 AM – 10:00 PM (daytime hours)
AND lux level < 50 (darker than ambient daylight threshold)
THEN turn on hallway lights to 80% brightness, 4000K
WAIT 2 minutes with no motion detected
THEN turn off hallway lights
Now add a nighttime variant:
IF motion detected in hallway
AND time is between 10:00 PM – 6:00 AM (nighttime hours)
THEN turn on hallway lights to 15% brightness, 2200K
WAIT 90 seconds with no motion detected
THEN turn off hallway lights
You've created context-aware lighting that adjusts to circadian rhythm and actual visibility needs. The lux condition prevents lights from firing during bright afternoons when they're unnecessary—a detail that matters for both energy use and the feeling that your home isn't overreacting.
Latency expectations: Zigbee and Z-Wave motion sensors typically report state changes in 50–150ms. The hub processes the logic and sends the lighting command in another 30–100ms. Well-tuned automations feel instantaneous—you enter a space and light appears as if anticipating you. Wi-Fi sensors and cloud-dependent automations introduce 300ms–2-second delays, which feel sluggish.
Fallback behavior: If a motion sensor goes offline (dead battery, mesh interference), the automation won't trigger. Zigbee Motion Sensors vs Z-Wave Motion Sensors: Latency and Reliability Compared explores mesh resilience, but the practical solution is manual switches as backup. Smart switches that retain physical control ensure you're never locked out by automation failure.
Step 4: Create Time-Based Scene Transitions for Morning and Evening Routines

Motion-triggered automations handle transient spaces. Time-based scene automations shape the atmosphere of spaces where you linger—living rooms, bedrooms, kitchens during meal prep.
A morning routine might look like this:
IF time is 6:30 AM on weekdays
THEN activate "Morning Wake" scene in bedroom:
  - Bedside lamps ramp from 0% to 40% over 10 minutes, 3000K
  - Hallway lights turn on to 60%, 4000K
  - Kitchen under-cabinet lights turn on to 80%, 4500K
The ramp is critical—abrupt brightness feels jarring, especially in bedrooms. Most platforms support gradual transitions; Zigbee and Matter lights handle smooth ramps natively, while some Wi-Fi bulbs step through brightness increments visibly.
An evening wind-down automation:
IF time is 8:30 PM
THEN activate "Evening Settle" scene in living areas:
  - Overhead lighting dims to 30%, shifts to 2500K over 15 minutes
  - Accent lighting (hidden LED strips, concealed uplights) turns on to 50%, 2200K
  - Kitchen task lights turn off
This gradual shift signals the day's close without requiring conscious intervention. You're guiding occupants toward rest through light alone—no announcements, no app interactions.
Invisible alternative: Time-based automations work beautifully with concealed lighting sources—cove lighting, toe-kick LEDs, in-wall recessed fixtures. The effect is environmental rather than fixture-focused. How to Hide Smart Home Devices Without Blocking Wireless Signals offers installation strategies that preserve aesthetics and signal strength.
Step 5: Add Conditional Logic for Occupancy and Override Scenarios
The automations above work until they don't—until you're watching a film in the living room at 8:30 PM and the lights suddenly dim to 30%, ruining contrast. Or until you're hosting a late dinner and don't want nighttime dim modes activating.
Occupancy conditions and manual override flags add intelligence:
IF time is 8:30 PM
AND [living room occupancy sensor] shows occupied for >10 minutes
AND [manual override mode] is OFF
THEN activate "Evening Settle" scene
The occupancy check prevents the automation from firing if the space has been empty—useful if you're traveling or spending the evening elsewhere. The manual override is a virtual switch (most hubs support these as boolean flags) you can toggle via app or voice when you want automations to pause. Some platforms call this "guest mode" or "party mode."
For film watching, a more elegant solution is a media-playing condition:
IF time is 8:30 PM
AND [living room TV] media state is NOT "playing"
THEN activate "Evening Settle" scene
This requires your TV or media device to report state to the hub—Chromecast, Apple TV, and some smart TVs expose this natively; others need HDMI-CEC adapters or IR blasters. The result is automation that respects context rather than blindly following a schedule.
Fallback behavior: If the occupancy sensor fails to report, the time-based automation will still fire. You may want a redundant condition (motion detected in the last 30 minutes) or simply accept occasional false triggers as acceptable friction. Perfect automation is an illusion; graceful degradation is the realistic goal.
Step 6: Build Entry and Exit Automations Using Contact Sensors
Door contact sensors add spatial awareness to your lighting logic, enabling automations that respond to arrivals and departures—moments when lighting can either welcome or conserve.
An entry automation:
IF [front door contact sensor] changes to "open"
AND time is after sunset OR lux level < 20
THEN activate "Welcome Home" scene:
  - Entryway lights turn on to 80%, 3500K
  - Hallway lights turn on to 60%, 3500K
  - Living room accent lights turn on to 40%, 2700K
WAIT 10 minutes
THEN dim entryway and hallway lights to 30%
This creates a lit pathway that anticipates movement through the home, then settles into ambient mode once you've dropped bags and removed shoes. The lux condition prevents the automation from firing on bright afternoons when natural light is sufficient.
An exit automation for energy savings:
IF [front door contact sensor] changes to "closed"
AND [back door contact sensor] remains "closed" for 5 minutes
AND no motion detected in any room for 5 minutes
THEN activate "Away" scene:
  - Turn off all lights except security perimeter (front porch, back patio at 10%)
  - Set override flag to prevent time-based automations
This assumes departure—a risky assumption. If someone's still home but stationary (reading, napping), you'll plunge them into darkness. A safer approach is a geofencing condition (all household smartphones outside a 500m radius), though that requires mobile app location permissions and reliable GPS/Wi-Fi triangulation.
Protocol consideration: Contact sensors using Zigbee or Z-Wave report state changes in under 100ms. Thread-based Matter sensors show similar performance, but ecosystem support is still fragmentary in early 2026—Apple Home handles Thread contact sensors well; SmartThings and Home Assistant support is improving but may require Matter 1.4 hub firmware updates.
Step 7: Test Latency, Adjust Timing, and Identify Points of Failure

Once your smart lighting automations are running, walk through your home deliberately, triggering each automation in sequence. Time the response with your phone's stopwatch—motion detected to light on, door opened to scene activated. Anything over 500ms will feel sluggish; anything over 1 second feels broken.
If latency is high, the culprit is usually:
- Mesh network congestion or weak signal strength: Add a Zigbee/Z-Wave repeater (a smart plug works) halfway between the sensor and hub. Device Mesh Network Reliability Explained: Zigbee vs Z-Wave vs Thread covers mesh optimization.
- Cloud-dependent devices: If your hub routes commands through a manufacturer's cloud API, you're at the mercy of internet speed and server response times. Switching to locally-controlled devices eliminates this.
- Hub processing overhead: Platforms running dozens of automations simultaneously may prioritize by rule complexity. Simplify conditions or upgrade to more powerful hub hardware.
Test failure modes intentionally: pull the battery from a motion sensor mid-automation. Does the light stay on indefinitely, or does a backup timer turn it off after 10 minutes? Disconnect your hub from Wi-Fi. Do Zigbee and Z-Wave automations continue running locally, or do they freeze?
Fallback behavior checklist:
- Manual switches remain functional if hub goes offline
- Lights default to a usable state (on, 50%, 3000K) if automation logic crashes
- Backup timers prevent lights from staying on indefinitely if sensors fail
- Critical pathways (stairs, exits) have redundant triggers or stay lit during uncertain states
Walk your home at 2 AM when you're groggy and test whether nighttime automations provide enough light to navigate safely without fully waking you. Adjust brightness and timing based on how the space feels, not what the numbers suggest.
Step 8: Refine Based on Seasonal Light Shifts and Household Rhythms
Your first set of automations will feel precise for about two weeks, then start to drift out of sync as sunrise times shift, household routines change, or you realize a motion sensor's placement catches too much incidental movement.
Set a recurring calendar reminder every six weeks to review and adjust:
- Update sunrise/sunset offset conditions as seasonal light changes (most hubs support dynamic sunrise/sunset variables; use those instead of hard-coded times)
- Adjust lux thresholds if you've added window treatments or landscaping that alters natural light infiltration
- Revisit motion sensor timeout durations—a 2-minute delay might feel right in summer when spaces are warm and inviting, but too abrupt in winter when you linger longer
- Test edge cases: weekend mornings when routines are looser, holiday gatherings when spaces are used differently, travel periods when automations should pause or shift to security-focused modes
One client found that her kitchen automation—designed to provide bright task lighting at 6 AM—became oppressive in winter when dawn arrived after 7:30 AM. We shifted the condition from "time is 6:00 AM" to "time is 30 minutes before calculated sunrise OR motion detected in kitchen after 6:00 AM," preserving the wake-up function while respecting the season's darker mornings.
Invisible refinement: As you adjust timing and brightness, consider whether visible switches and sensors could be further concealed. A motion sensor initially placed on a shelf for testing might be relocated to a ceiling mount or recessed into trim, reducing its visual footprint while maintaining detection range.
Pro Tips & Common Mistakes
Layer redundancy without creating conflicts: It's tempting to have both motion-based and time-based automations controlling the same lights, but overlapping triggers cause flickering or competing commands. Use priority flags or mutual exclusion conditions—if motion automation is active, time-based scenes defer.
Don't over-tune lux thresholds: A lux sensor reading 48 when your threshold is 50 will trigger lights; a reading of 52 won't. That 4-lux difference is imperceptible to your eye but creates inconsistent behavior. Use wider thresholds (lux < 30 vs. lux > 70) to avoid edge-case flickering.
Avoid long fade times in transient spaces: A 15-minute ramp works beautifully for bedroom wake lighting. It's maddening in a hallway where you're passing through in 20 seconds and the light only reaches 10% before you leave.
Motion sensor placement matters more than you think: A sensor aimed at a doorway will trigger the instant you enter. A sensor aimed at the center of a room means you'll walk several feet in darkness before detection. Test sightlines and detection angles before finalizing placement. Hidden Motion Sensors vs Visible Motion Sensors: Which Is Better for Matter Networks? compares detection patterns across protocols.
Common mistake: Forgetting that Zigbee and Z-Wave use different radio frequencies and can't directly trigger each other. If your motion sensor is Zigbee and your light switch is Z-Wave, the hub acts as translator—adding 20–50ms latency. Keeping devices within the same protocol family minimizes lag.
Common mistake: Building automations around voice commands or app buttons as primary triggers. These are override mechanisms, not daily interfaces. If your household is still saying "Alexa, turn on the living room" every evening, your automations aren't anticipating needs—they're just remote controls with extra steps.
Keiko's observation from a recent consultation: A couple insisted their smart lighting wasn't working because they constantly had to override automations. The issue wasn't the technology—it was that automations were built around their schedule two years ago. Their routines had shifted (earlier wake times, later dinners), but the automations hadn't. Lighting that feels intelligent is lighting that evolves.
Frequently Asked Questions
What's the difference between a scene and an automation in smart lighting?
A scene is a saved snapshot of lighting states—which bulbs are on, their brightness, color temperature—that you can recall instantly with a single command, like "Evening Relax" or "Bright Work Mode." An automation is the if/then logic that decides when to activate a scene or other lighting action based on triggers like motion, time, or sensor data. Scenes are the destination; automations are the rules that get you there without manual input.
Do smart lighting automations work if my internet goes down?
It depends on your protocol and hub. Zigbee, Z-Wave, and Thread-based automations run locally on your hub and continue functioning without internet—motion sensors, time triggers, and lighting commands all stay operational. Wi-Fi bulbs and cloud-dependent platforms like some LIFX or TP-Link Kasa setups may lose automation capability entirely without internet, though some offer limited local control. If reliability matters, prioritize local processing hubs and non-Wi-Fi protocols.
How do I prevent smart lighting automations from fighting each other or causing flickering?

Conflicting automations happen when multiple rules try to control the same lights simultaneously—one says "turn on to 80%" while another says "turn off after 2 minutes of no motion." Solutions include priority hierarchies (manual overrides always win, then motion-based, then time-based), mutual exclusion flags (if automation A is active, automation B pauses), and single source of truth design (one master automation per zone that evaluates all conditions before acting). Most platforms let you set conditions like "only run this automation if [other automation] is not active."
What's a realistic response time for motion-activated smart lighting automations?
Zigbee and Z-Wave automations with a healthy mesh network respond in 100–300ms total—fast enough to feel instantaneous. Thread over Matter shows similar performance where fully supported. Wi-Fi bulbs or cloud-dependent automations often take 500ms–2 seconds, which feels noticeably laggy—you'll walk into a dark room, pause, then see lights turn on. Latency compounds with weak mesh networks, hub processing delays, or congested Wi-Fi. How to Test Smart Device Response Times and Latency Across Protocols provides benchmarking methods if you want to measure your specific setup.
Summary
Building smart lighting automations with if/then logic and scenes isn't about accumulating triggers—it's about designing invisible choreography that responds to how your household actually moves, rests, and works. The most refined automations are the ones that anticipate needs without announcing themselves, using layered conditions, protocol-aware device selection, and fallback behaviors that degrade gracefully when sensors fail or networks lag.
Start with one high-impact space—an entryway, a hallway, a bedroom—and build outward only after that first automation feels effortless. Refinement comes from observation, seasonal adjustments, and a willingness to simplify logic when complexity creates more friction than function. The goal isn't a home that responds to every input; it's a home where light feels native to the rhythm of living.