Building a smart home from scratch feels overwhelming when you're staring at hundreds of incompatible devices and confusing protocol acronyms. This step by step home automation setup guide walks you through the entire process—from choosing your first hub to writing automation logic that actually works when you need it. You'll learn which protocols matter, how to avoid compatibility nightmares, and what to expect when your Wi-Fi drops at 2 AM.
I've walked over 500 homeowners through their first installations, and the ones who succeed all follow the same methodical approach. Let's break it down.
What Is Home Automation Setup?
Home automation setup is the process of selecting, installing, and configuring smart devices to work together as a coordinated system. It's not just buying a bunch of gadgets—it's building an infrastructure that lets devices communicate through shared protocols like Zigbee, Z-Wave, Thread, Matter, or Wi-Fi.
A proper setup includes three layers: the physical devices (lights, sensors, locks), the communication protocol that connects them, and the control layer (hub, voice assistant, or smartphone app) that manages everything. Most first-timers skip the planning phase and buy devices that can't talk to each other. I've seen homeowners with three separate apps for three lights because they didn't check protocol compatibility first.
The setup process typically spans 2-4 weeks for a basic system (10-15 devices) and requires decisions about ecosystem lock-in, monthly subscription costs, and what happens when your internet goes down. You're not just installing devices—you're choosing which company controls your home for the next 5-10 years.
This step by step home automation setup guide assumes you're starting from zero and want a system that expands without throwing away your first purchases. We'll prioritize local control where possible and cloud services only when they add genuine value.
How Home Automation Setup Works
The setup process follows a specific sequence that prevents compatibility issues and wasted money. Skipping steps or doing them out of order creates problems you'll spend months fixing.
Phase 1: Infrastructure Assessment (Week 1)
Before you buy anything, you need to understand your home's technical foundation.
Network Requirements:
- Measure your Wi-Fi coverage in every room where you'll place devices
- Document dead zones and concrete/metal barriers that block signals
- Identify your router's 2.4GHz and 5GHz capabilities (most smart devices need 2.4GHz)
- Confirm your internet upload speed (minimum 10 Mbps for cloud-connected cameras)
In my experience, 60% of "defective" smart devices are just victims of weak Wi-Fi. Use your phone's signal strength indicator and walk through every room. If you see two bars or less, you'll need a mesh router system or Wi-Fi extenders before adding smart devices.
Electrical Inventory:
- Check if your light switches have neutral wires (required for most smart switches)
- Count available outlets in each room
- Identify circuit breaker capacity for high-draw devices (smart ovens, EV chargers)
Open one light switch and look for a bundle of white wires in the back of the box. No neutral wire? You'll need battery-powered switches or specific models like Lutron Caseta that work without neutrals.
For a detailed pre-purchase checklist, see our Smart Home Setup Checklist: Everything You Need Before You Start.
Phase 2: Protocol and Ecosystem Selection (Week 1-2)
This is where most DIY installations fail. You must choose your primary protocol before buying devices.
Protocol Decision Matrix:
| Protocol | Range | Device Limit | Hub Required | Battery Life | Interoperability |
|---|---|---|---|---|---|
| Zigbee | 30-50 ft | 65,000+ | Yes | 1-2 years | Excellent with Matter bridge |
| Z-Wave | 100+ ft | 232 per hub | Yes | 2-3 years | Limited to Z-Wave Alliance |
| Thread | 30-50 ft | Unlimited | Yes (border router) | 1-2 years | Native Matter support |
| Matter | Varies | Varies | Depends on device | Varies | Universal (when working) |
| Wi-Fi | 50-150 ft | Router-dependent | No | Hours to days | Cloud-dependent |
My recommendation for 2026: Start with Matter-certified devices where available, backed by a Thread border router for low-power sensors. This gives you the widest compatibility with the least vendor lock-in.
For first-time installations, I typically suggest:
- Primary hub: Amazon Echo Hub (2nd Gen) or Apple HomePod mini with Thread support
- Secondary protocol: Zigbee for legacy devices and broader selection
- Fallback: Wi-Fi for devices without Matter/Zigbee options (cameras, complex appliances)
The Zigbee vs Z-Wave vs Thread: Which Protocol Should You Choose? guide breaks down the technical differences, but here's the practical version: Thread + Matter gives you future-proofing, Zigbee gives you device selection, and Z-Wave gives you range.
Ecosystem Lock-In Considerations:
Choose your voice assistant now because it determines which devices get first-class support:
- Amazon Alexa: Widest device compatibility, best routines editor, mediocre privacy
- Google Assistant: Better voice recognition, limited automation logic, requires cloud
- Apple HomeKit: Best privacy, local processing, smallest device selection, Thread/Matter native
I've seen homeowners spend $2,000 on Alexa-compatible devices, then switch to HomeKit and discover half their stuff doesn't work. Pick your ecosystem based on which limitations you can tolerate, not which marketing sounds best.
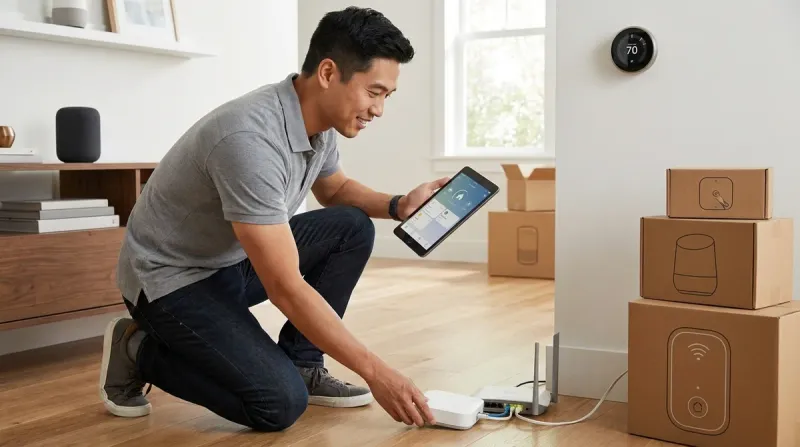
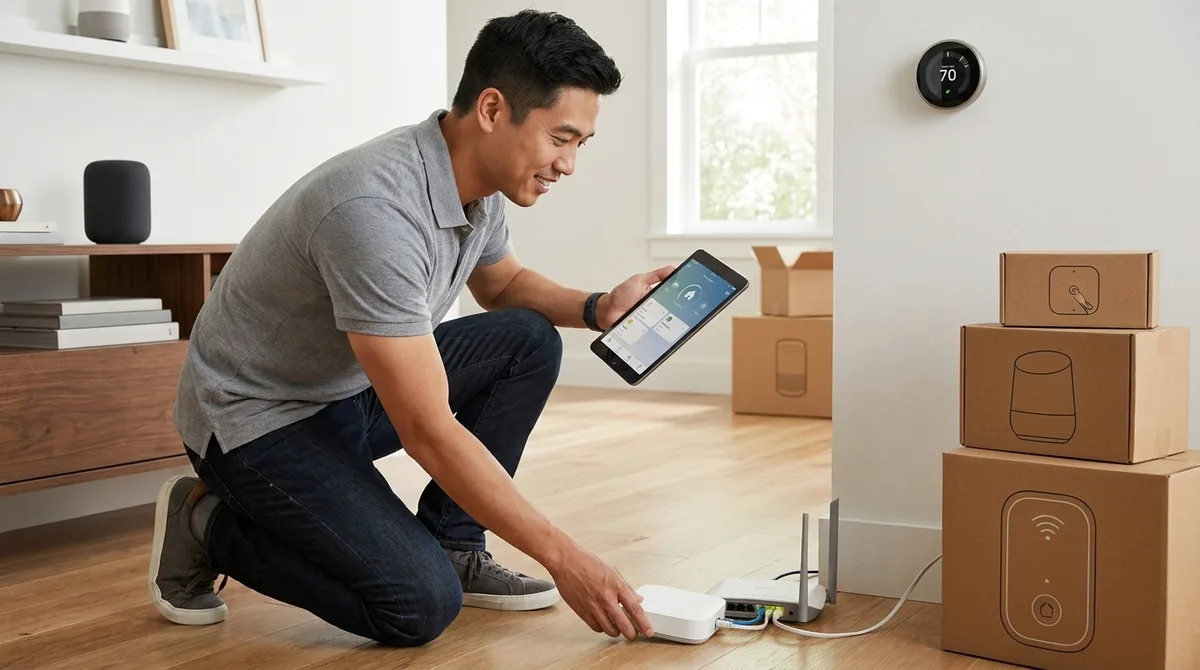
Phase 3: Hub Installation and Network Configuration (Week 2)
Your hub is the brain of your system. Get this right or nothing else matters.
Hub Setup Sequence:
Physical Placement
- Center of your home for maximum range
- At least 3 feet from Wi-Fi routers (RF interference)
- Near an Ethernet port if available (wired > wireless for hubs)
- Power protection via UPS (hubs dying during power blips cause network chaos)
Network Integration
IF hub supports Ethernet:
    Connect via cable → reduces wireless congestion
ELSE:
    Connect to 2.4GHz Wi-Fi ONLY (5GHz won't reach Zigbee/Thread devices)
Firmware Updates
- Run all updates BEFORE adding devices
- Set automatic update schedule to 3 AM (when devices aren't in use)
- Enable update notifications to catch breaking changes
Account Configuration
- Create accounts with strong unique passwords (password managers are your friend)
- Enable two-factor authentication
- Configure privacy settings BEFORE connecting devices
In my experience, homeowners who skip the UPS step regret it within three months. A $60 UPS prevents your mesh network from collapsing during every thunderstorm. See Best UPS Systems for Smart Home Hubs: Zigbee, Z-Wave & Matter Device Protection for specific recommendations.
Phase 4: Device Installation (Weeks 2-3)
Add devices in order of complexity, testing each before moving to the next.
Installation Sequence:
First: Smart plugs (simplest, validate protocol works)
- Plug into outlet within 15 feet of hub
- Open manufacturer app and initiate pairing
- Wait for confirmation (typically 30-90 seconds)
- Test on/off control from app
- Test voice control if using assistant
- Create simple time-based automation:
IF time = 6:00 PM:
    THEN turn on lamp
Second: Smart bulbs or switches
- For switches, verify neutral wire presence
- Install one switch/bulb per room initially
- Test before installing multiples
- Configure scenes before adding to automations
- Expected latency: 200-800ms for Zigbee/Thread, 1-3 seconds for Wi-Fi
Third: Sensors (motion, contact, temperature)
- Start with one motion sensor in high-traffic area (hallway)
- Test detection range (walk test from multiple angles)
- Adjust sensitivity if available
- Battery-powered sensors: expect 12-18 months on CR2032, 6-12 months on AAA
- Create trigger-based automation:
IF motion detected in hallway:
    AND time is between sunset and 11:00 PM:
    THEN turn on hallway light to 40% brightness
    AND turn off after 5 minutes of no motion
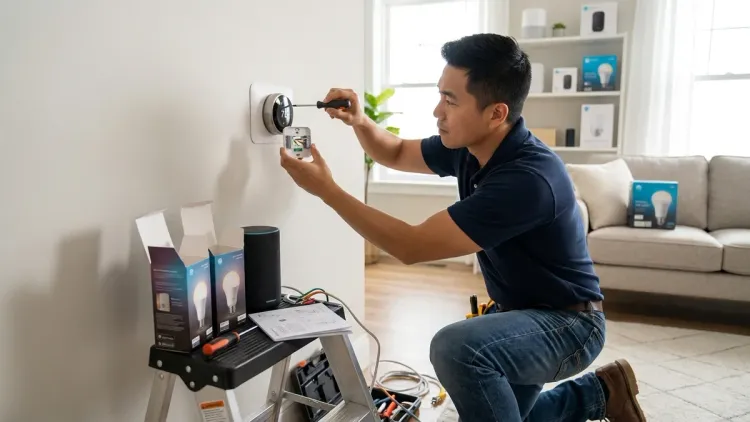
Fourth: Complex devices (thermostats, locks, cameras)
- Read manufacturer instructions completely (boring but essential)
- Test in isolation before adding to routines
- Configure local storage options if available
- Set up fallback behaviors (what happens if Wi-Fi drops)
I've seen homeowners install 30 devices in one weekend and then spend six months debugging why nothing works reliably. Slow down. Install 2-3 devices per day maximum, test each for 24 hours, then move forward.
For room-by-room guidance, check How to Automate Your Home Room by Room.
Phase 5: Automation Logic Creation (Week 3-4)

This is where setup becomes a smart home. Automations are if/then statements that make devices respond to conditions instead of manual commands.
Automation Complexity Levels:
Level 1: Time-Based (Simplest)
IF time = 7:00 AM on weekdays:
    THEN set thermostat to 68°F
    AND turn on kitchen lights to 100%
    AND start coffee maker
Expected reliability: 99%+ (no sensors required) Latency: <5 seconds
Level 2: Trigger-Based
IF front door contact sensor = open:
    AND time is between 10:00 PM and 6:00 AM:
    THEN turn on porch light to 100%
    AND send notification to phone
    AND activate camera recording
Expected reliability: 95-98% (sensor dependent) Latency: 1-3 seconds for Zigbee/Thread, 3-10 seconds for Wi-Fi
Level 3: Conditional Logic
IF motion detected in living room:
    AND ambient light level < 30 lux:
    AND someone is home (phone presence):
    AND time is after 5:00 PM:
    THEN turn on floor lamp to 60%
    AND set scene "Evening Relaxation"
Expected reliability: 85-92% (multiple failure points) Latency: 2-5 seconds
Level 4: Multi-Device Sequences
IF voice command "Good night":
    THEN lock all doors (wait for confirmation)
    AND set thermostat to 65°F
    AND turn off all lights except bedroom (30% dimmed)
    AND arm security system to "Home" mode
    AND enable motion sensor alerts for downstairs only
Expected reliability: 80-90% (depends on all devices responding) Latency: 5-15 seconds for full sequence
Start with Level 1 automations only. Once you have five working reliably for a month, add Level 2. I've consulted on installations where homeowners jumped straight to Level 4 and couldn't figure out which of twelve variables was failing.
Common Automation Failures and Fixes:
Lights turn on but don't turn off: Motion sensor timeout too short or positioned where it can't detect a still person. Increase timeout to 5+ minutes or add secondary sensor.
Automation works during testing but fails overnight: Device goes into deep sleep to save battery. Adjust sleep settings or switch to powered devices for critical automations.
Commands execute slowly or incompletely: Mesh network congestion. Reduce automation frequency or add Zigbee/Thread repeater devices.
For advanced automation patterns, see How to Create Smart Lighting Automations with If/Then Logic and Scenes.
Phase 6: Reliability Testing and Fallback Configuration (Week 4)
Your system isn't complete until you've tested failure modes.
Reliability Test Checklist:
Power Outage Simulation
- Flip circuit breaker for hub/router
- Wait 5 minutes
- Restore power
- Document which devices reconnect automatically (most won't)
- Expected reconnection time: 5-15 minutes for full mesh recovery
Internet Outage Test
- Disconnect router from modem
- Test voice commands (will fail for cloud-dependent devices)
- Test local automations (should continue working for Zigbee/Z-Wave/Thread)
- Test manual control via app (local-only apps work, cloud apps fail)
Hub Failure Test
- Power down hub completely
- Test which devices still respond to manual control
- Wi-Fi devices: usually work
- Zigbee/Z-Wave/Thread: stop responding
- Document recovery time after hub restarts (2-10 minutes)
Fallback Behavior Configuration:
For critical functions, configure multiple control methods:
Door Lock Fallback Hierarchy:
1. Voice command (primary)
2. Smartphone app (secondary)
3. Physical keypad (tertiary)
4. Physical key (emergency)
For lighting in high-traffic areas (stairs, bathrooms), use smart switches instead of bulbs so the physical switch always works even if automation fails.
Configure notifications for critical device failures:
IF front door lock loses connection for >30 minutes:
    THEN send push notification
    AND send SMS backup
Our guide on How to Configure Smart Home Fallback Automations During Power Outages covers advanced scenarios like UPS switchover and mesh network recovery.
Why This Setup Approach Matters
Following this methodical step by step home automation setup guide prevents the three most expensive mistakes I see repeatedly:
Mistake 1: Incompatible Device Accumulation
Homeowners buy devices based on features, not protocols. You end up with a Zigbee hub, Z-Wave sensors, Wi-Fi lights, and a Thread lock—none of which can directly communicate. You need multiple hubs, multiple apps, and your automations become impossibly complex.
Cost of fixing: $300-800 in duplicate purchases or hub bridges
Following the protocol selection phase prevents this entirely. Pick one primary protocol and stick to it for 80% of your devices. Use other protocols only when necessary.
Mistake 2: Cloud Dependency Without Backup
Wi-Fi devices are cheap and easy to install. They're also completely useless when your internet goes down or the manufacturer shuts down their cloud service (happens more often than you'd think). I've consulted on homes where the lighting literally doesn't work during internet outages.
Cost of fixing: $500-1,500 replacing cloud-only devices with local-control alternatives
The reliability testing phase exposes this before you've invested thousands. If your system doesn't work during an internet outage, you've built a single point of failure into your home.
Mistake 3: Over-Automation Too Fast
Complex automations with twelve conditions feel impressive until one sensor battery dies and you can't figure out why your morning routine stopped working. Debugging a simple automation takes 5 minutes. Debugging a complex one with multiple dependencies takes hours.
Cost of fixing: Not money, but dozens of hours troubleshooting and eventual abandonment of automation features
Starting simple and adding complexity gradually means you understand each layer before building on top of it. When something breaks, you know exactly where to look.
Real-World Performance Expectations:
A well-designed system following this setup guide achieves:
- 95-99% reliability for time-based automations
- 90-95% reliability for sensor-triggered automations
- 80-90% reliability for multi-device sequences
- Response latency of 1-3 seconds for Zigbee/Thread, 2-5 seconds for Wi-Fi
Those numbers assume proper mesh network coverage, regular firmware updates, and UPS protection for critical hubs. Skipping any phase of this guide drops reliability by 10-20% across the board.
Types of Setup Approaches
Not everyone needs the full systematic approach above. Here are the three common setup paths and when each makes sense:
Single-Ecosystem Setup
You buy everything from one manufacturer (all Philips Hue, all IKEA Trådfri, all TP-Link Kasa). Setup is trivial because compatibility is guaranteed, but you're completely locked into one vendor's pricing, update schedule, and feature limitations.
Best for: Renters who need easy removal when moving, small apartments (1-2 bedrooms), users who value simplicity over customization
Limitations: Expensive when scaling up, limited device variety, dependent on one company's survival
Setup time: 1-2 days for basic system
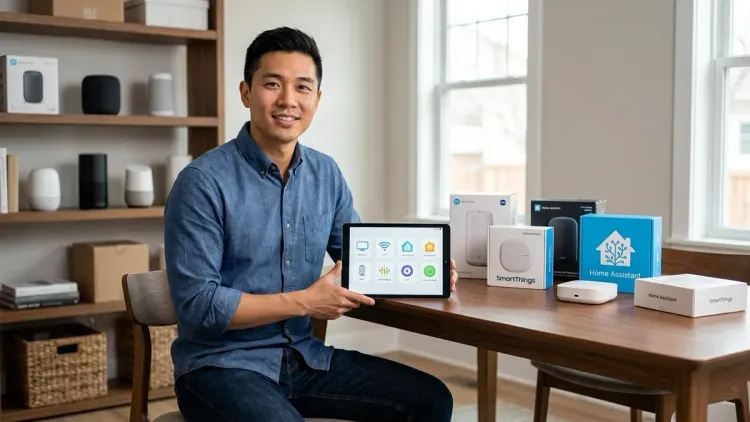
Hub-Centric Setup
You choose a powerful central hub (Samsung SmartThings Station or Home Assistant Green) that supports multiple protocols. This is the approach described in the main guide—maximum flexibility but requires more technical planning.
Best for: Homeowners planning long-term expansion, users who want local control, tech-comfortable individuals willing to learn
Limitations: Steeper learning curve, higher upfront cost, requires ongoing maintenance
Setup time: 2-4 weeks for robust system
For hub selection guidance, see Best Smart Home Hubs for Beginners.
Voice Assistant Setup

You start with an Amazon Echo or Google Nest speaker and add Wi-Fi devices that work with it. Simple and cheap initially, but scales poorly and relies entirely on cloud services.
Best for: Absolute beginners testing smart home concepts, budget-conscious users (<$300 total budget), rooms with excellent Wi-Fi coverage
Limitations: Complete cloud dependency, higher long-term costs (subscription features), poor interoperability
Setup time: Hours to days
I typically recommend voice assistant setups only as stepping stones. Get comfortable with voice control and simple automations, then migrate to a hub-centric approach within 6-12 months.
Hybrid Setup
Most successful installations end up here: a central hub supporting Zigbee/Thread for sensors and lights, supplemented by Wi-Fi cameras and specialty devices. This balances local control for critical functions with cloud features where they add value.
Best for: Most homeowners seeking reliable automation
Limitations: Requires understanding multiple protocols, more complex troubleshooting
Setup time: 3-6 weeks for comprehensive system
Frequently Asked Questions
How long does a complete home automation setup take from start to finish?
A basic 10-15 device system takes 2-4 weeks if you follow this step by step home automation setup guide properly—one week for planning and hub installation, two weeks for gradual device addition and automation testing, and one week for reliability validation. Rushing the process by installing everything in a weekend leads to compatibility issues and automation failures that take months to debug. I've seen homeowners attempt one-day installations that still don't work reliably a year later because they skipped the testing phases. For comprehensive whole-home automation (30+ devices), plan on 6-8 weeks of methodical installation and refinement.
Do I need a separate hub or can I just use my phone and Wi-Fi devices?
You can start with Wi-Fi-only devices controlled through phone apps, but you'll hit limitations quickly—most Wi-Fi smart devices rely on cloud services that fail during internet outages, battery-powered Wi-Fi devices drain in days instead of months, and your network gets congested with 15+ devices competing for bandwidth. A dedicated hub using Zigbee, Z-Wave, or Thread protocols enables local control that works without internet, supports battery-powered sensors that last 1-2 years, and creates a separate mesh network that doesn't burden your Wi-Fi. The What Is a Smart Home Hub and Do You Need One? guide explains the technical differences, but the practical answer is: hubs become essential once you exceed 10-12 devices or need reliability during internet outages.
What happens to my smart home when the internet goes down?
Cloud-dependent Wi-Fi devices stop responding entirely until internet is restored—you can't control them via app or voice, and cloud-based automations fail. Hub-based systems using Zigbee, Z-Wave, or Thread continue running local automations and respond to manual control through the hub's local interface, though voice assistants won't work and you can't control devices remotely from outside your home. Physical switches still work if you've installed smart switches instead of smart bulbs. This is why the reliability testing phase of this setup guide is critical—you discover these limitations before an actual emergency. For maximum resilience, configure multiple control methods for critical devices and ensure your hub and router have UPS battery backup so brief power blips don't collapse your mesh network.
Should I choose Zigbee, Z-Wave, Thread, or stick with Wi-Fi devices?
For 2026, start with Matter-certified Thread devices where available (growing selection but still limited), supplement with Zigbee for sensors and lights (largest device selection, excellent reliability), and use Wi-Fi only for devices that aren't available in other protocols like cameras and complex appliances. Z-Wave offers better range but smaller device selection and costs more—choose it only if you have a large home with thick walls that block Zigbee/Thread signals. Avoid Wi-Fi as your primary protocol because battery-powered Wi-Fi sensors drain too quickly and cloud dependency creates single points of failure. The Smart Home Protocols Explained: Zigbee, Z-Wave, Thread, and Matter article covers technical specifications, but protocol choice comes down to three factors: device availability in your region, whether you need local or cloud control, and battery life requirements for wireless sensors.
How much should I budget for a beginner smart home setup?
A functional starter system with 10-15 devices costs $800-1,200 including hub, breaking down to: $100-200 for a capable hub with multi-protocol support, $200-400 for smart lighting (5-8 bulbs or switches), $150-250 for sensors (motion, contact, temperature), $150-200 for smart plugs and switches, and $200-300 for one specialty device like a smart lock or thermostat. Add another $100-150 for a UPS to protect your hub and router. This assumes mid-range quality devices—you can cut costs by 30-40% with budget brands but expect shorter lifespans and less reliable connectivity, or double the budget for premium devices with better build quality and faster support. Don't buy everything at once; start with $300-400 for hub and basic lighting, test for a month, then expand. For specific recommendations at different price points, see Best Starter Smart Home Kits for Complete Automation.
Summary
This step by step home automation setup guide gives you a proven installation sequence that prevents the compatibility nightmares and reliability issues I see in rushed installations. Start with infrastructure assessment to understand your home's technical foundation, choose your protocol and ecosystem deliberately to avoid vendor lock-in, install your hub with proper network configuration and power protection, add devices gradually while testing each before moving forward, create simple automations first and add complexity slowly, and validate reliability through failure mode testing before declaring your system complete.
The entire process takes 2-4 weeks for a basic system, but that methodical approach means you'll have automation that actually works reliably instead of devices you fight with daily. I've seen too many homeowners spend thousands on impressive-sounding devices that end up in a drawer because they skipped the planning phases.
Your smart home should make life easier, not create a new hobby of troubleshooting failed automations. Follow this guide's sequential approach, test thoroughly at each phase, and you'll build a system that expands smoothly as your needs evolve.