The most successful smart home installations are the ones you never see. Learning how to install hidden smart plugs transforms everyday furniture and appliances into responsive elements of your space without introducing visual clutter or disrupting the calm you've carefully curated. When executed thoughtfully, hidden smart plugs create automation that feels intuitive—lamps that anticipate your arrival, seasonal decorations that illuminate at dusk, media consoles that power down completely when not in use—all without a single visible device interrupting sightlines or collecting dust on baseboards.
This guide walks through the strategic placement, protocol considerations, and installation techniques for concealing smart plugs behind furniture, inside cabinets, and within appliances. Expect to spend 1-3 hours depending on how many installations you're completing. Skill level: beginner to intermediate—no electrical wiring required, though you'll need patience for cable management and spatial planning. By the end, your automation will exist only as experience: rooms that feel responsive, not gadget-filled.
What You'll Need
Before you begin installing hidden smart plugs, gather these tools and materials:
Smart Plugs (protocol-specific)
- Matter 1.4 or Thread smart plugs for cross-platform compatibility (works with Apple Home, Google Home, Amazon Alexa simultaneously; requires a Matter border router such as Apple HomePod mini, Google Nest Hub 2nd gen, or Amazon Echo 4th gen)
- Zigbee smart plugs if you're running a Zigbee hub (Philips Hue Bridge, Samsung SmartThings, Hubitat); typical mesh range 30-50 feet between devices
- Z-Wave smart plugs if your hub is Z-Wave-based (Home Assistant with Z-Wave dongle, SmartThings); mesh range 50-100 feet but requires dedicated Z-Wave controller
- Wi-Fi smart plugs for standalone operation without a hub (TP-Link Kasa, Wemo); note: Wi-Fi congestion can introduce latency of 2-5 seconds vs. <1 second for mesh protocols
Tools and Materials
- Tape measure and painter's tape (for marking clearances)
- Outlet tester (confirm polarity and grounding before installing plugs)
- Cable ties, clips, or adhesive cord organizers
- Furniture sliders or felt pads (for moving heavy pieces temporarily)
- Smartphone or tablet with the appropriate app installed (Apple Home, Google Home, Alexa, or third-party hub interface)
- Notebook for documenting device names, locations, and automation logic
Space Requirements
- Minimum 2-3 inches of clearance behind furniture for airflow around the smart plug
- Access to wall outlets that won't be permanently obstructed
- Consider furniture with rear access panels, hollow bases, or lift-off backs
If you're building a broader concealed automation system, review the Hidden Smart Home Installation Checklist to ensure your hub and protocol choices align across all devices.
Step 1: Map Your Furniture Layout and Identify Automation Candidates
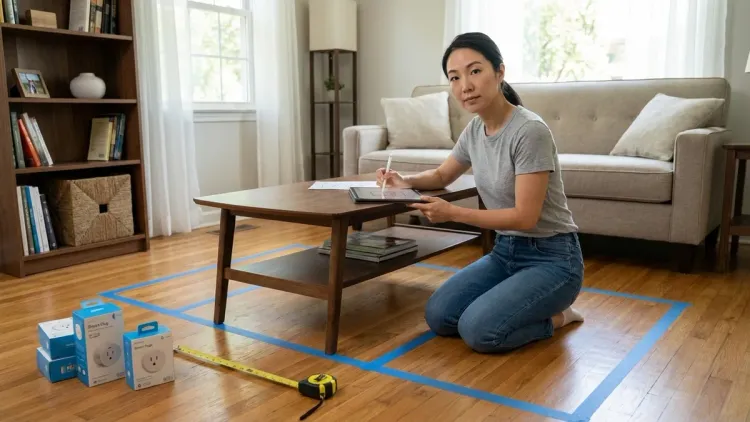
Walk through each room and identify which furniture pieces and appliances would benefit from automated power control—not based on what can be automated, but what should be. The goal is to enhance daily rhythms, not add complexity.
Strong candidates include floor lamps or accent lighting behind sofas and beds (automate based on time of day or occupancy), media consoles where standby power drain is significant (automate complete shutoff when no motion detected for 2+ hours), seasonal or decorative lighting (automate based on sunset/sunrise), small kitchen appliances like coffee makers (automate brew time without manual timers), and space heaters or fans (automate based on temperature thresholds or occupancy).
Measure the distance from the wall outlet to the furniture's final position. Smart plug protocols have different mesh network behaviors: Zigbee and Thread devices act as repeaters once plugged in, extending your network (useful if the installation location is at the edge of your home's coverage), while Z-Wave plugs with beaming capability strengthen the mesh for battery-powered devices like door locks. Wi-Fi plugs don't extend any mesh—they're endpoints that rely on your existing Wi-Fi router coverage.
Document each location with a simple diagram noting furniture name, outlet location, and the automation you're planning. This becomes critical when you're configuring rules later and can't easily see which plug controls which device. I've watched too many clients struggle to remember which of five identical "Smart Plug 3" entries powers the reading lamp versus the holiday garland.
If you're planning covert smart home sensors alongside your hidden plugs, map those locations simultaneously—motion sensors hidden in plants or shelves can trigger the plugs you're installing today.
Step 2: Choose the Right Smart Plug for Each Location
Not all smart plugs are suitable for concealed installation. Physical dimensions, heat dissipation, and protocol reliability dictate which models work behind furniture and which create fire hazards or connectivity issues.
Select compact, low-profile designs that don't protrude more than 2 inches from the wall outlet. Bulky plugs with external antennas or oversized housings create clearance issues and prevent furniture from sitting flush. The Aqara Smart Plug Matter (Matter/Thread protocol) measures just 1.9 inches in depth and generates minimal heat even under continuous load—ideal for tight spaces behind headboards or entertainment centers. For Zigbee networks, the Sengled Smart Plug is similarly compact and doubles as a Zigbee repeater.
Prioritize plugs with energy monitoring if you're automating appliances with variable loads. Real-time wattage reporting lets you create automation logic like:
IF coffee_maker_plug.power > 5W for 60 seconds
  THEN set coffee_maker_plug.state = ON
ELSE IF coffee_maker_plug.power < 2W for 10 minutes
  THEN set coffee_maker_plug.state = OFF
This "vampire load" detection confirms the appliance has actually completed its cycle (kettle boiled, hair straightener heated) rather than relying on fixed timers. For deeper energy optimization strategies, see Smart Home Energy Management.
Avoid Wi-Fi plugs for locations with weak signal. Behind metal media consoles, inside cabinets with metal framing, or near large appliances like refrigerators, Wi-Fi interference causes dropouts and 5-10 second latency on commands. Zigbee, Z-Wave, and Thread use different radio frequencies (2.4 GHz for Zigbee/Thread, 900 MHz for Z-Wave in North America) and mesh topologies that route around obstacles. For challenging locations, I've found Thread plugs particularly resilient—the protocol's self-healing mesh reconfigures routes within seconds if a node drops.
Compare protocol tradeoffs in Matter 1.4 vs Thread and consult Smart Home Protocol Compatibility Explained if you're mixing ecosystems.
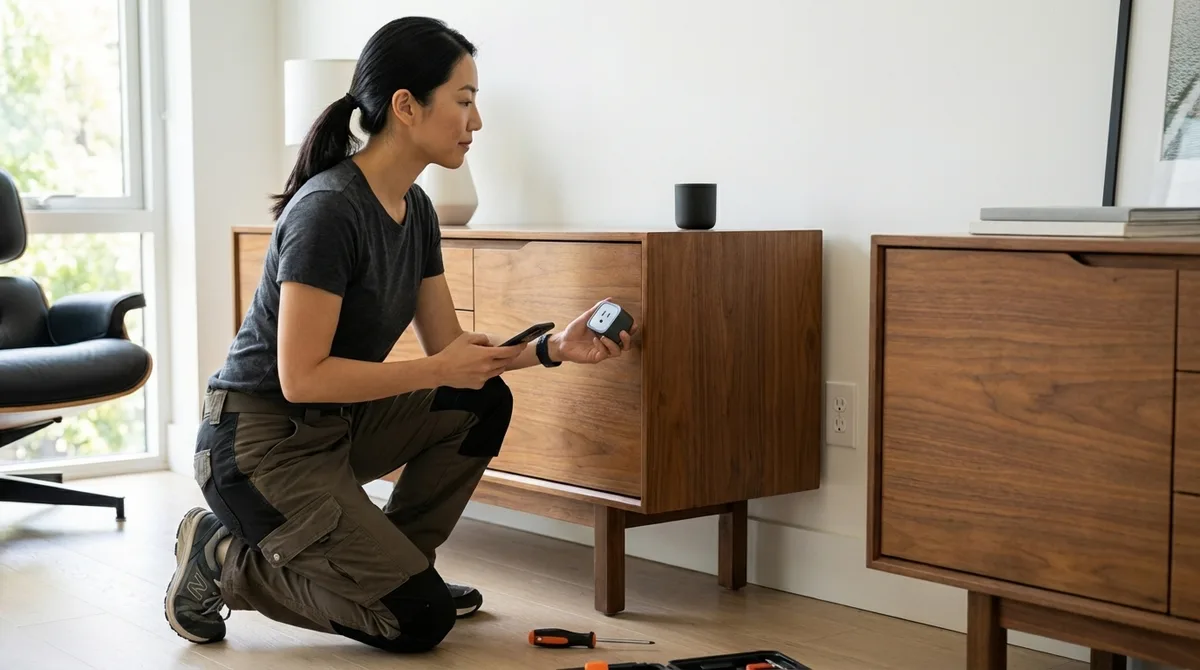
Step 3: Test the Outlet and Pair the Smart Plug Before Installation

Never install a smart plug behind immovable furniture without testing first. Plug the smart plug into the target outlet while still accessible, then confirm three things: proper electrical connection, successful pairing with your hub or controller, and responsive automation execution.
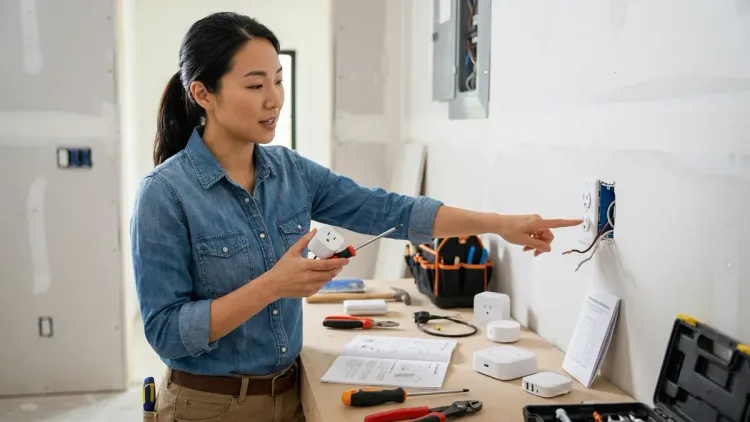
Use an outlet tester to verify correct wiring—reversed polarity or missing ground can cause erratic smart plug behavior or create shock hazards when troubleshooting later. I once spent an hour diagnosing "intermittent disconnections" on a living room plug only to discover the outlet itself had a loose neutral wire.
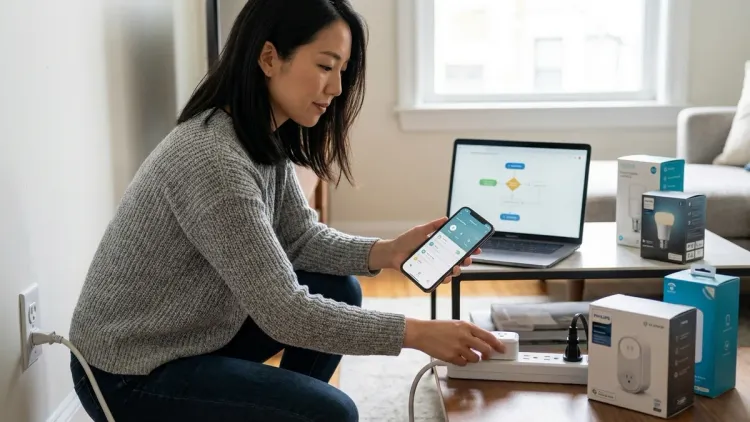
Pair the device according to protocol requirements:
- Matter/Thread: Open your preferred controller app (Apple Home, Google Home, or Alexa), scan the Matter QR code on the plug or packaging, wait 15-45 seconds for commissioning (device appears as "Smart Plug" or similar). Thread devices automatically join the mesh if you have an active border router; latency averages 200-500 milliseconds for command execution.
- Zigbee: Put your hub in pairing mode (usually via app), power on the smart plug, press and hold the pairing button for 3-5 seconds until LED blinks rapidly, wait 10-30 seconds for discovery. Zigbee latency is typically 300-800 milliseconds but varies with mesh density.
- Z-Wave: Enter inclusion mode on your Z-Wave controller, press the pairing button once (procedures vary by manufacturer), wait for the hub to assign a Node ID. Z-Wave latency ranges 500-1500 milliseconds depending on hop count through the mesh.
- Wi-Fi: Download the manufacturer's app, create an account if required, follow in-app pairing (usually involves connecting phone to the plug's temporary Wi-Fi access point, then providing your home network credentials). Expect 1-3 second latency plus vulnerability to network congestion.
Plug a lamp or small appliance into the smart plug and trigger an on/off command from your app or voice assistant. Confirm immediate response with no delays beyond the protocol's typical latency. If commands take more than 2-3 seconds, troubleshoot network issues now—once the plug is hidden behind a credenza, you won't want to move furniture repeatedly to debug connectivity.
Rename the device immediately using a location-based convention: "Living Room Floor Lamp," "Bedroom Right Nightstand," "Office Desk Light." Generic names like "Plug 7" are useless in six months when you've forgotten which outlet it occupies.
For devices joining Matter networks, verify cross-platform control works from all ecosystems you plan to use. Matter's promise is universal compatibility, but Matter 1.4 Compatibility Checklist reveals practical limitations—some advanced features like energy monitoring may only surface in one controller app.
Step 4: Position Furniture and Route Cables for Concealment

With the smart plug tested and paired, move furniture into final position while maintaining access to the outlet. Use furniture sliders under legs to prevent floor damage and make repositioning easier if you need to adjust clearance.
Before plugging the smart appliance or lamp into the smart plug, verify adequate airflow around the plug itself. Smart plugs generate modest heat under load—typically 3-6 watts of heat dissipation when passing 10-15 amps. Sandwiching a plug directly against the back panel of a sealed cabinet concentrates heat and can trigger the plug's internal thermal protection (causing random shutoffs) or, in extreme cases, create fire risk.
Leave a minimum 2-inch air gap behind the plug or ensure the furniture has ventilation holes, open backs, or slatted construction. I've designed media consoles with hidden 3-inch diameter holes drilled near outlet locations specifically for smart plug ventilation—the holes sit below sightlines but allow air circulation.
Route appliance cords to prevent pinching or strain. The cord running from your lamp or appliance to the smart plug should have a gentle curve, not a sharp 90-degree bend. Use adhesive cable clips on the furniture's back panel or underside to guide cords horizontally before they descend to the plug. This prevents cords from being crushed when furniture is pushed flush to the wall.
For media consoles and entertainment centers, run all device cords (TV, soundbar, streaming boxes) through the smart plug positioned centrally behind the furniture. This creates a single-point power cutoff for true standby elimination:
IF living_room_motion_sensor.state == no_motion for 120 minutes
  AND living_room_TV_plug.power < 10W
THEN set living_room_TV_plug.state = OFF
This automation logic waits until the TV is already off (indicated by sub-10W draw) and no one has been in the room for two hours, then cuts power entirely to eliminate the 5-15W standby drain common to modern TVs and sound systems.
Explore more cable management and signal preservation techniques in How to Hide Smart Home Devices Without Blocking Wireless Signals.
Step 5: Configure Automations with Explicit Logic and Fallback Behaviors

Hidden smart plugs are only as intelligent as the automation logic governing them. Effective automations feel predictive, not robotic—they anticipate needs based on patterns rather than rigidly executing schedules that quickly feel constraining.
Start with time-based automations for predictable daily rhythms:
IF time == 07:00 on weekdays
THEN set bedroom_nightstand_plug.state = ON (duration: 45 minutes)

IF time == 22:30
THEN set living_room_floor_lamp_plug.state = OFF
These basic schedules work well for morning routines and bedtime wind-down, but they lack adaptability. Enhance them with occupancy and environmental triggers:
IF time > sunset
  AND living_room_motion_sensor.state == motion
  AND living_room_floor_lamp_plug.state == OFF
THEN set living_room_floor_lamp_plug.state = ON

IF time > 23:00
  AND living_room_motion_sensor.state == no_motion for 30 minutes
THEN set living_room_floor_lamp_plug.state = OFF
This logic turns the lamp on only when someone enters after dark, not at an arbitrary time—accommodating late arrivals or early sunsets in winter. The delayed shutoff prevents the lamp from cutting out during brief bathroom trips but still eliminates waste if everyone has gone to bed.
For hidden plugs controlling seasonal or decorative lighting, adjust brightness or timing based on ambient light sensors (if available in your ecosystem) or simply sunrise/sunset times pulled from your controller's location data. This prevents holiday lights from glowing uselessly in daylight or staying dark on overcast afternoons when their ambiance is most welcome.
Define fallback behaviors explicitly. Smart home networks experience temporary outages—Wi-Fi drops, hub restarts, firmware updates, power failures. Configure each plug's behavior when it loses connection:
- Default to ON for essential lighting (e.g., porch lights, bathroom nightlights) so you're never left completely in the dark
- Default to OFF for energy-hungry appliances (heaters, fans, entertainment systems) to prevent waste during outages
- Restore last state for lamps and decorative lighting that should match how you left them
Most Matter and Zigbee plugs allow this configuration in advanced settings, often labeled "power-on behavior" or "default state." Wi-Fi plugs frequently lack this granularity and may reset to a manufacturer-defined state (usually OFF).
Latency expectations vary: Thread/Matter and Zigbee automations typically execute in under 1 second, creating a near-instantaneous response when motion is detected or a button is pressed. Z-Wave automations average 1-2 seconds depending on mesh hops. Wi-Fi automations can lag 2-5 seconds during network congestion or if the plug must communicate with a cloud service before responding (many Wi-Fi plugs require cloud roundtrips even when controlled via LAN).
If you're building complex multi-device routines, How to Create Energy-Saving Automations with Home Assistant and Matter Devices offers advanced conditional logic examples, and Smart Device Fallback Behavior Checklist walks through comprehensive failure planning.
Step 6: Label Plugs Physically and Digitally for Long-Term Manageability
Once your hidden smart plugs are installed and automations are running smoothly, the final critical step is creating a retrieval system for when you inevitably need to modify settings, troubleshoot connectivity, or move furniture months or years later.
Physically label the smart plug and the furniture piece. Use a small adhesive label or permanent marker on the plug body noting the device name exactly as it appears in your app ("LR Floor Lamp"). If the plug is inside a cabinet or behind a sofa, add a discreet label to the furniture's underside or interior panel: "Smart plug inside for floor lamp – see Home app: LR Floor Lamp."
This redundancy saves you from having to move every piece of furniture in a room to find "which plug controls the thing that stopped working." I once redesigned a client's living room and discovered four forgotten smart plugs behind different pieces—none labeled, all showing as "offline" in an abandoned app, all still drawing standby power.
Maintain a digital log with installation details: Create a simple spreadsheet or note with columns for room, furniture piece, outlet location (e.g., "left outlet on north wall"), device name in controller app, protocol/hub, and the primary automation logic. Include the installation date and any quirks you noticed during setup ("slightly warm under full load" or "needs manual power cycle every 3-4 months").
This documentation becomes invaluable when you're upgrading your hub, migrating to Matter 1.4, or troubleshooting why a room's lighting doesn't respond as expected. You'll know immediately that the bedroom plug is Zigbee and dependent on the mesh path through the hallway plug, or that the media console plug is Wi-Fi and affected by router placement.
For households with multiple residents, share access credentials and device names so anyone can control or troubleshoot the automation. Voice assistants help here—"Hey Google, turn off the bedroom lamp" works only if the device name is intuitive and consistently used by everyone.
If you're managing a property with comprehensive hidden automation, consider the broader inventory approach described in Discreet Smart Home Automation Checklist.
Step 7: Monitor Performance and Adjust Placement if Necessary

Hidden smart plugs should operate invisibly and reliably. Monitor for three failure modes in the first two weeks: connectivity dropouts (plug shows offline intermittently), overheating (plug is hot to touch or shuts down unexpectedly), and automation failures (commands work manually but automations don't trigger).
Connectivity dropouts usually indicate mesh network gaps or interference. For Zigbee and Thread, add a second plug or repeater device midway between the problematic plug and your hub—these protocols self-heal but need sufficient node density (one device every 30-40 feet in open space, closer in homes with thick walls or metal studs). For Z-Wave, check that beaming is enabled on nearby plugs if you're trying to reach battery-powered devices. For Wi-Fi, move your router closer or add a mesh extender node, though proximity to the plug doesn't always solve congestion issues.
Overheating signals insufficient airflow. Pull the furniture away from the wall by 1-2 inches to increase ventilation, drill discreet holes in the furniture's back panel near the plug location, or relocate the plug to an adjacent outlet with better clearance. Don't ignore heat—smart plugs have thermal cutoffs rated around 50-60°C, and repeated thermal cycling degrades their internal relays faster.
Automation failures despite manual control working suggest logic errors or sensor placement issues. Verify your if/then conditions are achievable (e.g., a motion sensor may not detect presence if it's too high or too low), check that all devices in the automation are on the same controller (Matter/Thread can share across ecosystems, but Zigbee automations require all participants to be on the same Zigbee hub), and confirm latency isn't causing race conditions (if a motion sensor triggers a plug but the plug takes 3 seconds to respond, rapid motion events may cancel each other).
Log any adjustments you make in your documentation. Over time, you'll recognize patterns—certain furniture configurations create interference, specific plug models are more heat-sensitive, particular automation logic works more reliably than others. This institutional knowledge makes future installations faster and more successful.
For mesh network reliability across protocols, see Device Mesh Network Reliability Explained.
Step 8: Scale Your Hidden Automation Thoughtfully
Once you've successfully installed and tested hidden smart plugs in a few key locations, resist the urge to automate everything. Invisible intelligence works best when it enhances what you already value—morning rituals, evening ambiance, energy savings—not when it adds complexity for its own sake.
Expand strategically by identifying automation gaps rather than device opportunities. If you consistently forget to turn off the basement dehumidifier, that's a candidate for a hidden smart plug triggered by humidity readings. If seasonal decorations sit unplugged because the outlet is inconvenient, hide a plug and automate based on sunset. If guests struggle with unfamiliar light switches, hide plugs controlling lamps and trigger them via motion when the front door opens.
Interoperability limitations become more apparent as your system scales. If you've built around a Zigbee hub like Philips Hue Bridge or SmartThings, you're constrained to Zigbee accessories unless you add a separate hub for Z-Wave or Wi-Fi devices. Matter 1.4 promises to unify this, but in practice, advanced features—energy monitoring, detailed scheduling, custom scenes—may only surface in the device manufacturer's native app, not in your preferred controller interface.
I've seen clients start with Apple Home controlling Matter devices, then gradually drift back to manufacturer apps (Aqara Home, TP-Link Kasa) because HomeKit exposes only basic on/off controls, not the granular power reporting or firmware update management available natively. This isn't a failure of Matter—it's a reminder that protocol compatibility doesn't guarantee feature parity.
Budget your expansion around hubs and protocols that align with your primary controller. If you're an Apple household, prioritize Matter/Thread devices; if you've invested in Home Assistant, Zigbee and Z-Wave offer richer local automation logic without cloud dependencies. For subscription-free systems, focus on devices that operate entirely on your local network—see Best Home Security Systems With No Monthly Fee for broader ecosystem planning.
Track energy savings as you scale. Many hubs and energy-focused smart plugs (Best Smart Plugs for Energy Monitoring) aggregate consumption data, letting you quantify the impact of standby elimination and optimized schedules. I've documented installations that recoup the cost of smart plugs within 18-24 months purely through reduced vampire loads on entertainment systems and seasonal lighting.
Pro Tips & Common Mistakes
Choose plugs rated for the appliance's load. Most smart plugs max out at 15 amps (1800W at 120V). Heaters, hair dryers, and some kitchen appliances exceed this—using an undersized plug causes overheating and trips internal breakers. Check the appliance nameplate wattage before selecting a plug.
Don't assume all outlets behind furniture are grounded. Older homes frequently have two-prong outlets or improperly wired three-prong ones. Smart plugs with energy monitoring or surge protection need proper grounding to function correctly. Test first, upgrade the outlet if necessary—it's a 15-minute job for most electricians.
Avoid pairing plugs while furniture is in final position. Troubleshooting pairing failures when you can't see the plug's status LED is frustrating. Always pair in an accessible location, confirm functionality, then move furniture and finalize installation.
Don't over-rely on Wi-Fi plugs in crowded network environments. If you're running 20+ devices on a single router with no QoS (quality of service) prioritization, Wi-Fi smart plugs will be the first casualties of congestion. Mesh protocols (Zigbee, Thread, Z-Wave) operate on separate channels and handle high device counts more gracefully.
Create naming conventions before you have 30 devices. "Smart Plug 18" tells you nothing. "BR East Nightstand" or "Kitchen Coffee Maker" tells you everything. Rename devices the moment they're paired—future you will be grateful.
Test automations under actual conditions, not just manually. An automation that works when you trigger it from your phone at 3 PM may fail at 7 AM when your hub is processing six other routines simultaneously, or at 11 PM when your router is throttling bandwidth. Run real-world scenarios for a full week before declaring success.
The most common mistake: installing plugs you can't physically reach for resets. Every smart plug occasionally needs a power cycle to clear a firmware glitch or rejoin a mesh. If you've buried it behind a 400-pound media console screwed into the wall, you've created a permanent headache. Always maintain some access—even if it requires reaching behind with a long tool or temporarily pulling furniture away from the wall a few inches.
Frequently Asked Questions
Can hidden smart plugs overheat if furniture blocks airflow?
Yes, inadequate ventilation can cause smart plugs to overheat, triggering thermal shutdowns or accelerating component degradation. Leave at least 2-3 inches of clearance behind the plug, ensure furniture has ventilation holes or an open back, and avoid stacking additional items directly around the plug. Most quality smart plugs are rated to dissipate 3-6W of heat safely, but trapped air concentrates that heat and can raise surface temperatures above safe thresholds. If a plug feels hot to the touch after 30 minutes of use, improve airflow or relocate it to a better-ventilated outlet.
Which smart home protocol is most reliable for hidden smart plugs?
Thread and Zigbee are the most reliable for hidden installations because they form self-healing mesh networks—each powered device acts as a repeater, extending range and routing around obstacles or interference. Thread plugs offer sub-second latency (200-500ms) and automatically reconfigure routes if a node drops, while Zigbee plugs provide similar performance (300-800ms) with wider manufacturer support. Z-Wave works well for larger homes due to its longer range (50-100 feet vs. 30-50 for Zigbee/Thread) but requires a dedicated controller. Wi-Fi plugs are least reliable in concealed locations where signal strength weakens or congestion is high, often experiencing 2-5 second delays or intermittent dropouts.
Do Matter smart plugs work without an internet connection?
Matter smart plugs require an internet connection for initial commissioning and cloud-based voice control through Alexa, Google, or Siri. However, once commissioned, local control within your home network via Thread or Matter-over-Wi-Fi continues to function even during internet outages, provided your local border router (Apple HomePod, Google Nest Hub, Echo 4th gen) remains powered. Automations executed by the border router or a local controller like Home Assistant also persist offline. Cloud-dependent features—remote control from outside your home, firmware updates, voice assistants querying external data—stop working until the internet returns, but basic on/off control and locally-stored automations remain active.
Can I use smart plugs to completely eliminate standby power drain?
Yes, smart plugs completely cut power to devices when switched off, eliminating standby drain. Modern TVs, soundbars, game consoles, and cable boxes can draw 5-20W continuously even when "off," which adds up to 45-175 kWh per year per device (approximately $5-20 annually depending on electricity rates). By automating shutoff when devices aren't in use—such as cutting TV power after 2 hours of inactivity—you prevent this vampire load. Be aware that some devices lose settings or require longer boot times after full power loss. Experiment with your specific appliances: if a device needs 30 seconds to reconnect after power cycling, that delay may be worth the energy savings, or it may frustrate daily use.
Summary
Learning how to install hidden smart plugs transforms everyday furniture into seamless automation points without introducing visible clutter. By selecting protocol-appropriate devices (Thread/Matter, Zigbee, Z-Wave, or Wi-Fi based on your ecosystem), testing connectivity before concealment, routing cables thoughtfully, and configuring automation logic with explicit if/then conditions and fallback behaviors, you create responsive environments that feel intuitive rather than gadget-laden.
Maintain adequate ventilation around hidden plugs, label both physically and digitally, and monitor performance in the weeks following installation. Scale strategically by addressing real automation gaps—not by adding devices for their own sake. Interoperability remains imperfect even in the Matter era, so choose a primary controller and build around its strengths.
The most successful hidden installations are the ones you forget are there—until your morning lamp greets you at precisely the right moment, or your holiday lights dim at dusk without a single switch touched.