Selecting a security system that doesn't demand monthly subscriptions requires understanding not just the cameras and sensors themselves, but the invisible architecture that connects them—the protocols, hubs, and automation logic that determine whether your setup flows seamlessly into daily life or announces itself with lag, false alerts, and visual clutter. In this guide, you'll learn how to choose security systems with no monthly fee by evaluating protocol compatibility, hub requirements, local storage constraints, and the automation behaviors that make security feel effortless rather than intrusive. This is an intermediate-level project requiring approximately four to six hours across research, purchasing decisions, and initial system planning—though installation timing varies with your chosen devices.
The decision shapes not only what you spend upfront, but how the system integrates into the rhythm of a home: whether sensors remain discreetly embedded in doorframes, whether cameras blend into trim molding, and whether alerts arrive with the precision that distinguishes genuine threats from shadows shifting across walls.

What You'll Need
- Existing Wi-Fi network with stable 2.4 GHz coverage (5 GHz for certain Wi-Fi cameras, but 2.4 GHz reaches farther through walls)
- Smart home hub or controller (if choosing Zigbee, Z-Wave, or Thread devices): options include Home Assistant running on a Raspberry Pi, Samsung SmartThings Hub, Hubitat Elevation, or a Matter-enabled border router like Apple HomePod (2nd gen) or Google Nest Hub (2nd gen)
- Local storage solution: microSD cards (32–256 GB per camera, depending on retention needs), network-attached storage (NAS) device, or USB drive connected to a hub
- Smartphone or tablet for initial setup and ongoing alert management (iOS 17+ or Android 13+ recommended for Matter 1.4 compatibility)
- Basic understanding of if/then automation logic (e.g., if motion detected AND time is after sunset, then turn on entryway lights + record video)
- Voltage tester (for hardwired devices like doorbells)
- Ethernet cables and PoE injector (optional, for wired camera installations that avoid Wi-Fi congestion)
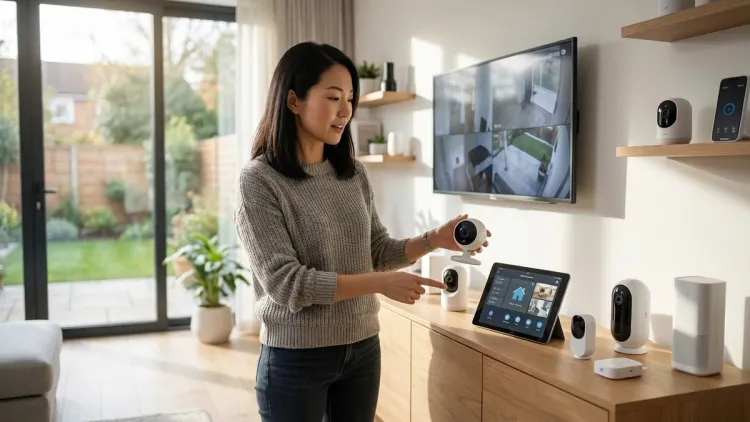
Step 1: Identify Your Protocol Foundation and Ecosystem Constraints
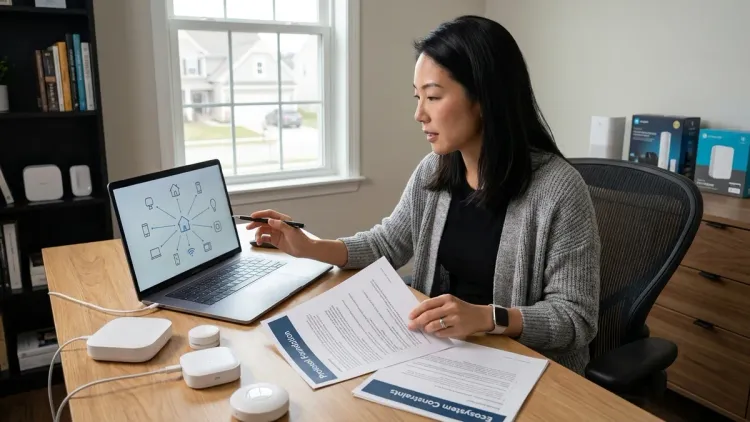
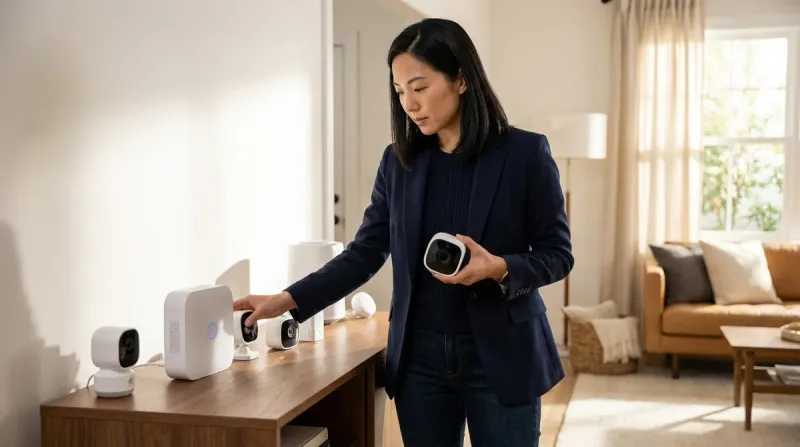
Before evaluating individual devices, establish which protocol ecosystem aligns with your home's existing infrastructure—or which you're willing to build from scratch. Wi-Fi-based systems (like Wyze, Reolink, or TP-Link Tapo cameras) operate independently without hubs, connecting directly to your router. They're visually simple to deploy, often wall-mounted or placed on shelves, but they saturate bandwidth, introduce latency during peak network use (typically 800ms–2s for live feeds), and lack mesh redundancy. If your router fails or Wi-Fi drops, the entire security layer goes silent.
Zigbee and Z-Wave create self-healing mesh networks where each powered device extends range, ideal for door/window sensors and motion detectors scattered across multiple floors. Zigbee operates on 2.4 GHz (crowded spectrum, prone to interference from microwave ovens and Bluetooth), while Z-Wave uses sub-1 GHz frequencies (less congestion, slightly better wall penetration). Both require a compatible hub: Hubitat Elevation supports both protocols natively, SmartThings Hub (2018 or later) includes Zigbee and older Z-Wave versions, and Home Assistant requires USB dongles like the SONOFF Zigbee 3.0 Dongle Plus or Aeotec Z-Wave stick. Latency for Zigbee/Z-Wave sensor triggers averages 100–300ms locally—perceptibly faster than cloud-dependent Wi-Fi devices.
Thread and Matter 1.4 represent the newer interoperability layer, designed to let devices from different manufacturers communicate without proprietary bridges. Thread (the low-power mesh networking protocol) requires a border router—Apple HomePod (2nd gen), Google Nest Hub (2nd gen), or dedicated Thread border routers from manufacturers like Nanoleaf. Matter sits atop Thread, Ethernet, or Wi-Fi, acting as the universal translation layer. As of 2026, Matter 1.4 includes camera support, but adoption remains patchy: Arlo, Ring, and Eve have announced compatible models, yet many lack local recording without subscriptions.
When learning how to choose security systems with no monthly fee, recognize that protocol choice dictates hub requirements, device availability, and automation complexity. Wi-Fi simplifies initial setup but fragments control across multiple manufacturer apps. Zigbee/Z-Wave demand upfront hub investment (around $100–$200) yet consolidate automation logic and reduce monthly dependencies. Matter promises unification but remains immature for subscription-free recording in 2026—compatibility requires careful vetting.
A home I worked on in Portland exemplifies this: the clients wanted invisible security without visible cameras in living spaces. We embedded Zigbee contact sensors into custom window frames, tucked a Hubitat hub behind a bookshelf, and placed a single discreet Reolink RLC-810A PoE camera in the eave soffit overlooking the entry—recording to a small Synology NAS hidden in a hallway closet. The Zigbee mesh meant sensors responded within milliseconds, triggering hallway accent lighting as the front door opened, while the camera fed local recordings without cloud fees. The system felt ambient, not bolted-on.
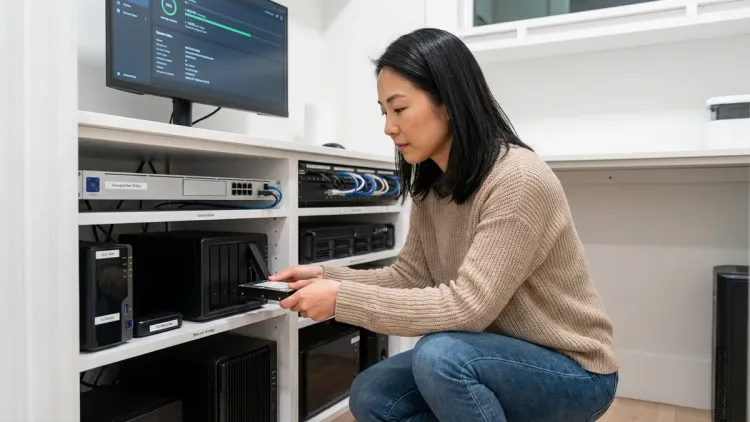
Step 2: Evaluate Camera Recording and Storage Architecture
Subscription-free security hinges on local storage, yet the implementation varies wildly. Some Wi-Fi cameras include microSD card slots (typically supporting 32–512 GB cards), writing motion-triggered clips or continuous loops directly to the card. This approach keeps data on-premises and avoids recurring fees, but creates single points of failure: if someone steals the camera, they take the evidence. Cards also degrade with constant overwriting—expect replacement every 12–18 months with high-traffic recording.
Network-attached storage (NAS) devices like Synology DS224+ or QNAP TS-264 offer centralized recording for multiple cameras via RTSP (Real-Time Streaming Protocol) or ONVIF (Open Network Video Interface Forum) streams. Cameras push footage to the NAS over your local network, which stores days or weeks of rolling recordings depending on drive capacity. Synology Surveillance Station supports around 15 camera licenses without additional fees (varies by model), though adding more requires one-time license purchases (around $50–$60 per additional camera pack). The NAS remains hidden—closet, basement utility room, or even tucked behind a false panel in cabinetry—and operates silently. Latency for playback queries averages 1–3 seconds depending on network traffic, which feels imperceptible during after-the-fact review.
Hub-integrated storage appears in systems like Hubitat (via USB drive attachments) or Home Assistant with Frigate NVR add-on. Frigate runs on a Raspberry Pi 4 or dedicated mini PC, using hardware acceleration (Coral Edge TPU or Intel iGPU) to analyze camera feeds locally for person/vehicle/animal detection without cloud AI subscriptions. Automation logic becomes granular:
IF camera_front_door.person_detected == TRUE
AND sun.elevation < -6 (civil twilight)
AND alarm_mode == "armed_away"
THEN
  light.entryway.turn_on(brightness=100%)
  notify.mobile_app("Person detected at front door")
  camera_front_door.record_clip(duration=30s, save_to=/storage/alerts/)
END
This local processing introduces around 500ms–1.5s latency for object recognition (depending on hardware), but eliminates cloud dependencies entirely. The system responds to presence, not just motion—reducing false alerts from wind-blown branches or passing headlights.
Understanding how to choose security systems with no monthly fee means weighing storage architecture against aesthetic and technical constraints. MicroSD cards suit single-camera deployments where theft risk is low (backyard monitors, garage interiors). NAS systems scale elegantly for multi-camera estates but require Ethernet runs or robust Wi-Fi backhaul. Hub-integrated solutions like Frigate offer the deepest automation but demand technical literacy—flashing operating systems, configuring YAML files, troubleshooting Docker containers. I guide clients toward NAS setups when they value "set and forget" reliability, reserving Frigate for those who enjoy tinkering and iterating.
For comprehensive context on recording strategies, see our local storage vs cloud storage breakdown.
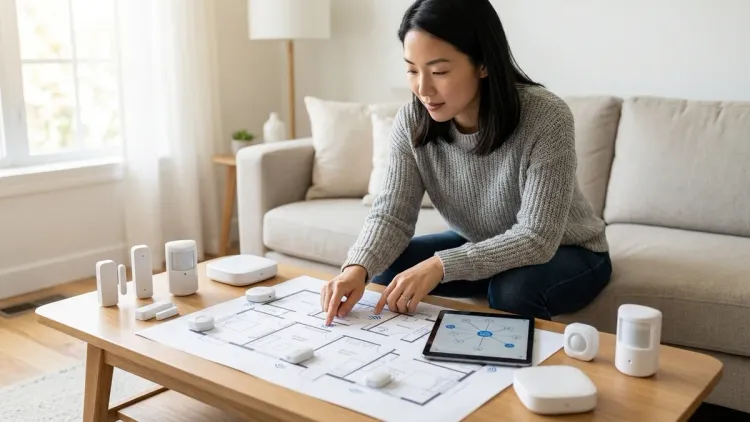
Step 3: Map Sensor Coverage and Protocol Mesh Topology
Security extends beyond cameras—contact sensors (door/window), motion detectors, and glass-break sensors form the perimeter awareness that alerts you to intrusions before visual confirmation. Choosing between Wi-Fi, Zigbee, Z-Wave, or Thread for these sensors determines battery life, response latency, and mesh resilience.
Wi-Fi sensors (rare for contact/motion due to power draw) typically plug into AC outlets or use large battery packs, checking in with cloud servers every few seconds. They introduce 1–3 second notification delays and drain batteries within months. Avoid Wi-Fi for battery-powered perimeter sensors unless no alternative exists.
Zigbee sensors like Aqara door/window contacts or Third Reality motion detectors operate on CR2032 or AA batteries lasting 1–2 years, thanks to low-power mesh networking. Each mains-powered Zigbee device (smart plugs, light bulbs) acts as a mesh repeater, extending range. However, not all Zigbee devices repeat signals equally—some manufacturers (Philips Hue, IKEA Trådfri) create isolated mesh networks that don't relay messages for third-party sensors. When mapping coverage, ensure repeaters use Zigbee 3.0 standard and explicitly support routing. Response latency for Zigbee contact sensors averages 150–400ms locally, imperceptible in real-world use.
Z-Wave sensors (Ecolink, Aeotec) offer slightly better range (up to 100 meters line-of-sight vs. Zigbee's 75 meters) and operate on less-congested frequencies, reducing interference. Z-Wave mesh topology requires powered "beaming" devices to relay battery sensor signals—not all Z-Wave plugs or switches support this, so verify beaming capability before purchasing repeaters. Latency mirrors Zigbee (100–300ms), and battery life similarly extends 1–2 years.
Thread sensors represent the newest option, with ultra-low power consumption and IP-based addressing that simplifies network integration. Eve Door & Window (Thread edition) and Nanoleaf Sense+ controls embed contact sensing, operating for years on coin cells while meshing through Thread border routers. As of 2026, Thread sensor selection remains limited compared to mature Zigbee/Z-Wave catalogs, but reliability proves excellent where available—packet loss under 0.1% in properly configured meshes.
When planning sensor placement for how to choose security systems with no monthly fee, sketch your floor plan and mark entry points (doors, ground-floor windows, basement egresses). Note wall materials: concrete/brick/metal studs attenuate signals more than wood framing, requiring denser mesh repeater spacing. A Zigbee mesh with one repeater per 10–12 meters in wood-frame homes may need repeaters every 6–8 meters through brick. Run a sensor temporarily at the farthest planned location, checking signal strength (RSSI/LQI values) in your hub's device panel—Zigbee LQI above 200 and Z-Wave signal strength above -70 dBm indicate reliable connectivity.
I often embed contact sensors directly into window frames during renovations, routing wires to magnets hidden in sash pockets—completely invisible when windows close. For existing homes, adhesive-mount sensors can nestle into trim reveals or be painted to match millwork. The Aqara Door and Window Sensor measures just 36mm long, small enough to disappear into most casings.
Step 4: Select Cameras That Support ONVIF or RTSP for Local Access
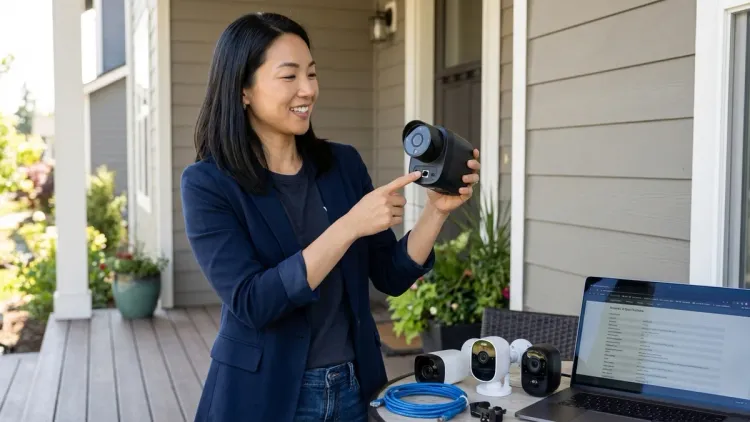
Subscription-free camera ecosystems collapse if devices lock footage behind proprietary cloud platforms. ONVIF (managed by the ONVIF organization) and RTSP are open standards that let cameras stream directly to NAS devices, hubs, or third-party software without manufacturer intermediaries. When evaluating cameras, verify explicit ONVIF Profile S (streaming) or Profile T (advanced video streaming) support—marketing pages often bury this, so check specification sheets or user manuals before purchase.
Reolink cameras (RLC-810A, RLC-820A, RLC-511WA) provide ONVIF and RTSP streams with local microSD recording, no mandatory subscriptions. They connect via Ethernet (PoE models) or Wi-Fi, pushing footage to the Reolink app, NAS via ONVIF, or Home Assistant via RTSP. Image quality at 4K/8MP proves sharp during daylight; night vision (infrared LEDs to ~30 meters) renders clear monochrome footage. The limitation: Reolink's smartphone app feels utilitarian—notifications lack nuance (motion vs. person detection requires cloud AI subscription), though local Frigate integration compensates.
Amcrest (owned by Dahua) offers similar ONVIF compliance across their IP camera range (IP4M-1051, IP8M-2496E). Continuous or motion-triggered recording to microSD or NAS, with person/vehicle AI detection available locally on some models without fees. Amcrest firmware updates arrive sporadically, and their web interface feels dated, but the cameras integrate cleanly with Blue Iris, Synology, or Frigate.
Wyze Cam v4 and TP-Link Tapo C520WS represent budget Wi-Fi options (around $30–$40 per camera) with microSD slots, but RTSP support requires firmware modifications (Wyze) or is absent entirely (Tapo). These cameras push aggressively toward cloud subscriptions—person detection, extended recording lengths, cloud backups all paywalled—making them poor fits for genuinely subscription-free setups despite low upfront cost.
Ubiquiti UniFi Protect cameras (G3 Instant, G4 Bullet) require a UniFi Dream Machine or Cloud Key for local recording (around $200–$400 for the controller), but deliver exceptionally polished interfaces, sub-500ms live view latency over Ethernet, and advanced motion zones with no recurring fees. The ecosystem locks you into Ubiquiti hardware—no ONVIF streams to third-party systems—but the walled garden performs flawlessly. I specify UniFi for clients who prioritize refinement over openness, particularly when integrating with existing UniFi network equipment.
For Matter-compatible cameras in 2026, Eve Cam and select Aqara models offer local HomeKit Secure Video recording (iCloud-based, requiring 200 GB iCloud+ subscription—not truly subscription-free despite Matter branding). True subscription-free Matter cameras remain scarce; verify local recording options explicitly before assuming compatibility equals freedom from fees.
When deciding how to choose security systems with no monthly fee, prioritize cameras with documented ONVIF/RTSP support, local storage (microSD or NAS), and open API access. Budget an extra 15–20% above baseline camera cost for PoE switches or injectors if choosing wired models—the stability and bandwidth justify the expense.
For deeper dives into specific models, consult our best subscription-free security cameras roundup.
Step 5: Design Automation Logic With Explicit If/Then Rules and Fallback Behaviors
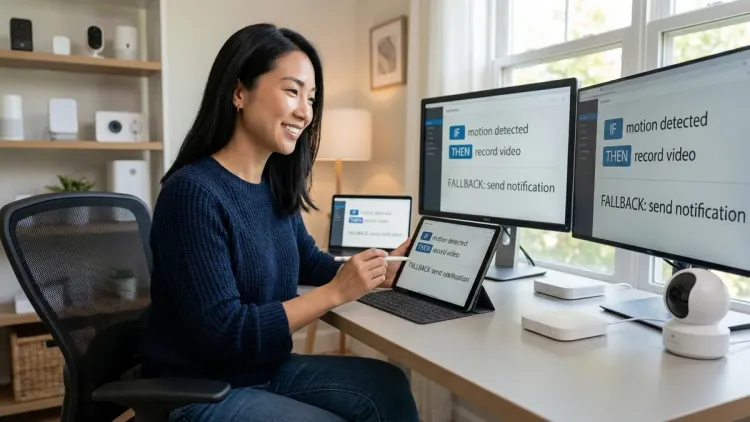
Subscription-free systems shine when automations reduce manual oversight—cameras record only when genuinely needed, sensors trigger lights or sirens contextually, and notifications arrive with precision. Automation logic in platforms like Home Assistant, Hubitat, or even Samsung SmartThings translates this intent into executable rules.
A basic automation for an entry door might read:
IF sensor.front_door == "open"
AND binary_sensor.alarm_mode == "armed_away"
THEN
  camera.front_door.start_recording(duration=60s)
  light.porch.turn_on(brightness=100%, color_temp=3000K)
  notify.mobile_app("Front door opened while armed")
  siren.entryway.sound_alarm(volume=80%, duration=10s)
END
This triggers multiple devices across protocols—a Zigbee contact sensor, Wi-Fi camera, Z-Wave light, and Zigbee siren—within a single event, typically executing within 500ms–1.5s depending on hub processing load and network conditions. Latency compounds when automations chain—if the siren activation depends on camera confirmation of a person (via Frigate object detection), total delay extends to 1.5–3 seconds. For security, this remains acceptable; for lighting that should feel instantaneous, simplify the chain.
Fallback behaviors address hub or network failures. Most Zigbee/Z-Wave sensors default to "offline" states when mesh connectivity drops, failing silent rather than triggering false alarms—a conservative choice that prioritizes stability over paranoia. Wi-Fi cameras typically buffer motion clips to internal memory (if equipped) during network outages, uploading retroactively once connectivity restores. Configure your hub's automation engine to send you alerts if critical sensors go offline for more than 10 minutes, indicating battery depletion or device failure:
IF sensor.front_door.last_updated > 10 minutes
THEN
  notify.mobile_app("Front door sensor offline - check battery")
END
For geo-fencing (arming/disarming security based on smartphone presence), leverage your hub's native capabilities or IFTTT-style integrations. Home Assistant's companion app reports device location with 50–200 meter accuracy; when the last household member crosses a geo-fence perimeter, the system arms:
IF person.household.state == "not_home"
AND alarm_mode.state == "disarmed"
AND time > 08:00 AND time < 22:00 (prevent accidental arming late at night)
THEN
  alarm_mode.set_armed_away()
  camera.all.start_recording()
  light.all_exterior.turn_off()
  notify.mobile_app("Security armed - all household members away")
END
This introduces 30-second to 2-minute delays depending on phone location refresh intervals and hub polling frequency—acceptable for departure scenarios, less so for instant disarming upon arrival. I prefer manual disarm triggers (keypad, NFC tag at entry) over pure geo-fencing to avoid fumbling with apps while carrying groceries.
Conditional recording conserves storage and reduces review fatigue. Rather than continuous recording, trigger cameras only when doors open, motion occurs during armed periods, or specific zones activate:
IF camera_driveway.motion_detected == TRUE
AND camera_driveway.zone == "mailbox_area"
AND time >= sunset - 30min
THEN
  camera_driveway.record_clip(duration=45s, save_to=/storage/mailbox_events/)
  notify.mobile_app("Motion near mailbox after dusk")
END
This granularity—how to choose security systems with no monthly fee effectively—depends on platforms supporting zone-based triggers (Frigate, Blue Iris, Synology Surveillance Station). Consumer camera apps (Reolink, Wyze) offer basic motion zones but lack integration with broader home automation unless bridged through IFTTT or similar middleware.
Explore how to compare smart device automation logic for deeper protocol-specific examples.
Step 6: Test Latency, Reliability, and Signal Strength Across Protocols

Once devices arrive, benchmark performance before embedding them permanently into walls or trim. Start with sensor response times: trigger a contact sensor and measure delay until the hub registers the event (visible in device logs or real-time dashboards). Zigbee/Z-Wave sensors should respond within 100–400ms locally; Wi-Fi sensors range 800ms–3 seconds. Anything beyond 5 seconds indicates mesh weakness, excessive hub load, or failing batteries.
For camera latency, open live feeds from each camera simultaneously and pan a bright object (smartphone flashlight) across the frame—note the delay between physical movement and on-screen representation. PoE cameras over Ethernet typically exhibit 200–700ms latency; Wi-Fi cameras range 1–4 seconds depending on network congestion and encoding settings (H.264 vs. H.265). High latency degrades two-way audio usefulness—doorbell cameras with 3+ second delays make conversations awkward.
Signal strength mapping reveals mesh gaps before they cause failures. In Home Assistant or Hubitat, navigate to device pages and record LQI (Link Quality Indicator) or RSSI (Received Signal Strength Indicator) values for each Zigbee/Z-Wave device. LQI above 200 (Zigbee, scale 0–255) or RSSI above -70 dBm (Z-Wave) indicates strong connectivity; below 150 LQI or -80 dBm RSSI suggests weak signals prone to dropped messages. Add powered repeaters midway between weak devices and the hub, then re-test after the mesh self-heals (Zigbee: ~15 minutes; Z-Wave: up to 30 minutes, or run manual network repair).
Wi-Fi cameras benefit from dedicated SSIDs on your router, isolating security traffic from household streaming/gaming. Create a 2.4 GHz network named "SecurityCams" with WPA2 encryption, limiting connected devices to cameras only—this prevents bandwidth contention and simplifies troubleshooting. Run continuous ping tests from a laptop to camera IP addresses over 24 hours, logging packet loss; anything above 1% indicates Wi-Fi instability requiring AP repositioning or mesh node additions.
Reliability stress-testing involves intentional failures: unplug your router mid-recording to observe camera buffering behavior; power-cycle the hub to see how long sensors take to rejoin the mesh; discharge a sensor battery completely to verify low-battery alerts arrive before the device goes offline. These exercises feel tedious but prevent silent failures months later when you depend on the system.
I recall a Seattle project where testing revealed a Zigbee mesh black hole—two bedrooms upstairs reported LQI under 100 despite a smart plug repeater in the hallway below. The culprit: radiant barrier foil in the attic floor, attenuating 2.4 GHz signals. We relocated the repeater to an outlet directly below the bedroom and LQI jumped to 220. Without testing, those sensors would have missed window openings during our first winter storm.
For structured testing workflows, reference how to test smart device response times and latency.
Step 7: Configure Notifications, Alerts, and Mobile Access Without Cloud Reliance
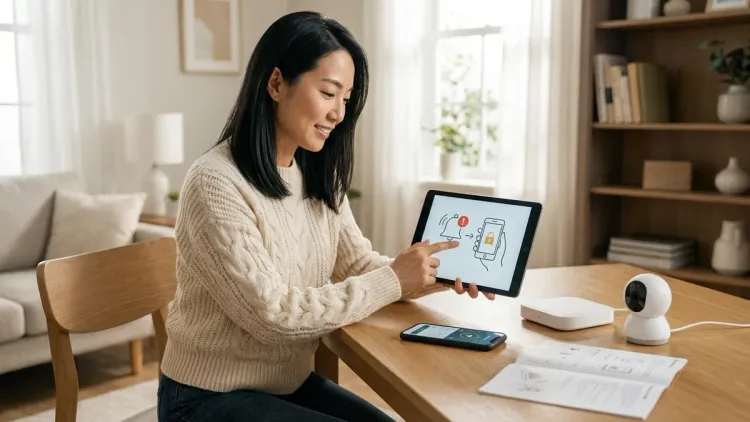
Even with local recording, mobile notifications typically route through cloud services—Home Assistant Cloud, Hubitat's cloud link, or manufacturer-specific relay servers. To minimize cloud dependency, configure self-hosted notification channels using services like Ntfy (open-source push notifications via your own server), Telegram bots (free, self-contained, encrypted), or direct webhooks to your phone's notification system (iOS: Pushcut; Android: Tasker with AutoNotification).
A Telegram-based automation in Home Assistant looks like:
IF binary_sensor.front_door == "on"
AND alarm_mode == "armed_away"
THEN
  telegram_bot.send_message(
    chat_id="your_chat_id",
    message="🚨 Front door opened at {{ now().strftime('%H:%M:%S') }}",
    photo="/config/www/snapshots/front_door_latest.jpg"
  )
END
This sends instant alerts with camera snapshots to your phone via Telegram's infrastructure—free, persistent, and functional even if your hub's cloud subscription lapses. Latency averages 1–3 seconds globally, faster than many proprietary notification systems.
Local network access lets you view cameras and control sensors while home without internet dependency. Configure your NAS or Frigate instance with HTTPS access on your LAN (e.g., https://192.168.1.50:8123), bookmarking the address on your phone. This bypasses cloud relays entirely—live feeds load in under 500ms when connected to home Wi-Fi. For remote access without cloud, set up Tailscale or WireGuard VPN—encrypted tunnels that route your phone's traffic through your home network, presenting the same local interface regardless of physical location. Tailscale proves exceptionally user-friendly (install app, authenticate, access devices), though it introduces 20–100ms latency overhead compared to direct internet.
Alert tuning separates useful notifications from noise. Start conservatively—armed mode only, critical sensors (entry doors, ground-floor windows). After a week, review false positives: if the back door sensor triggers every time wind rattles the frame, adjust mounting or increase the magnet gap tolerance. If motion-triggered camera clips capture passing cars nightly, refine motion zones to exclude the street. Gradual refinement over 2–3 weeks transforms a chatty system into one that speaks only when necessary.
For context on building cohesive no-fee systems, see our complete checklist for building a no-fee home security system.
Step 8: Plan for Long-Term Maintenance, Storage Scaling, and Protocol Migration
Subscription-free doesn't mean maintenance-free. MicroSD cards degrade with constant write cycles—inspect them quarterly for read errors, replacing preemptively after 12–18 months. NAS drives (mechanical HDDs) should be monitored via SMART data; Synology DSM and QNAP QTS surface health warnings before failures. Budget 10–15% annual replacement cost for storage media.
Firmware updates introduce interoperability risks—cameras or sensors may lose ONVIF compliance, hubs may break automations, or protocol stack updates (Zigbee 3.0 to Thread, Z-Wave 700 to 800 series) require device re-pairing. Defer non-critical updates until community forums (Home Assistant subreddit, Hubitat community) confirm stability. When updating, document current automations and export configuration backups—restoring from scratch consumes hours if updates fail catastrophically.
Storage scaling becomes necessary as camera counts or retention periods grow. A four-camera system recording motion clips (5–10 minutes daily per camera) consumes roughly 50–80 GB monthly at 1080p/H.264. Continuous recording at 4K balloons to 200–400 GB per camera per week. When local storage nears 80% capacity, either purge older footage more aggressively (retain 7 days instead of 30) or expand drives. NAS devices simplify this—hot-swap larger drives, rebuild RAID arrays, done. USB drives on hubs require manual file transfers and periodic cleanup scripts.
Protocol migration looms as Matter 1.4 matures. Zigbee and Z-Wave devices installed today won't disappear, but new product launches increasingly favor Matter/Thread. Plan for gradual transitions: replace devices as they fail rather than wholesale swaps. Many hubs (Home Assistant, Hubitat) support multi-protocol coexistence—Zigbee sensors, Thread door locks, Wi-Fi cameras all controlled through one interface. The complexity lies in managing multiple mesh networks simultaneously; ensure sufficient powered repeaters for each protocol to maintain reliability.
When considering how to choose security systems with no monthly fee for the long term, favor platforms with active development communities (Home Assistant's releases every three weeks, Hubitat's quarterly updates) over stagnant ecosystems. Vendor-locked solutions (Nest, Arlo with proprietary hubs) offer polish but risk abandonment—Google has already sunset multiple Nest product lines, orphaning users.
I guide clients toward modular, open-standard systems that evolve incrementally rather than monolithic setups requiring rip-and-replace migrations. A Synology NAS recording from ONVIF cameras today seamlessly integrates future Matter cameras tomorrow—no ecosystem restart required.
Pro Tips & Common Mistakes
Avoid mixing battery-powered and mains-powered devices from different Zigbee manufacturers carelessly—some brands (IKEA, Philips Hue) create isolated meshes that don't relay third-party sensor signals. Use Zigbee 3.0–certified repeaters (Third Reality plugs, Aqara smart plugs) as mesh backbone to ensure universal routing.
Don't assume all PoE cameras draw the same wattage—4K cameras with IR illuminators can pull 12–15 watts, exceeding 802.3af (15.4W) limits during peak load. Budget for 802.3at (30W) PoE switches or injectors when deploying higher-resolution cameras, preventing brownouts or restarts.
Test NAS recording before finalizing camera mounts—some cameras' ONVIF implementations report incorrect timestamps, frame rates, or codec profiles, causing Synology Surveillance Station to reject streams. Verify recording for 24 hours before drilling permanent holes.
Never rely solely on geo-fencing for arming without manual override—smartphone GPS drift, battery saver modes, or app crashes can leave systems disarmed unintentionally. Combine geo-fencing with time-based logic (arm after midnight if everyone's home location stale) and manual keypad entry.
Underestimating storage consumption ranks as the most common error—clients expect 128 GB microSD to hold weeks of 4K footage, only to discover it fills in 3–5 days. Calculate retention based on realistic bit rates (8–12 Mbps for 4K H.265) and choose storage accordingly.
Skipping signal strength validation leads to intermittent sensor failures months post-installation. Run mesh analysis tools (Home Assistant's Zigbee map visualization, Hubitat's Z-Wave network repair) before considering the system "done."
Overlooking fallback power for hubs and NAS devices means a 10-minute power blip disables all recording. Even an inexpensive UPS (around $80 for 600VA units) sustains a hub and modem through brief outages, keeping security active.
Positioning cameras near bright backlight sources (windows, glass doors facing sunrise/sunset) washes out faces despite WDR (Wide Dynamic Range) claims. Angle cameras perpendicular to dominant light sources or install during midday to preview glare conditions.
For aesthetic integration strategies, consult how to hide smart home devices without blocking wireless signals.
Frequently Asked Questions
Can I use subscription-free security cameras with professional monitoring services if I change my mind later?
Most DIY subscription-free systems (Reolink, Amcrest, Frigate-based setups) don't integrate with professional monitoring services like ADT or Brinks, which require proprietary panels and sensors for UL-certified central station connectivity. However, some hybrid systems—SimpliSafe (hardware purchase around $250–$400 upfront, optional monitoring at around $18–$28/month) or Abode (around $280–$500 upfront, optional monitoring around $20/month)—let you operate without monitoring initially, adding it later without replacing hardware. These use Zigbee/Z-Wave sensors that function identically whether monitored or self-managed, giving flexibility. If professional monitoring matters long-term, choose platforms explicitly designed for optional monitoring rather than purely local-only systems.
How do I know if my existing Wi-Fi network can handle multiple security cameras without upgrading equipment?
As a baseline, each 1080p camera streaming continuously consumes 2–4 Mbps upload bandwidth (to NAS or hub); 4K cameras demand 8–12 Mbps. Multiply by your camera count—four 4K cameras require 32–48 Mbps sustained upload within your local network. Test current network capacity using iPerf3 between a laptop and your NAS location, simulating camera traffic. If results fall below 70% of theoretical bandwidth (e.g., under 250 Mbps on gigabit Ethernet), investigate bottlenecks—aging Cat5e cables, 100 Mbps switch ports, or Wi-Fi router placement. For Wi-Fi cameras specifically, ensure no more than 3–4 cameras per access point to prevent airtime saturation; beyond that, add mesh nodes or switch to PoE wired deployments.
What happens to local recordings if someone steals the camera or physically destroys the NAS device?
MicroSD-based cameras lose all evidence if stolen—the primary vulnerability of single-point storage. NAS systems mitigate this by centralizing recordings in hidden locations (closets, basements, locked cabinets), but physical destruction remains possible. For critical locations (entry doors, safes), consider dual-recording strategies: one camera with local microSD for immediate playback, plus RTSP stream to a NAS hidden elsewhere. Cloud backup (even free-tier options like Google Drive with automated upload scripts) adds offsite redundancy without monthly fees, though uploads lag 5–30 minutes behind real-time. Alternatively, hardwired cameras with PoE allow network cables to run to concealed recording equipment rooms, physically separating cameras from storage—a thief sees the camera but cannot locate the recorder.
Which smart home platform offers the most reliable subscription-free security integrations in 2026?
Home Assistant leads for technical users comfortable with YAML configuration and command-line troubleshooting, offering native ONVIF/RTSP support, Frigate add-on for local AI detection, and integrations for virtually every Zigbee/Z-Wave/Thread sensor without vendor lock-in. Hubitat Elevation provides similar local-first philosophy with a more polished GUI, ideal for users wanting reliability without Linux expertise—though camera integration remains less mature than sensor/automation features. For Apple ecosystem users, HomeKit Secure Video (via HomePod as hub) delivers seamless iPhone integration but requires iCloud+ subscriptions for recording, disqualifying it as truly fee-free. Synology Surveillance Station paired with DSM excels for camera-centric setups, especially when cameras outnumber other smart devices—unified NAS interface, mature mobile apps, and robust retention policies, though sensor integration requires bridging through Home Assistant or similar.
Summary
Understanding how to choose security systems with no monthly fee pivots on protocol architecture, local storage strategies, and automation logic that operates independently of cloud subscriptions. By selecting ONVIF/RTSP-compliant cameras, Zigbee or Z-Wave sensors with reliable mesh topologies, and hubs that support granular if/then automations, you build systems that remain responsive, private, and sustainable without recurring costs. Test latency rigorously, validate signal strength across intended coverage areas, and design fallback behaviors for network failures. The result: security that recedes into the background of daily life, present only when genuinely needed, invisible until the moment it matters.