A smart yard should feel like an extension of the home's interior rhythm—responsive, intuitive, never demanding attention. This smart yard automation setup checklist covers the foundational elements, protocol considerations, and invisible integration strategies for outdoor spaces that anticipate needs rather than broadcast their intelligence. Whether you're orchestrating irrigation based on soil moisture or concealing motion sensors in architectural trim, this checklist ensures every device, hub, and automation logic works cohesively before installation begins.
Essential Infrastructure and Protocol Foundations
Before any device touches soil or mounts to siding, the invisible backbone must be in place. Outdoor automation demands more robust connectivity than interior spaces—weather interference, distance from routers, and metal structures all degrade signals. Start here.

Wi-Fi extender or outdoor mesh node positioned within 30 feet of farthest device—Wi-Fi-based irrigation controllers, cameras, and outdoor lighting strips (Govee Outdoor String Lights) lose connectivity beyond this threshold, resulting in 3-5 second automation delays or total dropout during rain. Test signal strength at each planned device location using a smartphone app before mounting anything permanent. If your primary router sits at the front of the house and irrigation valves hide near the back fence, a weatherproof mesh node bridging that gap prevents the frustration of automations that fire inconsistently.
Zigbee or Thread border router if mixing protocols—A Zigbee mesh requires at least three powered nodes (not battery devices) to maintain reliable outdoor coverage, while Thread relies on border routers like the Apple HomePod mini positioned near windows facing the yard. Z-Wave operates at a lower frequency (908.42 MHz in North America) and penetrates walls more effectively, but fewer outdoor devices support it in 2026. For guidance on consolidating multiple protocols without creating device conflicts, reference our smart home protocol compatibility explained breakdown.
Hub compatibility matrix documented before purchasing any device—Not every Zigbee controller speaks to every Zigbee sensor, and Matter 1.4 adoption remains inconsistent across landscape brands. Create a spreadsheet listing each planned device, its protocol (Zigbee 3.0, Matter over Thread, Wi-Fi, proprietary), required hub or bridge, and confirmed compatibility with your existing ecosystem. The frustration of a $400 sprinkler controller that won't integrate with your home automation platform is entirely avoidable with upfront verification—our Matter 1.4 compatibility checklist offers a structured template.
Weatherproof outdoor enclosure for any exposed hub or bridge—Even "outdoor rated" electronics degrade when subjected to direct sun, temperature swings, and moisture infiltration. A recessed niche in exterior siding, a ventilated utility box tucked under eaves, or a hidden compartment within landscaping stonework keeps hubs functional while invisible. I've seen too many projects where a Zigbee coordinator mounted proudly on a garage wall became a blistered, non-responsive eyesore within six months.
Backup power consideration for critical devices—Battery backup for irrigation controllers ensures scheduled watering continues during brief power outages, while security cameras benefit from UPS systems that provide 4-6 hours of runtime. Document which devices have built-in battery failover (many smart locks and sensors do) versus those that go dark immediately. For deeper context on what happens when connectivity drops, explore our guide on smart device fallback behavior.
Cable pathways and conduit mapped before trenching or drilling—Low-voltage landscape lighting, sensor wiring, and camera power runs should follow deliberate routes that avoid future digging zones or irrigation line placement. Bury conduit 6-8 inches deep to protect from shovel strikes, and photograph the pathways before backfilling—you'll thank yourself when troubleshooting connectivity issues months later.
Latency tolerance defined per automation type—Motion-triggered security lighting demands sub-500ms response times, while irrigation schedule adjustments can tolerate 5-10 second delays. Wi-Fi devices average 800ms-2 second latency, Zigbee typically achieves 200-400ms, and Thread can hit 100-200ms when properly meshed. Match protocol to use case rather than choosing based on brand loyalty or price alone.
IP rating verification for every outdoor device—IP65 withstands rain and splashing but not submersion; IP67 tolerates brief immersion; IP68 handles continuous submersion. A sensor rated IP44 will fail within a season if mounted where sprinklers directly hit it, regardless of how "waterproof" the marketing claims. The manufacturer's official specifications matter more than generic promises.
Irrigation and Water Management Components

Water automation requires more nuance than simply scheduling timers—soil type, sun exposure, plant water needs, and weather patterns all influence whether a smart system conserves resources or floods flowerbeds. These components transform reactive watering into responsive hydration.
Smart irrigation controller with local weather API integration—Controllers that pull real-time precipitation data and forecast information (via Wi-Fi connection to services like Weather Underground or NOAA feeds) skip scheduled watering when rain has already saturated soil or storms approach within six hours. Look for devices supporting Matter over Wi-Fi or Zigbee protocols for easier ecosystem integration. The automation logic should follow:
if (rainfall_last_24h >= 0.25_inches OR forecast_next_6h == rain) then skip_scheduled_zone_watering; else proceed_with_zone_schedule. For deeper exploration of zone-specific timing strategies, see our guide on understanding smart irrigation zones and scheduling logic.Soil moisture sensors per irrigation zone—Battery-powered Zigbee sensors buried 4-6 inches deep report actual moisture levels rather than relying on generic schedules. Automation logic becomes:
if (zone_1_moisture < 25%) AND (air_temp > 55°F) then activate_zone_1_for_15_minutes; check_moisture_after_30_minutes; if (moisture < 30%) then extend_watering_10_minutes. This prevents overwatering clay-heavy zones while ensuring sandy areas receive adequate saturation. Sensors should report at least every 2 hours during growing season; anything slower risks missing critical dry periods.Flow meter to detect leaks and system faults—A Wi-Fi-enabled flow sensor installed inline before zone valves monitors water volume per cycle. The system learns baseline flow rates for each zone, then triggers alerts when consumption exceeds expected parameters by 15% or more—usually indicating a broken sprinkler head, cracked line, or stuck valve. Invisible automation:
if (zone_3_flow > baseline_+15%) then send_alert AND pause_watering_zone_3 AND log_incident_timestamp.Master valve with fail-closed behavior—If connectivity drops or the controller loses power mid-cycle, a fail-closed master valve prevents water from running indefinitely. This single component has saved more water (and prevented more flooding) than any other in outdoor smart systems. Verify the valve's default state before installation—some cheap models fail open, which defeats the entire safety purpose.
Rain sensor override with 24-hour delay reset—Physical rain sensors (simple mechanical devices) provide redundancy when internet connectivity fails. Mount 10-15 feet from structures to avoid false positives from roof runoff, and set logic to prevent watering for 24 hours after activation:
if (rain_sensor_triggered == true) then pause_all_zones_24h; reset_timer_on_sensor_dry. This complements API-based weather integration rather than replacing it.Manual zone control with 15-minute auto-shutoff—Physical buttons or a wall-mounted panel (concealed inside a garage or utility area) allow watering without phone apps or voice commands. Each zone activation should auto-terminate after 15 minutes unless manually extended, preventing forgotten hoses from flooding foundations. The automation:
if (manual_zone_button_pressed) then activate_zone_for_15_min; if (no_extension_input_received_at_14_min) then begin_shutdown_sequence.Energy monitoring for pump-based systems—Properties using well water or booster pumps benefit from smart plugs with energy monitoring (Zigbee or Matter-compatible) that track pump runtime and power consumption. Sudden spikes indicate mechanical issues; gradual increases suggest declining efficiency. Our guide to the best smart plugs for energy monitoring covers options that handle outdoor electrical loads safely.
Lighting and Ambiance Automation
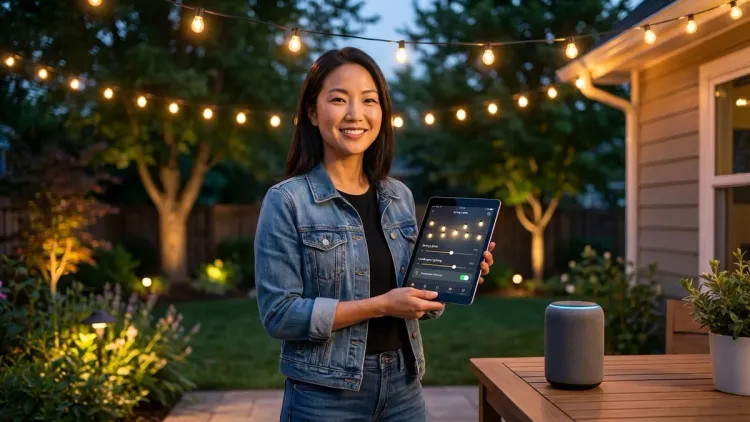
Outdoor lighting should respond to human presence and natural light transitions, not simply turn on at 7 PM regardless of sunset's seasonal shift. The goal: illumination that feels intuitive, as if the space itself anticipates use.
Dusk/dawn sensor integrated with geolocation data—Rather than fixed timers, lighting should activate when actual ambient light drops below a measured lux threshold (typically 20-30 lux for pathway lighting, 5-10 lux for accent lighting) while also considering your home's specific GPS coordinates for accurate sunset calculation. Automation:
if (ambient_lux < 25 AND sun_position < horizon_-6_degrees) then fade_in_pathway_lights_over_10_minutes. This prevents lights from glaring unnecessarily during bright summer evenings while ensuring they're already on during overcast winter afternoons.Motion sensors positioned for 15-foot detection radius—Zigbee or Thread motion sensors mounted 7-8 feet high at entry points detect approaching people 15 feet away, allowing lights to fade on before anyone reaches the door rather than triggering abruptly when already standing in darkness. Battery-powered sensors should report every 30-60 seconds and have 18-month battery life minimum. For comparison of different sensor protocols and their outdoor reliability, see our analysis of Zigbee motion sensors vs Z-Wave motion sensors.
Color temperature shifting based on time and context—Zigbee-based outdoor fixtures (like Philips Hue Outdoor Lily Spot Lights) can transition from 4000K cool white during dinner preparations (enhancing visibility for grilling or outdoor cooking) to 2700K warm white during late evening conversation, then to dim amber (2200K) after 10 PM to reduce light pollution and preserve night vision. Logic:
if (time >= 18:00 AND < 20:30) then set_temp_4000K; if (time >= 20:30 AND < 22:00) then transition_to_2700K_over_15min; if (time >= 22:00) then set_2200K_at_30%_brightness. Our smart lighting automations guide covers similar if/then structures for interior spaces.Zone-based activation rather than all-or-nothing control—Divide the yard into functional zones (pathway, deck, garden accent, driveway, security perimeter) and automate each independently. Motion at the front door activates entry lighting without illuminating the entire yard; deck occupancy (detected via pressure mat sensor or secondary motion device) brings up ambient string lights while leaving garden spots off. This prevents visual clutter and energy waste while maintaining responsive illumination where actually needed.
Astronomical clock integration for seasonal shifts—Rather than manually adjusting schedules four times yearly, astronomical clock functions (built into most Zigbee hubs and Matter controllers) automatically adjust activation times as sunset/sunrise shifts throughout the year. The system recalculates daily based on your latitude/longitude, ensuring lights never come on too early or stay off too late during seasonal transitions.
Failover to motion-only mode during hub outages—Higher-quality Zigbee lights retain local motion-sensing capability even when disconnected from the hub, reverting to basic "motion detected = turn on for 5 minutes" logic. Verify this behavior during your device comparison research before purchasing—cheaper Wi-Fi bulbs often become completely non-functional when internet drops, leaving outdoor areas dark despite having powered fixtures.
Hidden sensor placement within architectural elements—Motion sensors embedded in post caps, concealed behind downspout brackets, or tucked into eave trim maintain functionality without broadcasting their presence. I once integrated motion sensors into decorative corbels flanking a garden gate—guests never noticed them, but the pathway always illuminated three seconds before they arrived. The principle: technology should be felt, not seen. For more approaches to invisible sensor integration, explore our overview of covert smart home sensors.
Security and Monitoring Systems
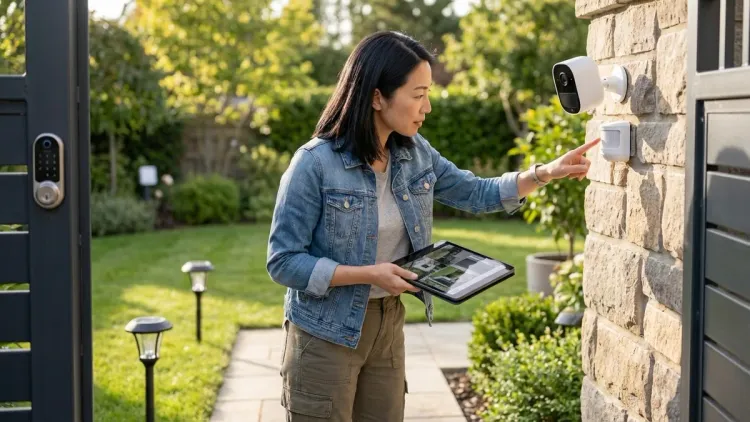
Outdoor security automation must balance awareness with privacy, capturing genuine threats without creating surveillance anxiety for family or neighbors. These elements provide layered protection that escalates response appropriately.
Subscription-free camera system with local storage—Wi-Fi cameras writing to Network Video Recorders (NVRs) or microSD cards avoid monthly fees while maintaining 24/7 recording. Motion-triggered clips should upload to secure cloud storage (if desired) only when specific zones detect activity, reducing bandwidth consumption and false alerts. For detailed comparison of recording strategies, see our breakdown of local storage vs cloud storage for no-subscription security. The Reolink RLC-810A exemplifies this approach with 4K resolution and person/vehicle detection that runs entirely offline.
Geofencing automation for armed/disarmed states—Security cameras and motion sensors should automatically arm when the last family member's phone exits a 200-meter geofence radius, then disarm when anyone returns within that boundary. Logic:
if (all_family_member_devices > 200m_from_home) then arm_security_system_after_5min_delay; if (any_family_device < 200m) then disarm_exterior_cameras_but_maintain_perimeter_sensors. This prevents constant notifications about your own movements while maintaining protection when the property is vacant.Distinct detection zones with variable sensitivity—Divide camera views into regions: high-sensitivity for doorways and windows, medium for pathways, low or disabled for street-facing areas where passing cars trigger false alerts. Most systems allow polygon-based zone drawing; spend time refining these boundaries to eliminate tree branches swaying into frame or headlight sweeps from neighbor driveways.
Two-factor verification before security automations execute—Rather than immediately sounding alarms when motion detected at 2 AM, require confirmation from a second sensor type (door contact sensor, glass break detector, or secondary camera) within 10 seconds before escalating to alert/alarm state. This logic prevents raccoons or wind-blown debris from triggering full security responses:
if (motion_zone_perimeter == true) then monitor_secondary_sensors_for_10_seconds; if (door_sensor_triggered OR glass_break_detected) then activate_alarm; else log_as_non-threat.Progressive notification escalation—First motion detection logs an event; second detection within 5 minutes sends a push notification; third detection within 10 minutes triggers siren and notification to secondary contacts. This prevents alert fatigue while ensuring genuine intrusions receive appropriate attention. The system learns baseline activity patterns (delivery drivers typically appear between 10 AM-6 PM) and adjusts sensitivity accordingly—a concept similar to adaptive learning in smart home energy management systems.
Invisible camera placement within functional objects—Security cameras integrated into light fixtures, mounted within birdhouse enclosures, or positioned behind one-way mirror panels in outdoor cabinetry provide surveillance without overt intimidation. A camera doesn't need to be visible to be effective—in many contexts, concealed placement captures more genuine behavior because subjects don't alter their actions in response to obvious recording. Our guide to best hidden security cameras explores options that disappear into architectural contexts.
Latency testing for time-critical automations—Motion detection that takes 3-4 seconds to trigger lighting or recording may miss critical moments. Test actual response times using your specific hub, devices, and automation logic under various network load conditions. If latency consistently exceeds 1 second for security-critical triggers, consider switching from Wi-Fi to Zigbee or Thread devices, or implementing local automation rules that don't require cloud processing. Our article on how to test smart device response times provides methodology.
Robotic and Autonomous Equipment Integration
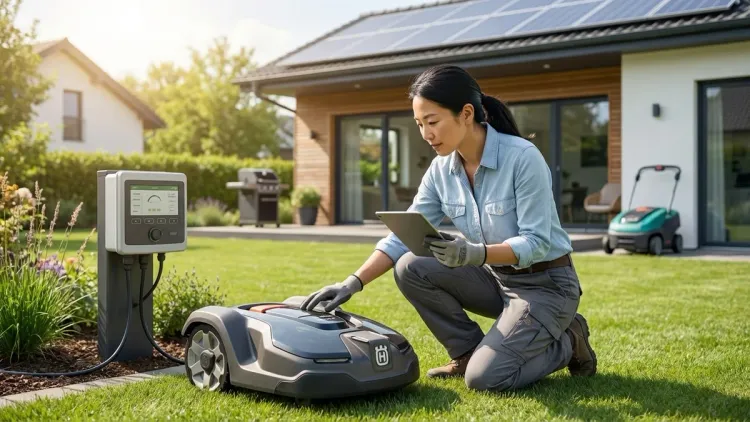
Robotic mowers, pool cleaners, and autonomous yard tools represent the most visible category of smart yard automation—yet even these can integrate more thoughtfully than simply scheduling runtime. Proper connectivity transforms them from isolated appliances into responsive system components.
Hub integration for coordinated scheduling—A robotic mower should communicate with the irrigation controller to avoid mowing saturated grass (which tears turf and clogs blades) and with weather APIs to return to dock before storms. Automation:
if (irrigation_zone_all_completed_within_last_4h OR soil_moisture_all_zones > 60%) then delay_mower_start_6h; if (precipitation_forecast_next_2h > 40%) then send_mower_to_dock. Not all robotic equipment supports this level of integration—verify Matter, Zigbee, or proprietary API availability before purchasing. For comparison of different equipment connectivity options, see our guide on how to connect robotic yard equipment to your smart home hub.Perimeter wire burial at proper depth and voltage testing—Robotic mowers rely on boundary wire buried 2-4 inches deep; too shallow and it surfaces after frost heave, too deep and signal weakens. Use a wire break detector to verify continuous circuit before covering pathways, and map wire routes photographically. The automation fails entirely if perimeter signal drops—there's no graceful degradation here. One poorly installed splice will cause the mower to randomly stop and beep for attention at 6 AM.
Scheduling that respects noise ordinances and household routines—Even "quiet" robotic mowers produce 60-65 dB—conversation-level volume that becomes intrusive during outdoor dining or video calls. Schedule operation during typical absence windows:
if (workday AND time >= 09:00 AND < 15:00 AND no_manual_override) then begin_mowing_cycle_zone_1. Include manual override capability via button, app, or voice command so spontaneous yard use doesn't require fighting with a robot mid-cycle.Energy monitoring to detect mechanical issues early—Smart plugs monitoring charging dock power consumption reveal declining battery health (longer charge times) or motor inefficiency (higher runtime power draw) months before catastrophic failure. Track baseline metrics after installation, then set alerts for 15% deviations from normal patterns. This same monitoring approach applies across smart home systems—see our comprehensive guide to smart home energy management for broader context.
Rain sensors that pause autonomous equipment—Beyond irrigation, robotic mowers and pool cleaners should halt operation when precipitation detected. Mowing wet grass damages turf and dulls blades; pool cleaners waste energy when rain is diluting chemicals anyway. Logic:
if (rain_sensor_active == true OR rainfall_last_hour > 0.1_inches) then pause_all_robotic_equipment; resume_after_surface_dry_2h_minimum.Geofencing to prevent operation when children or pets present—Advanced systems detect family members' phones within the property boundary and pause potentially hazardous equipment. A robotic mower can injure small pets; pool cleaners can trap animals. The automation:
if (child_device_detected_in_yard_zone OR pet_collar_beacon_in_range) then immediate_pause_all_robotic_equipment AND send_notification. This requires additional Bluetooth beacons or pet collar sensors, but the safety margin justifies the complexity for households with young children or small animals.Fall migration to reduced frequency scheduling—Rather than manually adjusting mowing schedules as grass growth slows, integrate soil temperature sensors (also used by irrigation systems) that automatically reduce mowing frequency when ground temp drops below 55°F for three consecutive days. The grass isn't growing meaningfully at that point; weekly mowing becomes biweekly, conserving energy and equipment wear.
Climate and Environmental Monitoring
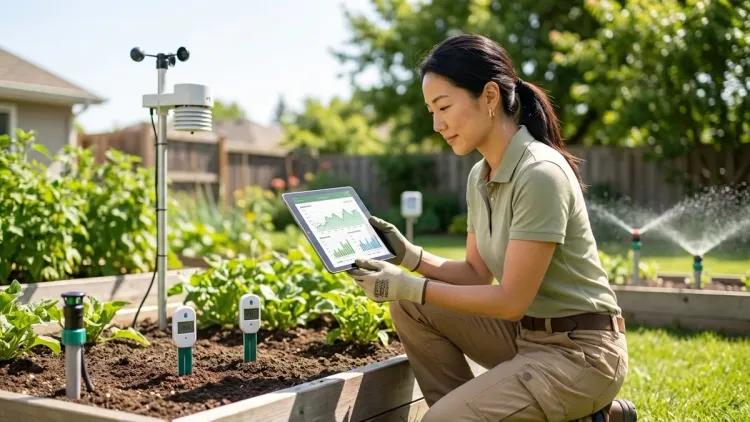
Smart yards respond to actual conditions rather than assumptions—wind speed, UV index, soil temperature, and air quality all inform better automation decisions. These sensors provide the contextual awareness that separates reactive systems from truly intelligent ones.
Weather station with hyperlocal data reporting—Personal weather stations (Wi-Fi or Zigbee-connected) mounted 10 feet above ground measure conditions at your specific property rather than relying on airport data 15 miles away. Temperature, humidity, wind speed, and barometric pressure feed into multiple automations:
if (wind_speed > 25_mph) then retract_awning AND delay_mower_operation; if (UV_index > 8 AND time > 14:00) then extend_shade_sails_over_deck. This data also improves HVAC efficiency by triggering window shade adjustments before heat builds inside—a cross-boundary automation that demonstrates the value of integrating indoor and outdoor systems.Soil temperature sensors for frost protection—Buried sensors reporting soil temperature (often the same devices used for moisture monitoring) trigger protective measures when ground temp approaches 32°F:
if (soil_temp_zone_garden < 34°F AND air_temp_forecast_low < 30°F) then activate_frost_protection_irrigation_2am AND send_notification_cover_sensitive_plants. Brief irrigation before hard freezes can protect root systems in borderline conditions, while alerts allow manual covering of vulnerable plants.Air quality monitoring for ventilation automation integration—Outdoor air quality sensors (measuring PM2.5, PM10, ozone, and VOCs) inform whole-home ventilation decisions. During wildfire season or high pollen days, outdoor air quality data prevents fresh air intake systems from pulling contaminated air into living spaces:
if (outdoor_AQI > 150 OR pollen_count > high_threshold) then close_fresh_air_damper AND switch_HVAC_to_recirculation_mode AND notify_occupants_keep_windows_closed. This bridges outdoor sensing with indoor comfort—a holistic approach that justifies the presence of outdoor sensors beyond yard-specific automations.UV sensors triggering shade deployment—Retractable awnings, motorized shade sails, or adjustable pergola louvers respond to actual UV intensity rather than time-based schedules. Southern exposures may need shade at 11 AM during summer but not until 2 PM in spring; UV sensors capture this variation:
if (UV_index > 6 AND outdoor_temp > 78°F AND deck_occupancy_detected) then extend_awning_to_50% AND adjust_to_sun_angle_every_30min. This automation requires motorized shade systems with Matter or Zigbee control—not common in 2026, but increasingly available as outdoor furniture manufacturers integrate smart capabilities.Lightning detection for emergency equipment shutdown—Advanced weather stations or standalone lightning detectors (Wi-Fi-connected) sense electrical storms within 20 miles and trigger protective measures:
if (lightning_detected_within_10_miles) then send_robotic_mower_to_dock AND retract_motorized_awnings AND pause_charging_electric_vehicle_via_smart_plug AND log_storm_proximity_timestamp. This prevents equipment damage from power surges and protects fabric/mechanical components from wind damage as storms approach.
Energy Management and Load Balancing
Outdoor automation can become an energy burden if dozens of devices draw phantom loads, charge batteries inefficiently, or operate during peak rate periods. These strategies ensure smart yards reduce rather than increase overall consumption.
Time-of-use scheduling for equipment charging—In areas with time-of-use electricity rates, shift robotic mower charging, outdoor battery system recharging, and pool pump operation to off-peak hours (typically 9 PM-7 AM). Automation:
if (current_time >= 21:00 AND < 07:00 AND device_battery < 80%) then initiate_charging_cycle; else maintain_current_state. This simple logic can reduce outdoor automation costs by 30-40% in TOU rate zones. For deeper strategies on optimizing around rate structures, explore our guide to peak and off-peak energy automation.Smart plugs on always-on devices to measure actual consumption—Many irrigation controllers, outdoor lighting transformers, and robotic equipment docks draw 5-15 watts continuously. Smart plugs with energy monitoring (compatible with Zigbee or Matter networks) measure actual consumption, allowing you to identify and eliminate phantom loads. An outdoor lighting transformer drawing 8 watts 24/7 consumes 70 kWh annually—$11-14 wasted even when lights are off. A smart plug cutting power during daylight hours eliminates that waste:
if (ambient_lux > 100 AND time > 08:00 AND < 17:00) then disable_power_to_lighting_transformer.Solar panel integration with battery storage monitoring—Properties with solar generation benefit from monitoring outdoor automation energy consumption separately from household loads. A dedicated circuit or smart breaker reporting outdoor power draw reveals whether irrigation pumps, outdoor refrigeration, or charging equipment exceed reasonable thresholds. Integration logic:
if (solar_generation > household_consumption AND battery_state > 80%) then prioritize_outdoor_equipment_charging; else defer_non_critical_loads_to_off_peak_hours.Dynamic load balancing to prevent circuit overload—When multiple high-draw devices operate simultaneously (pool heater, irrigation pump, outdoor kitchen appliances), smart breakers or load management controllers prioritize critical loads and defer discretionary ones:
if (circuit_load > 80%_capacity) then pause_pool_heater AND defer_mower_charging_until_load_drops_below_60%. This prevents nuisance breaker trips and extends equipment lifespan by avoiding voltage sags. Our guide to how to set up dynamic load balancing explores implementation details.Energy audit revealing outdoor consumption patterns—Before implementing energy management, conduct a baseline audit measuring actual outdoor consumption across categories: lighting, irrigation, equipment charging, decorative features, security cameras. This reveals where optimization will have meaningful impact versus marginal gains. A complete smart home energy audit checklist provides structure for this process, though outdoor spaces require additional consideration for weather-dependent loads.
Final Check Before You Go
Print or save this condensed verification list—check each item before declaring your smart yard automation setup checklist complete:
- Connectivity verified: All device locations tested for adequate Wi-Fi, Zigbee, or Thread signal strength
- Hub compatibility documented: Every device confirmed compatible with your specific hub/bridge
- Power infrastructure: Outdoor outlets installed, circuit capacity verified, backup power considered for critical devices
- Protocol consistency: Devices grouped by protocol with appropriate bridges/border routers positioned
- Weatherproofing confirmed: All devices and connections meet or exceed IP65 rating for exposed locations
- Automation logic tested: Each if/then rule verified with manual triggers before relying on autonomous operation
- Fallback behaviors documented: Known failure modes and offline functionality confirmed for each device
- Energy monitoring baseline: Initial consumption measured before automation to quantify future improvements
- Physical installation complete: All mounting, burial, and concealment work finished before activating systems
- Integration with indoor systems: Cross-boundary automations (security, climate, energy) configured and tested
- Manual override access: Physical buttons, wall controls, or app access confirmed for every automated function
- Notification settings refined: Alert thresholds adjusted to eliminate false positives while catching genuine issues
Frequently Asked Questions
What smart home protocol works best for outdoor yard automation in 2026?
Thread and Zigbee 3.0 provide the most reliable outdoor automation in 2026 due to their mesh networking capabilities and lower power consumption compared to Wi-Fi. Thread devices typically achieve 100-200ms response times and maintain connectivity through multiple node hops, making them ideal for larger properties where distance from the router exceeds 50 feet. Zigbee works well for irrigation controllers and lighting but requires at least three powered (non-battery) nodes to maintain outdoor mesh stability. Wi-Fi devices work for high-bandwidth needs like security cameras but introduce 800ms-2 second latency and can overwhelm router capacity when you're running eight or more outdoor devices. Matter 1.4 compatibility allows mixing these protocols under unified control, but verify specific device support before assuming cross-protocol functionality—not every manufacturer has implemented Matter fully despite claiming compatibility. For comprehensive protocol comparison, see our Matter 1.4 vs Thread analysis.
How do I hide smart yard automation devices without blocking their wireless signals?
Concealing outdoor automation devices requires balancing aesthetics with signal propagation—metal enclosures and dense materials block Zigbee, Thread, and Wi-Fi signals by 40-70%, while wood, stone veneer, and architectural foam create minimal interference. Position devices inside decorative post caps, behind lattice panels, or within faux rock enclosures that maintain line-of-sight to hub locations. For motion sensors and cameras, embed them in eave trim, downspout brackets, or light fixture housings where their presence reads as architectural detail rather than surveillance. Irrigation controllers hide well in ventilated utility boxes painted to match siding or tucked inside planter boxes with weatherproof lids. The key principle: test signal strength after concealment but before permanent installation—a device that loses 30% signal strength may still function reliably if it started with excellent connectivity, but a marginal device will become unreliable when hidden. Our detailed guide on how to hide smart home devices without blocking signals covers materials testing and placement strategies applicable to outdoor contexts.
Should I invest in a complete smart yard system or start with one category and expand?
Start with irrigation automation as your foundation, then expand to lighting, security, and robotic equipment in subsequent phases—this staged approach prevents overwhelming complexity while allowing each system to prove reliability before adding dependencies. A smart irrigation controller with soil moisture sensors and weather integration delivers immediate water savings and demonstrates whether your protocol choice (Zigbee, Thread, Wi-Fi) performs reliably across your property's layout and distance challenges. Once irrigation runs consistently for 2-3 months without intervention, add motion-activated lighting using the same protocol, which shares the mesh network you've already established and proven. Security cameras can integrate next, followed by robotic equipment that coordinates with irrigation schedules. This staged expansion also spreads costs across 6-12 months rather than requiring $2,000-4,000 upfront investment, and allows you to pivot protocol choice if early devices prove unreliable—better to discover Wi-Fi connectivity issues with three irrigation zones than after installing fifteen devices across multiple categories. The smart device comparison checklist helps evaluate options at each expansion phase.
Final Thoughts
The most successful smart yards feel invisible in daily experience—irrigation happens during sleep hours, lighting anticipates movement before it's consciously noticed, security monitoring remains silent unless genuinely needed. This checklist provides the technical foundation, but the real work lies in refining automation logic through observation and adjustment over weeks and seasons. Watch how morning sun hits the deck in July versus September. Notice where motion sensors trigger too eagerly during windy afternoons. Observe which routines actually happen daily versus the ideal schedule you initially programmed. Smart yard automation succeeds not when every possible feature has been enabled, but when the technology recedes so completely that the space itself feels responsive—a garden that waters itself precisely, pathways that illuminate moments before they're needed, security that protects without performing. Start with this smart yard automation setup checklist, build methodically, test thoroughly, then refine until the intelligence disappears into the landscape.